Hi,
Can someone please help. The left and right side where my artworks (before 1inches after 19inches) are are not being recognised - showing No Artwork. Is there something I need to do as this will be ineffective in maximising the material.
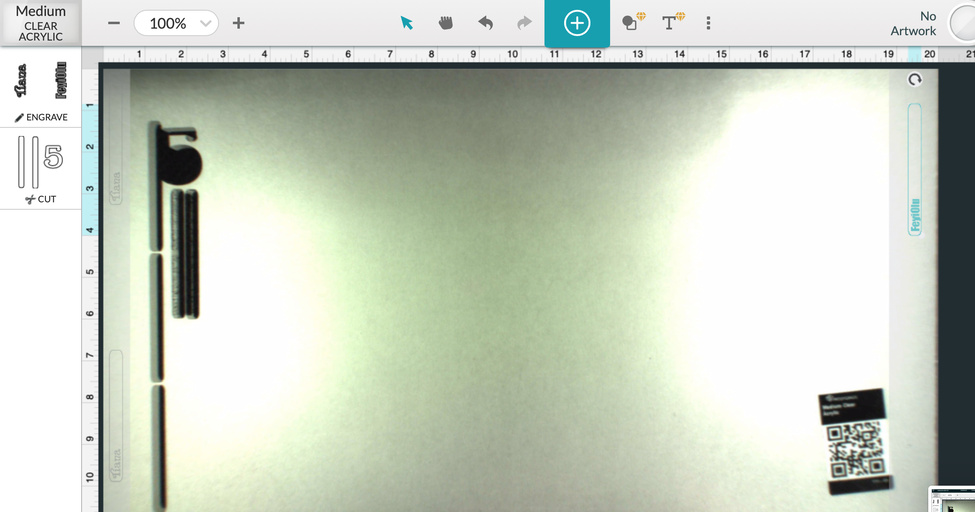
Hi,
Can someone please help. The left and right side where my artworks (before 1inches after 19inches) are are not being recognised - showing No Artwork. Is there something I need to do as this will be ineffective in maximising the material.
If the artwork is even very slightly outside the cuttable area the Glowforge will not count it as cuttable, and say “no artwork”. If you move it to just very slightly inside it will cut, Note Also that the area available to engrave is narrower than to cut. If you look at the image your work is well inside that gray band that it needs to be outside of.
You will also get a faster job if it is horizontal to engrave rather that vertical.
It cuts and engraves well when I moved it (notice the cut holes within the material) but my worry is not being able to use the whole sheet of material if the 1st and last inch is not recognised as cutable. The artworks are well within the ruled area and I was expecting them to cut 
The key is the dark shade to the side that is bigger or smaller depending on the speed of the engrave, The area is ruled far beyond what is cuttable,(even negative numbers!) That darker area is there to tell you where the “no cut” area is. If there is an engraved area with a cut it will not do the cut either.
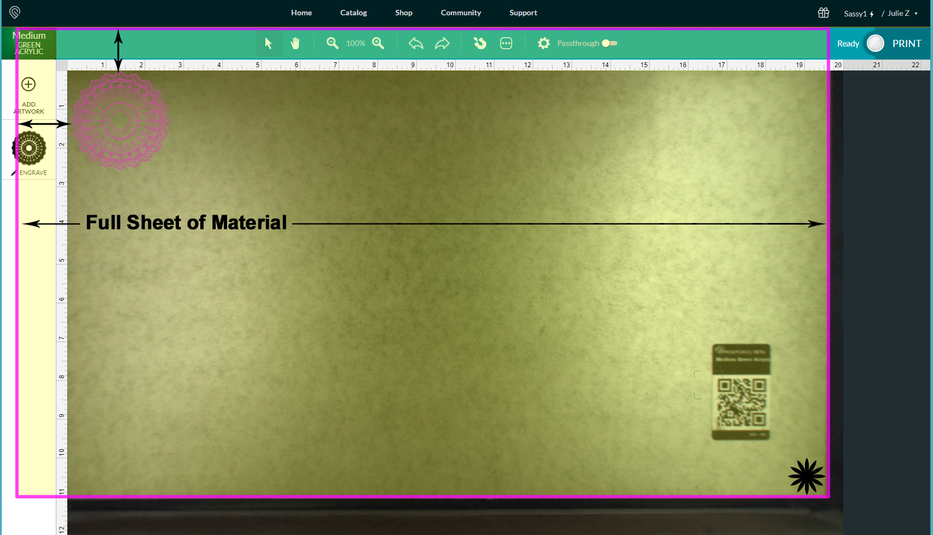
This diagram might help to explain it. There is about an inch of material hidden underneath the thumbnail column on the left. If you want to use a whole sheet of material, work out from the lower right corner. (Black Star) Make sure the metal gridded area is completely covered with material.
When you have completely filled the part that is visible, you can turn the material over and use up the bit on the left and top.
The cuttable area is smaller than the full honeycomb tray. There’s a strip on the left and across the top that the head can’t physically reach, so they’re not shown on the camera. (Turn your machine off and move the head around manually – you’ll see why.) There’s also a smaller usable area for engraving, to allow for the acceleration / deceleration of the head as it reaches the edge.
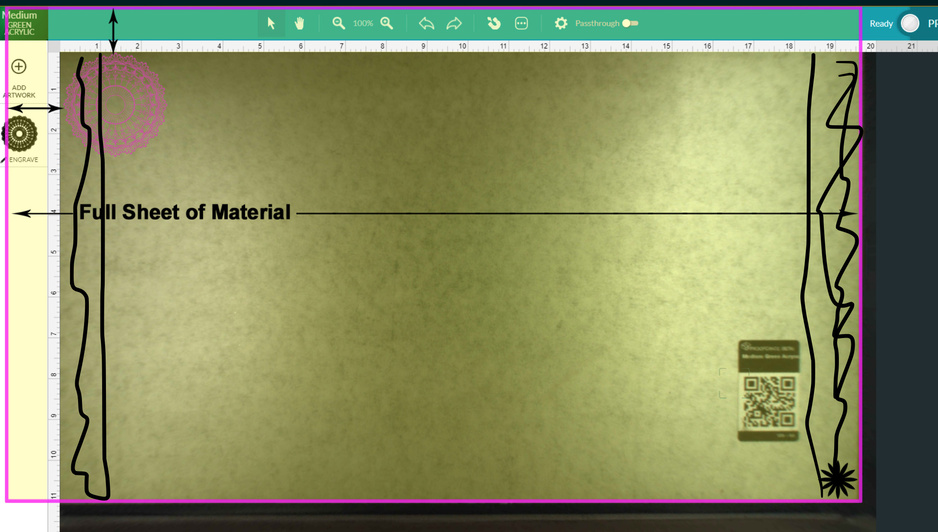
Thanks Jules, this is helpful. The issue I have is that the first inch from your diagram is not even usable for me -the highlighted area( excuse my rubbish shading lol). I cannot place my artwork same as yours.
If you have Engraving on the design, the available bed area is a little smaller (about 18"-18.5" wide) because the head needs room to slow down at either side during the back and forth motion it makes.
There is a way to slow down the speed to increase the available bed size for engraves, but you also have to significantly reduce power if you do it, otherwise you will start a fire.
If you can move the items closer together, so that the total width for all of them is around 18-18.5", you will find they fit.
If it absolutely has to be 19.5" or you want to use the full cutting area for engraves, you have to reduce the speed on the engraves and lower the power. (Do testing on small squares to see what the best settings are.)
Yes there was engraving - all makes sense now. Thanks a bunch.
When I was first getting comfortable with my machine and its limits, I masked of the entire tray and then cut out at the very limits of the cutting area. When it was finished I pulled the tray out and removed the cut section of masking and painted what was exposed. After many hundreds of projects it is almost impossible to see it now but when I was learning it really helped. You could do it with just masking tape without painting too.
I did the same and then added an inch scale, When exactly in place It ties the inches on the screen to the inches on the crumb tray,
Thanks for the answer @jules and @rbtdanforth , that’s right. I’m going to close this thread - if the problem reoccurs, go ahead and post a new topic. Thanks for letting us know about this!