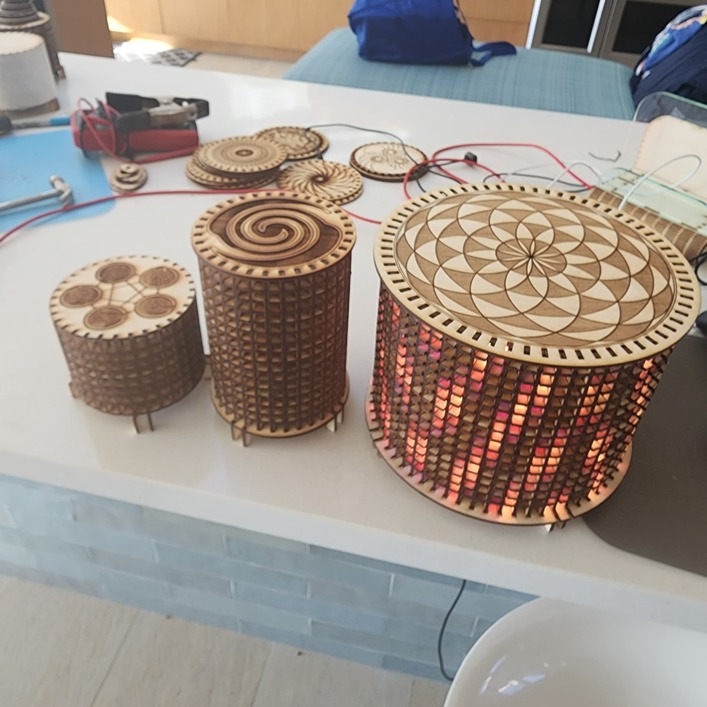
I have been tinkering with LED matrix based lamps over the past few years. Started with a small one that used 8 x 32 LED. I eventually doubled the height to 16 x 32. Along the way, I figured out how to save wood by breaking the rings into 1/4 rings for most of the rows, increased the diameter of the top to provide an overhang which improves the aesthetics and added a matching larger diameter near the bottom.
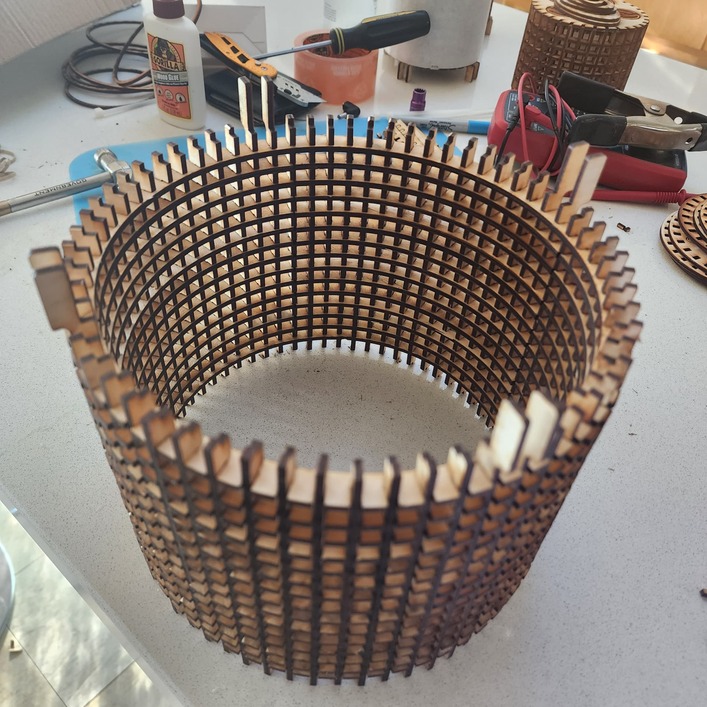
Now, I have taken the next step. Double diameter. So, now it is 16 x 64 LEDS. I also finally got serious about pixelblaze as an LED driver. I am now a fan of the pixelblaze.
This is the first prototype, needs a bit of fine tuning but went together well enough. Uses 3 sheets of wood to make this. (up from a single sheet for the small and 2 sheets for the tall).
Thanks, That pattern is inspired by the tile work near the fountains at the Getty Villa in LA ( which were inspired by tile work in ancient Italian and Greek villas).
Looks great! What did you use before Pixelblaze? I’ve used FastLED a lot, but haven’t heard of / tried Pixelblaze yet. I’ll have to show this to some students in my Design class. They had AP Comp Sci Principles last year, and we did some Arduino stuff as a “fun unit” after the AP exam, so they can definitely handle the design and programming side.
I am 99% FastLED and 1% pixelblaze at this point. But that will change as I use the blaze more moving forward. I will use FastLED for my big matrix projects and clocks, and PB for all else.
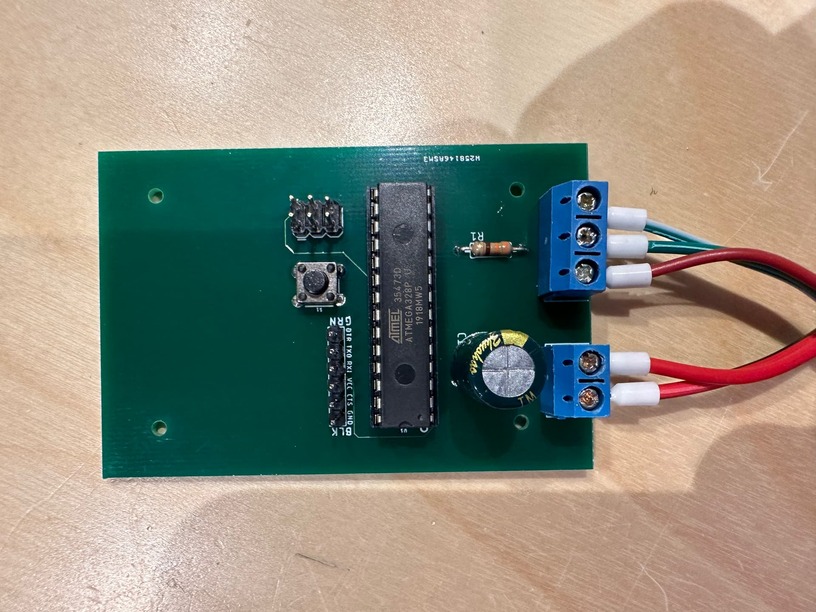
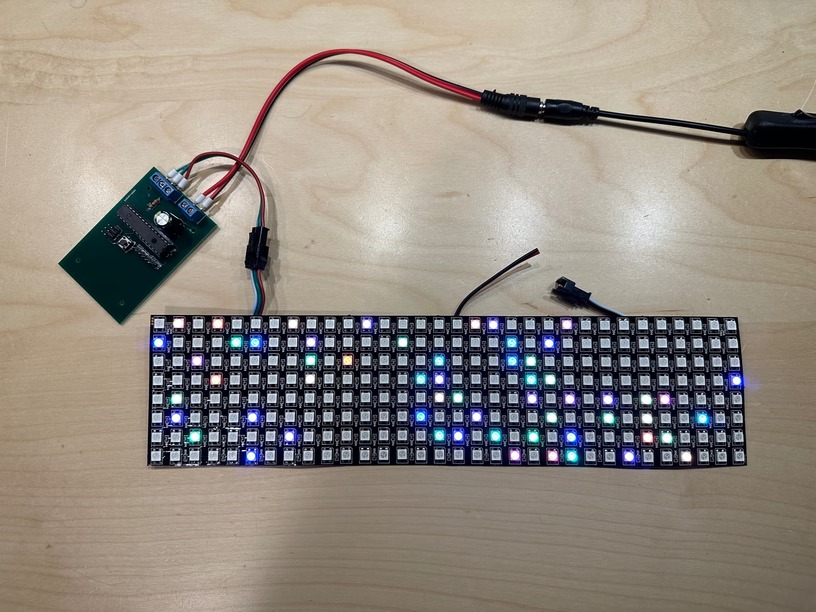
For all prior lamps, my clocks, and other LED projects that are not big matrix panels, I have run FastLED on an Adafruit trinket M0 controller built into a custom board. The board handles all the connections except power in and a lead out to the LEDs. It includes a Big Cap to protect long runs of LEDS and a shift register for talking to 5volt strips. The board was designed for my clocks but for non clock projects, I would not populate the clock components ( battery holder, clock chip, 2 resistors, crystal , 2 push buttons, and a capacitor) and make use of the board. The trinket M0 can handle much more than I am giving it from a code perspective.
Pixelblaze(PB) is different. I had 2 of them sitting around and dusted them off after discussions with other LED geeks during my show reception last month.
PB is designed with one goal, drive leds. There is no use of the arduino IDE. The infrastructure to run LEDS is already in place on the board, so from a hardware perspective, it is easy to set up (just add power and leds). One programs the pixelblaze over a web connection. It allows someone to load and use a ton of patterns quickly. That web interface provides a remote control that is good for the builder of the project but not consumer friendly. I was able to get up and running in very little time and then started poking under the hood. It is different than fast LED but I was able to adjust some little things like colors and speed after a few trials. It also has a mapping function so that you can fit it to any size and shape of matrix. I ordered more of them given how easy they are to use for this type of project . At $35 a pop, the material cost is higher than my own board by the labor cost offsets that nicely.
For my clone, I started with PixelBlaze (which is awesome) but for a fun project I designed a minimalist PCB to run the thing off of a bare ATMega328P (which needs no external crystal if you run it at 8mhz). I use FastLED to drive the output but for the animation code I dropped everything I learned about clean and well-structured programming in the last 35 years and just had fun cramming as much as I could into the limited space available.