I didn’t have any messages on the app but my light turned yellow and the fans were still running when it told me that the print was done. This is a replacement unit that hasn’t been used here much. I think I’ve had it 2 weeks tomorrow maybe. Anyway, I just cut it off and will do something else while I wait for any recommendations.
What model do you have?
Basic
How long was the print and how warm is the room the machine is in? It sounds like the machine overheated and was cooling down. You may also have an issue with the wifi connection from your machine back to the router if it sent no error message back. Post the date/time/timezone of the print if you plan on doing any more so that the glowforge support can find the logs from the print easier
Eastern time zone and time was within 10 mins of posting my original post. Room probably in 60s. Print job maybe 3 mins if that. Havent cut it on since then.
Check the connections on your white cable, it might have come loose.
1 Like
Hello @budsysmith,
Thank you for reaching out to us. I extracted some logs from your Glowforge to investigate, and it looks like the yellow button is appearing because the Glowforge is having trouble communicating with the printer head. There are two key connections I’d like you to check for me.
Could you please do the following?
- Turn off your Glowforge.
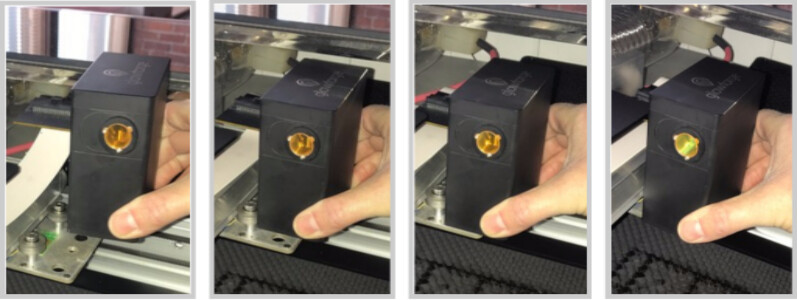
- Holding only the finished black surfaces, grasp the printer head as shown. Pull gently up and back to disengage the magnets and remove the head.

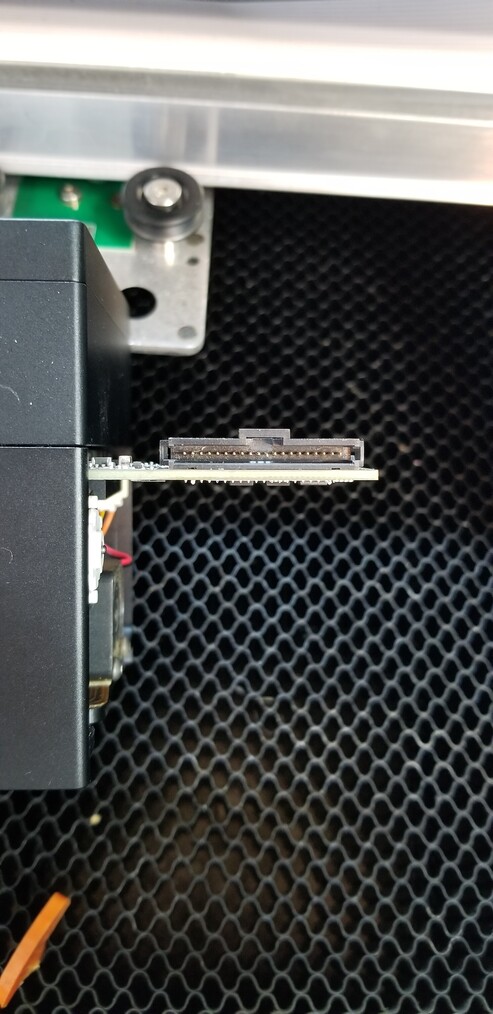
- There is a small tab in the center of the wire ribbon. Push down fully on the tab to release it, and gently pull the wire ribbon plug from the printer head.
- Take a clear photo of the gold pins inside the printer head where you just unplugged the wire ribbon. It should look like this.
- Pick up the printer head and wire ribbon. Make sure the tab on the wire ribbon is facing up. Slide the ribbon back into the head until you feel it click securely back into place.
- As shown, lower the printer head over the metal plate so that it rests next to the two round posts. Then push it gently away from you – you’ll feel a “click” as magnets pull the printer head until it sits snugly atop the metal plate.
- Pull the laser arm all the way forward.
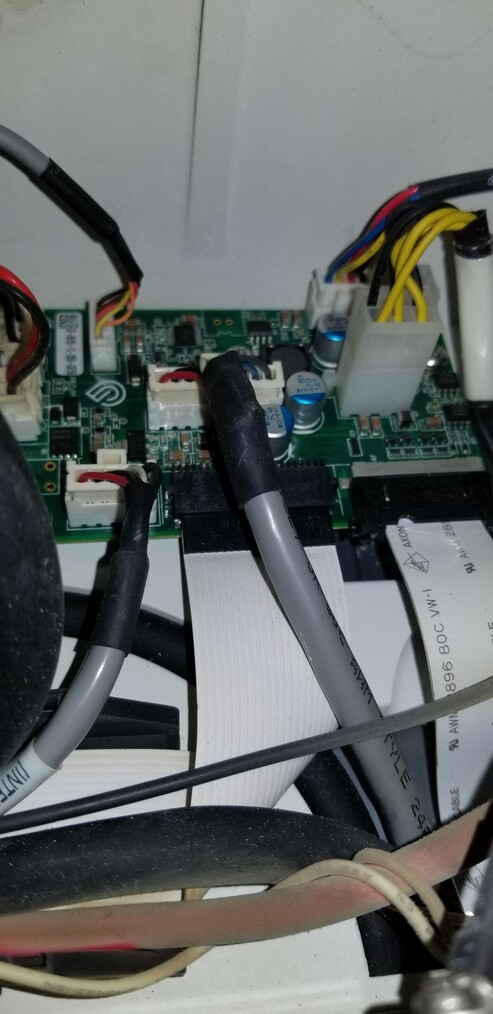
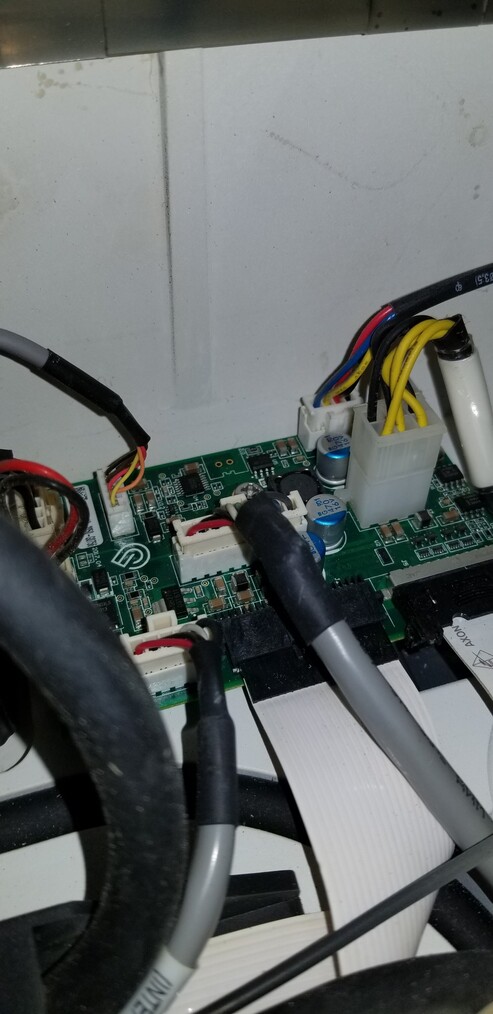
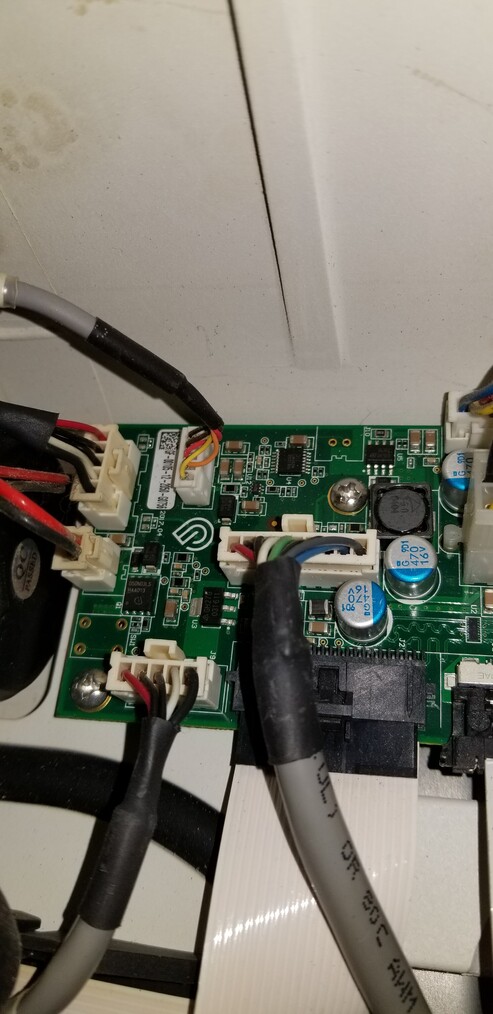
- Reach over the laser arm, and to the left of the inside of the unit and you’ll see this circuit board:
- Take a photo of the circuit board, please use flash. If the cable I’ve indicated above with the red arrow appears to be loose, please reconnect it and try printing again. This cable should ‘click’ back into place.
- Turn your Glowforge back on. Let me know if the yellow button still appears.
- Send me the photos you took in step 4 and step 9.


Once I have your feedback and photos, I’ll review and follow up with next steps. Thank you!
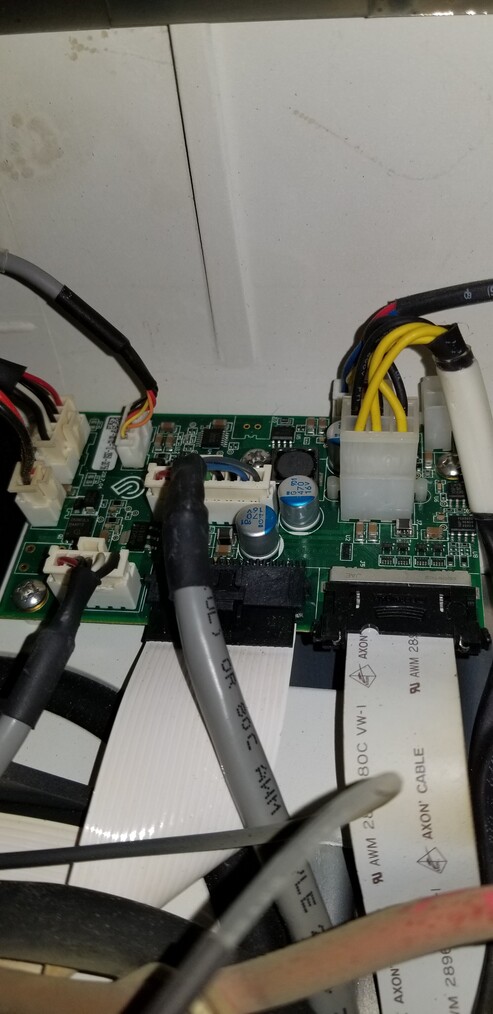
The cable seemed fine to me. It was snapped in there. I’ve cut it back on and no lights on it and it says it’s ready but I havent done any jobs with it today.
Hi @budsysmith. Thank you for getting back to us with the requested photos of your Glowforge. I reviewed them and noticed you mentioned putting the cable back on resulted in no lights and saying it’s ready. Can you try a test print at your earliest convenience and let us know if you run into the same trouble?
It sounds the issue may have been resolved, but the best way to check is to run a print and we can review your Glowforge’s log files for anything out of the ordinary. Thank you!
Hello @budsysmith, I took a look at the logs from your Glowforge and see that you were able to successfully print today, that’s great. Did you run into any problems at all when trying to print?
No it worked fine. I only did the one yesterday. Thank you.
@budsysmith I’m glad to hear things went well. I’m going to go ahead and close this thread now. Should anything change, please don’t hesitate to reach back out, we’re happy to help.
Have a wonderful day!