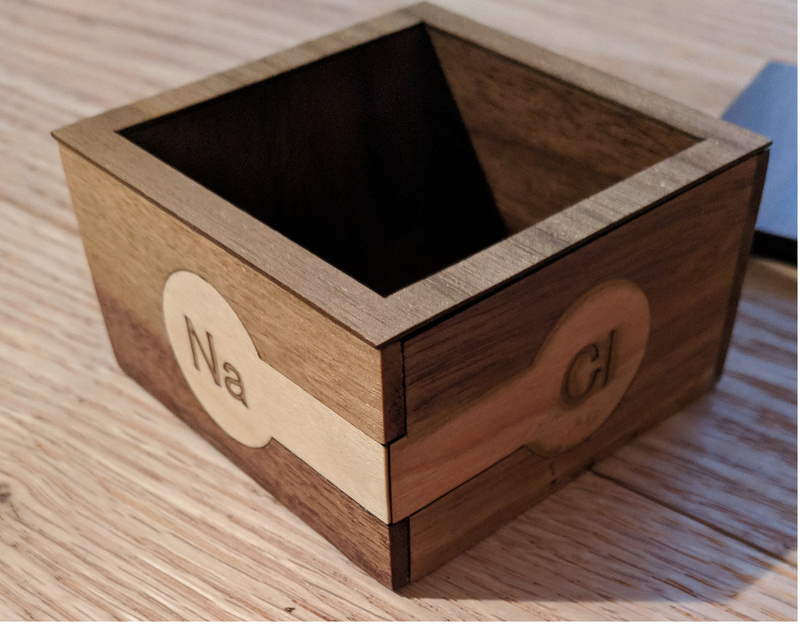
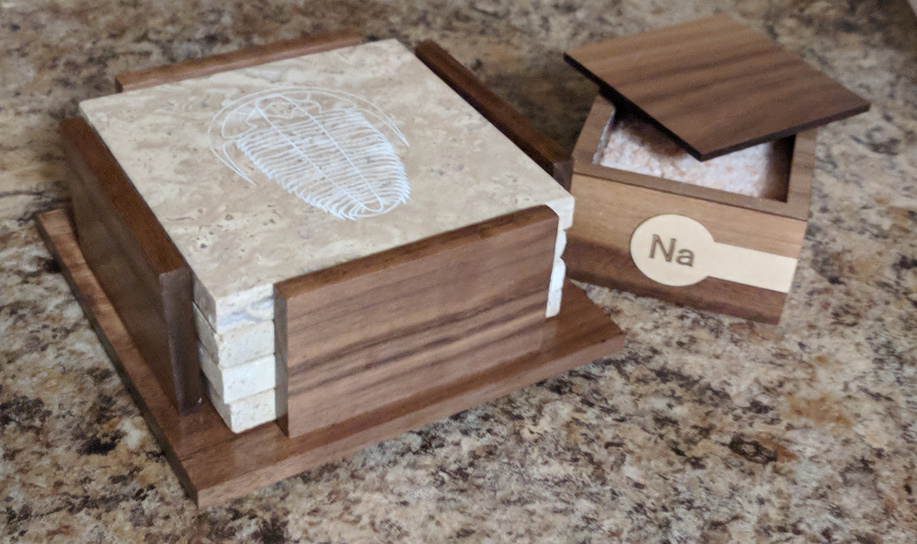
So this salt cellar was a learning project for non-fingerjoint looking boxes. I’ve been thinking along these lines since I first investigated laser cutters before the pre-ordering started. The cellar is a fingerjoint box with four sides adhered to it. The bottom is veneer over the bottom of the fingerjoint box and the four-sides sized to be as tall as the interior box plus the veneer on the bottom. The top of the box is also covered in a veneer layer, but sized to cover both the interior box and the outside layer. In its normal use case the lid will be covering up the top and any seam line of veneer won’t be noticed. If I had done the same on the bottom I was afraid the eye would be drawn to that thin little line of side wall sitting on a veneer layer.

I did some inlay, because I want to do inlay, and as I suspected there is too much variation in natural materials to dial in your settings to the no need to sand level of precision. I was expecting to sand. However, it means proofgrade materials need not apply for this application. Here the quality finish on ![]() means doubling up your sanding time. Of course without a laser there is no way I’m getting the veneer butting up, overlapping the butt joint of the walnut stock, much less cutting out the letters. Speaking of which, precision tweezers and a benchtop mounted magnifying glass would be a huge help in placing the inside of the a in Na. I’m not sure what happened around the Cl to make it look sooty, but it happened to the one on the other side as well. The Cl atom is cherry veneer and irl it is a little darker than the maple of the Na atom, but not a lot.
means doubling up your sanding time. Of course without a laser there is no way I’m getting the veneer butting up, overlapping the butt joint of the walnut stock, much less cutting out the letters. Speaking of which, precision tweezers and a benchtop mounted magnifying glass would be a huge help in placing the inside of the a in Na. I’m not sure what happened around the Cl to make it look sooty, but it happened to the one on the other side as well. The Cl atom is cherry veneer and irl it is a little darker than the maple of the Na atom, but not a lot.
So lessons learned:
- You probably don’t want to use proofgrade for an inlay piece that is supposed to be flat. For inlaying powders and gels, or where you want depth and the inlay is not supposed to be flat, proofgrade is still a great choice.
- Buy a benchtop mounted magnifying glass and some precision grabbers. My pick and smallest needle nose pliers worked, but not if this is going to become a thing.
- The key to this style of construction is precision clamping. My calculations and the glowforge’s cutting were dead on. There are a couple of spots where my assembly was the tiniest bit off and they’re noticeable. For now, if anyone asks, I was going for the time worn look of imperfection.
- Have a plan for how you are going to hold small pieces when you sand them.
- I settled on Engrave settings of 865 speed, 100 power, 341 LPI and 1 pass. The proofgrade maple and cheery veneer were still a little proud, but the same settings on different parts of the walnut board resulted in depths that varied in the hundredths of millimeter range. FYI – Full power and 925 speed on a Pro will vaporize more than 2mm of solid walnut.
Now for the coasters. So I made a foray to the Tile Shop and learned that 4x4-inch tiles are not very popular. They had one slate tile and 6-8 travertine tiles in this size. I guess a wet saw will be necessary if I want to really get into the stone coaster biz. I bought the slate tile and four of the travertine tiles and experimented. I thinks to myself, “self, it’s a rock, this isn’t Start Wars, how much damage could a laser do?” I need to cut down on the thinks-ing.
So, full power and 100-speed on a pro resulted in black blobs bubbling out of the slate tile and some really bright light. I lifted the lid. I moved onto the four Travertine tiles. On one nothing really happened. The rest had some very deep engraves. I didn’t take any photos, because I could always take them later I thinks to myself. After one or two weeks the area that was engraved had grown up out of the tile. A couple of millimeters proud growth. Then one night I came home to find the corners had broken off. Two of the tiles were moved to new homes for testing (holding glassware) and one was left next to the machine. They all broke – so it wasn’t handling or heat/cold/moisture from the glassware. Here is a photo of after the insides of the tile made a break for freedom.
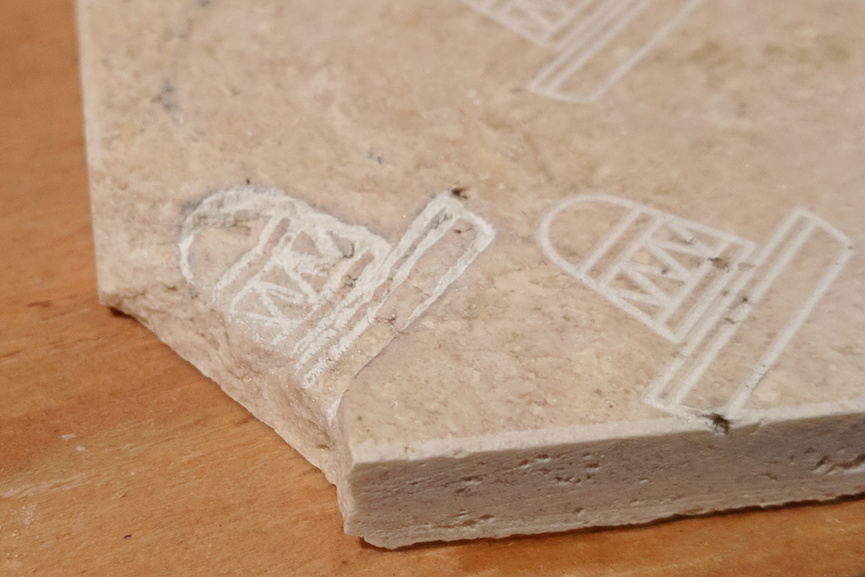
What you can’t really see, because I couldn’t figure out how to photograph it, is the depth of the break. The tile is 10mm thick and the original engrave went 3-4 mm deep. The sombrero to the right was a second engrave attempt with less powerful settings. It appears that as long as you don’t engrave too deep you won’t release the beast.
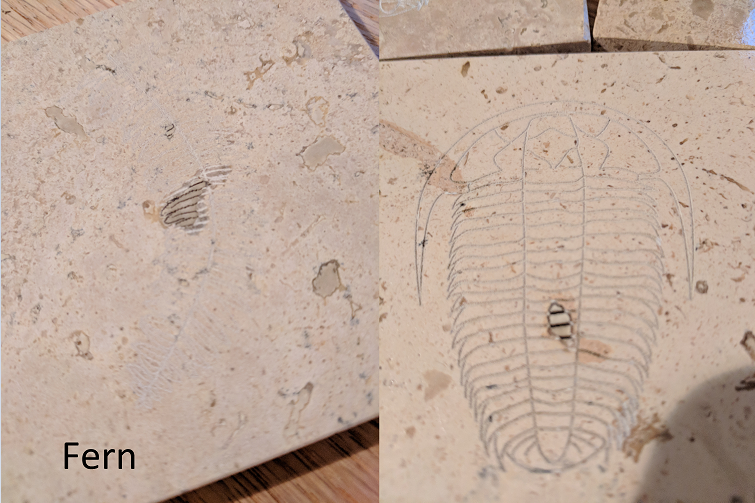
With the settings issue solved I went to the Tile Shop and picked up 20 tiles. Note, the big box Home Centers sell travertine tiles for a lot less than a tile shop, but I didn’t try those. I guess I hate my money. Where I live there are a lot of trilobite fossils in the sandstone. Going for the fossil-coaster look I searched the web for plants, mollusks, fish and of course trilobite fossil drawings without lots of detail and thick lines. Either the Internet doesn’t hold much, especially in public domain or creative commons licenses, or my google skills are poor. I knew going in simple, thick lines, is what would show up best on the tile. These detailed fish skeletons look decent if you hold them at the perfect angle to the light. From all other angles they are just blobby.
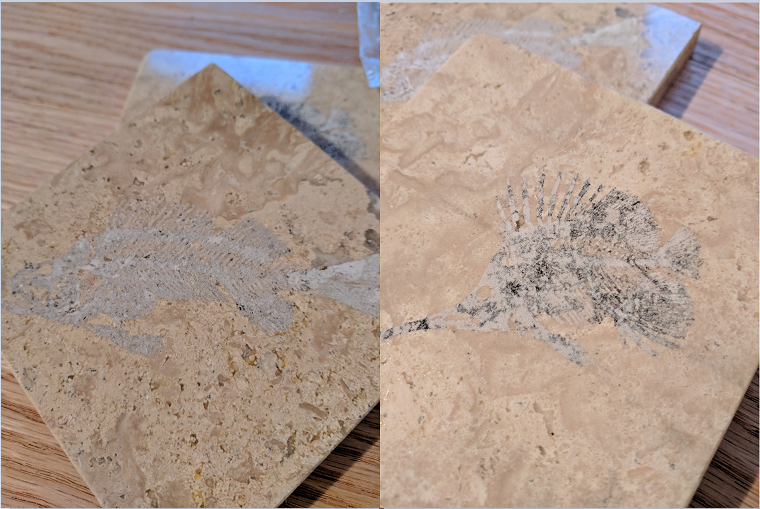
The trilobite and fern came out all right. The trilobite came out with thinner lines than I wanted and the fern came out with black lines. But I thinks to myself, we have two winners engrave two more and we’re done.
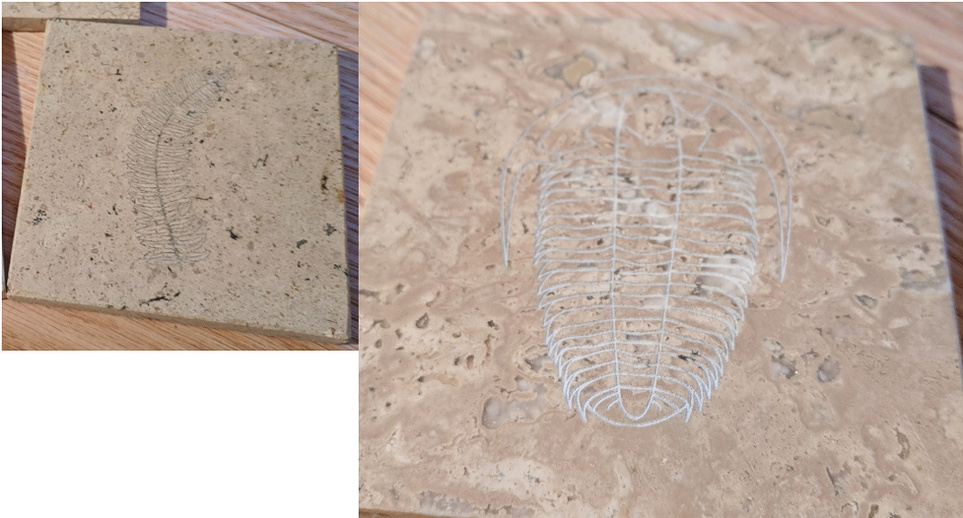
So I did it again. What’s up with the fern? Most of it is white you can barely see except for a black-lined area in the middle. The second trilobite came out so you could barely see it. Another two tiles went into the forge. These came out better, but that heavy, black-lined thing struck the center of the trilobite. The picture below shows the stricken trilobite and the fern that went in the reject pile.
I bought the adhesive-backed, polyester-felt, box of many colors from Amazon. Cut out squares smaller than the tiles and adhered them to the bottom.
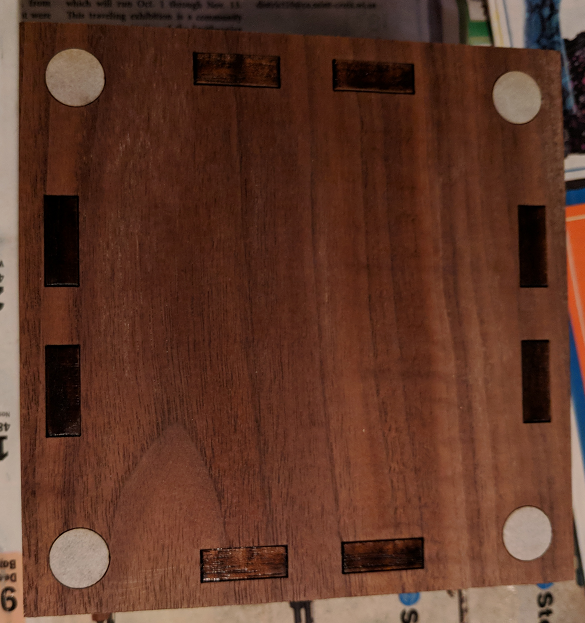
The holder for the coasters is 0.27” walnut I bought at Rockler. I sanded the sides of the walnut to remove the charring and learned that the char on the side that runs with the grain comes off easy-peasy. The cross-grain end pieces need a 80 or 60 grit sanding. The 120 grit I used worked, eventually. 220 grit paper worked as well as 120 on the sides going with the grain. I masked the walnut with medium-tack transfer paper. On the bottom I scored circles for the stick-on rubber feet. Two coats of shellac and before it dried I removed the masking. This way the rubber feet are adhered to the sanded wood and not the shellac. I’d read here you can remove char with alcohol, so before assembly I wiped the bottom of two of the sides with a Zeiss wipe (top & bottom). As you can see it removes some char. I didn’t bother sanding off the char on the bottom of the sides, because bottom.
Lessons learned from this project:
- Expect rejects if you’re engraving travertine tiles.
- Not all slate is the same. People are having great results engraving black slate tiles. My “rust slate” weakly attracts magnets (I guess that is where the rust comes from) and engraves by bubbling up a black ooze (glass maybe??).
- Engrave simple artwork with thick lines on travertine.
- Don’t engrave travertine deeply.
Settings used for the travertine tile:
- 450 speed
- Full power (pro)
- 225 LPI
- 1 Pass
You can easily increase the speed from what I used for the polyester-felt. There was no charring and the melting was just on the cut edge and it was clean and not “melty”. The settings I used:
- 250 speed
- 40 power
- 1 pass
Use too much power cutting solid wood and you increase the kerf and the charring. You also get a lot of flashback on the bottom with too much power. The settings below resulted in very little kerf. But be warned, if you try and cut it too close you will wind up not cutting all the way through. For the 0.27” walnut I cut with:
- 180 speed
- Full power (pro)
- 2 passes
I made the bottom and sides of the coaster holder in OpenSCAD (a 3D CAD program.) Normally I model what I make in 3D before exporting it in 2D. I also make a cardboard prototype of most of my designs. I skipped both of those steps because this was so simple. If I had modeled it, or made a cardboard prototype, I would have noticed the sides are too long. There should be more room to grab the coasters. It’s okay function-wise, but it would have been better without the shortcuts.
I applied three coats of the shellac to the top of the coaster holder, the salt cellar and the top of the tiles. As the tiles are actually engraved, it goes deeper than just the surface, I wanted to seal them from wear. No idea how well it will work. The tiles had a nice polished surface and the shellac is a downgrade, but if it protects them from wear it’s probably worth it. They’re only a chair for a glass.
 .
.