so… as a happy new owner of a glowforge, i started with thebasics… the founder’s ruler, the “infinite wave” square design… and then an engrave…
i figured shutting down between each print would be fine, or that each time i did, perhaps my “problem” would be fixed as the cutting head realigned itself… but alas… NO.
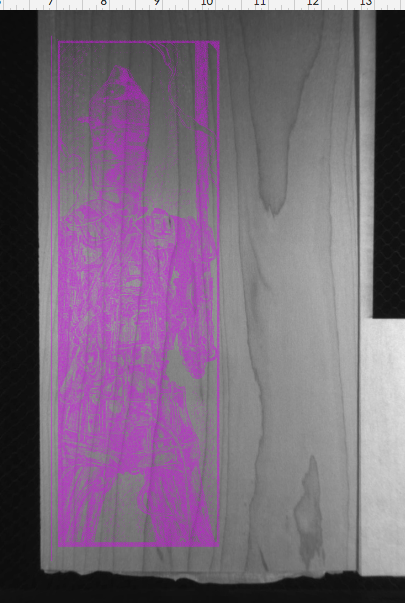
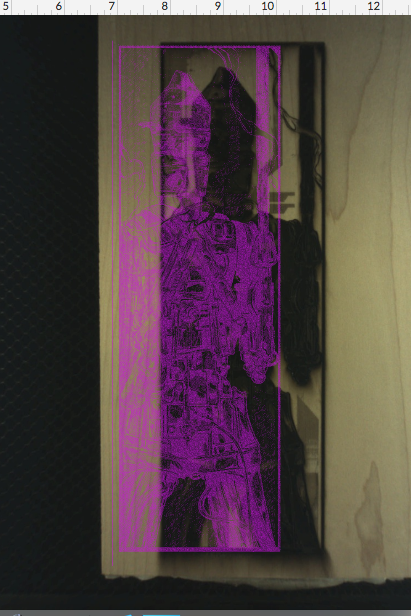
so far (3 out of 3) what i “see” in the camera for “placing” the art, and where it actually CUTS on the proofgrade wood are maybe 1/2" to 3/4" off?
the “before” and “after” camera prints corroborate this… and ive been reading through these posts to find a “simple” fix… but nothing really hits the vast alignment im experiencing…
BEFORE (where it “looks” like where im placing the image)
what’s going on? and how can i fix this?
(because my next job depends on HITTING the center of a 4x4 coaster… and theres no way i can see this working.
Wow. That’s nearly an inch! Looks like a definite issue. One thing that might help is if they know the date/time/timezone of the job(s) to look at logs from that time.
The only way to currently hit a 4x4 coaster is to cut a jig in cardboard or in masking tape and drop it in. If the artwork to be engraved is in the same file as the cut line it will engrave in the same position relative to it. So you set it to ignore the engrave when making the jig and ignore the cut when engraving the coaster.
Make sure your lid is closed properly. The camera is on the lid and has a fisheye lens. To have accuracy of placement the thickness of the material must be exact in the software - if the lid is partially opened 1/32" of an inch or the material is warped and not sitting flat or the thickness is entered wrong you will see error.
Best way to make coaster is using a jig like palmercr has stated.
Coaster alignment Would be a good place to start if you absolutely have to get your 4x4 what-have you out within a deadline and can’t wait if it is a hardware issue requiring replacement.
But basically cutting the outline of your 4x4 square in a sacrificial piece of material. Without moving the sacrificial piece or deleting your cut square from the UI, Removing the cut out piece, placing your actual piece in the hole, aligning your engrave with the outline you cut previously so it will fall within the hole you cut. Does that make sense?
makes perfect sense… but “coaster” was a “easy to explain” setup…
but it was more of something to “etch on” like a slate tile. i didnt want to get too specific, because i didnt want to get into a new topic on non-pro-grade materials…
i just want to hit a targeted area.
that makes perfect sense. and a definite work-around… sacrificing a piece of cardboard to see where it lines up then setting the “good” material in it’s “center”
thanks… lid WAS totally closed… and proofgrade material with correct thickness was in the bed.
the only thing i notice in the screencaptures are that the code on the material and the image is a bit “blurry” - maybe the lid camera needs a screenwipe?
If you click the link, the explanation was for setting up an engrave with irregularly shaped slate coasters. I just threw down the quick and dirty, its much more detailed.
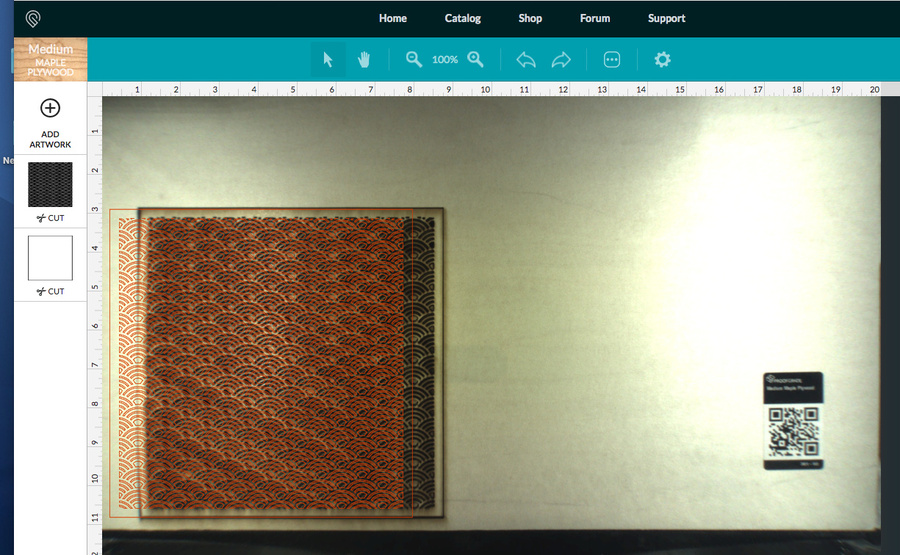
I also did a similar technique with a (full bed-sized) cheese board using a single edge to align it. Jigging is a really useful skill in GF-world. You can see my alignment material on the left in the second picture.
I have to set a weight on the right side lid of my glow forge when I close it to get a more accurate location. Looks closed but adding 5-10 lbs to the right side makes mine go from being off over 1 inch to being within 1/4 inch.
I always use a jig when trying to engrave anything that needs precision. Works very well.
Thanks! - will try that tonight… was yours off to the right or the left?
(trying to figure out which side to place the weight on)
also wonder if there’s a fingerprint on the lens? (i havent touched anything since setup) but DID notice after 3 small jobs - lots of streaks in the glass showing up (im sure the soot/smoke makes things like oil and fingerprints stand out quite well)
would something like that really cause alignment, though?
i thought the laser had its own focus-able head that determined “depth” but not left-to-right alignment…
and STILL… having to weight the lid… and being 3/4 - 1" off… doesnt sound right.
The laser does have its own camera which is used to focus the laser but it has absolutely nothing to do with the placement of the design on the material, nor is it used to measure the thickness of the material to determine placement. Because the lid camera lens is a fisheye it is greatly distorted. The software needs to know the accurate thickness of the material - a little bit makes a major difference. You can experiment and change your settings to manual and set a manual thickness and see where it says it will cut. Then change that thickness very slightly and see how much it will move where it thinks it will cut. Its amazing how much it will move it with a very little change in thickness. Since the camera is on the lid any change in height (by the lid not closing to the same position) will also effect where it thinks the cutting will be.
I just happened to stumble on my lid thing by accident. I was multi-tasking. Setting up a job to engrave on the glowforge and setting up a job to cut on my cnc router. I had a box of clamps that I got out to hold the piece on the router that I set down on the glowforge. I left it there when I set up the engraving job and found that the engraved location was a lot closer to where it said it was supposed to be than normal. Without the box it would cut further to the left than it would show it would.
As I’ve struggled with things aligning, I’ve made “jigs” with paper at 1000/12, but just for one off pieces. If i make a jig of cardboard or plywood, and I want to take it out, do something else and put it back in, will the registration be maintained? I guess I would first have to use my paper test score, and the coasters would have to be in a group that doesn’t falter from the original positioning to each other.
Hmm, I didn’t think of this “fix.” I had to remove the pass through guard from the front to get the door to seat fully, because it was being help up a little by the crumb tray. It improved after I did that.
No guarantee because each time the machine homes it lines the head up with the lid camera, not the crumb tray or the case. If the lid closes consistently in the same place and the neural net looking at the camera is consistent and you manage to line your jig up with the casing then you might get lucky.
I put a small box on the lid to weigh down the right side. Box weighs 5-10 lbs depending on how much stuff I have in the box at the time. It has helped my alignment - shouldn’t have to do this but I do and its easy enough to do.