I’ve had unreproducible but increasingly frequent alignment issues.
Most of these issues have been minor but this morning I wasted half of a sheet of proofgrade clear acrylic and I’m pretty upset about the waste of material.
Since I haven’t been able to reproduce the issues, I haven’t made any support tickets. This is primarily a complaint since I can’t offer any "it happens when . . . " scenarios and so far it seems really random. We haven’t been able to determine any patters to it so far.
So far every time it’s happened, if I redo the print with no changes to the settings/file/etc. then it prints fine the second time.
Two nights ago I started a print and early in the print I noticed there was an alignment shift during the print. I stopped the print, moved the image over and restarted it with no other changes and the whole thing printed without any issues.
Material was proofgrade medium maple plywood and it happened early in the print so there was minimal loss.
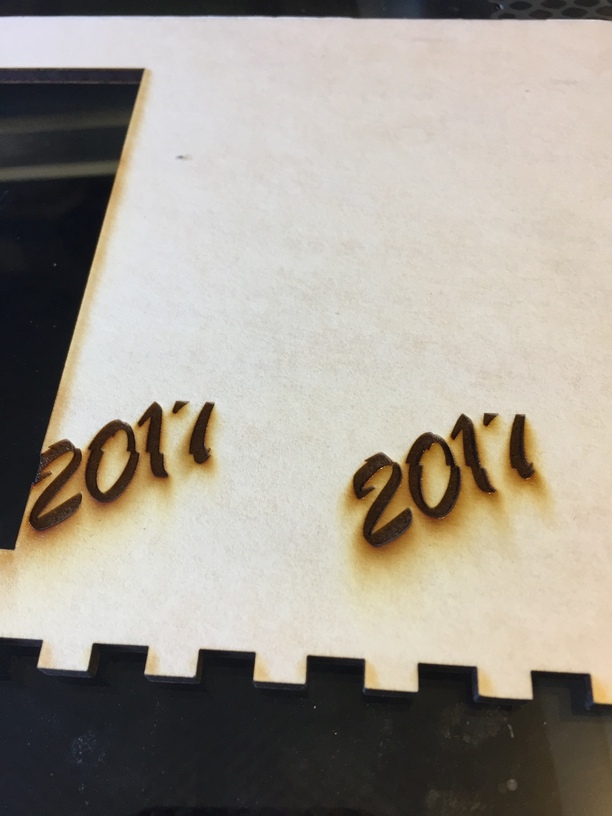
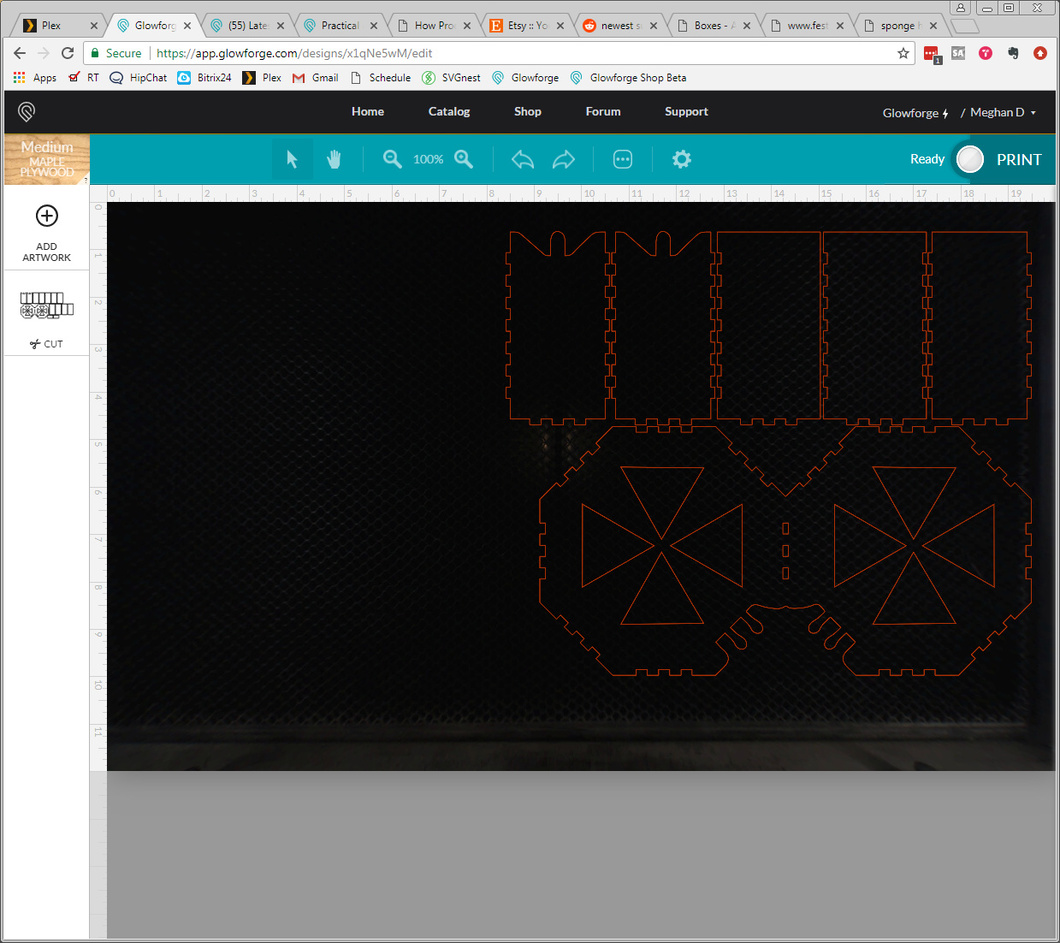
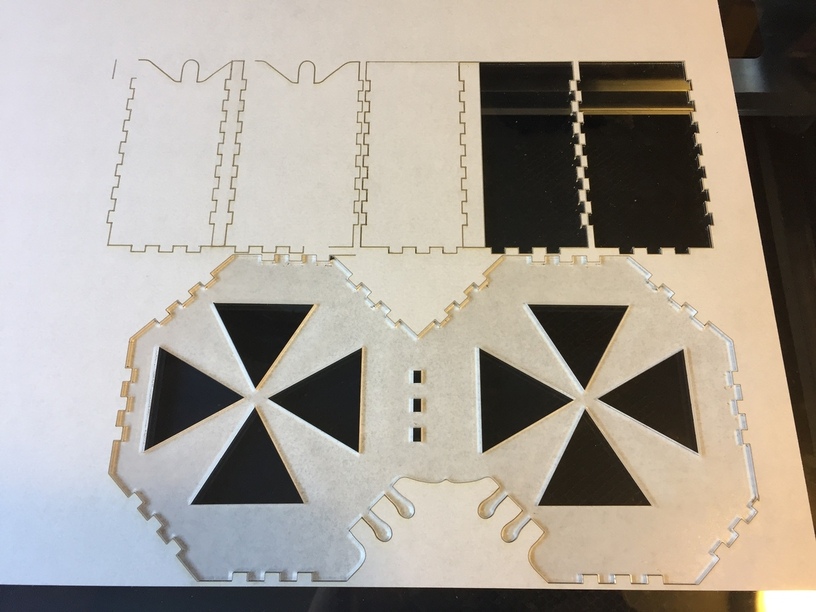
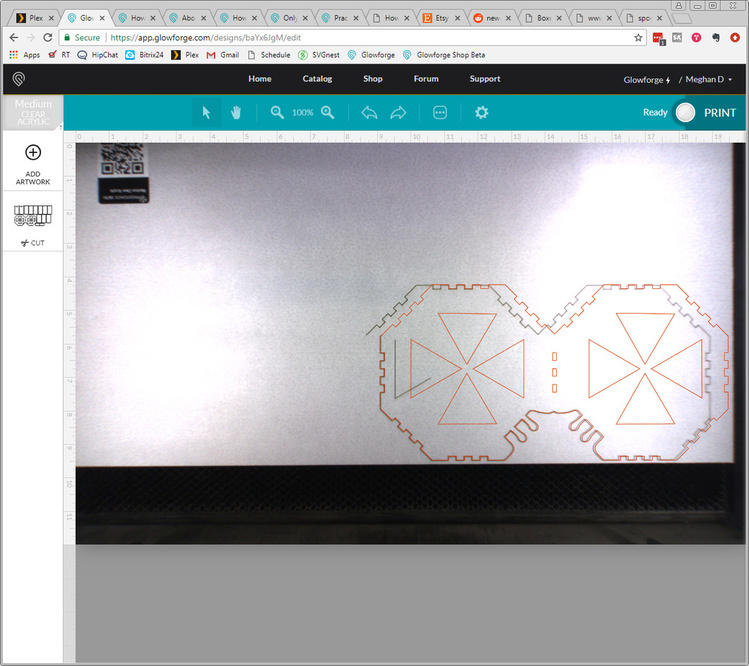
This morning I didn’t really notice how bad the problem was until I actually pulled it all out and started putting it together. I thought maybe I’d messed the lines up when I was moving the file around and I just didn’t notice, then I got back to my computer and saw that the lines looked perfect.
Material was proofgrade clear acrylic and I’ve ruined half a sheet.
Side note - I only just noticed that it thought it was plywood. Although that shouldn’t have affected where the lines were happening (which is the problem) I guess when I adjusted the acrylic to be able to use the corner, I moved the qr code out of range of the camera and rather than keep the acrylic setting, it decided to use the last thing I’d set manually which was the plywood and I didn’t notice until now.
It still cut through the material.
UPDATE: Since it was suggested I include this information -
Timezone is Pacific (“America/Los_Angeles”)
The ornament issue happened 12/21 sometime between 6pm and 10pm
The print issue this morning, 12/23, happened between 6am and 9:18am (took that screenshot at 9:18am)
It is really helpful in the troubleshooting process if you can give the date, time, and time zone in the problem report so support can review the machine logs to see what happened.
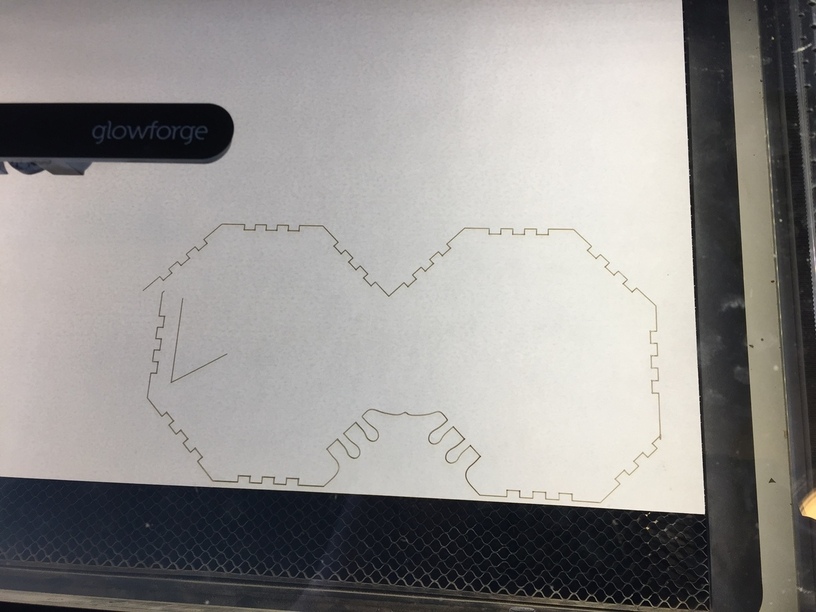
I just tried it again because I still want to build this thing. (cut ended around 10:30am and started, IDK, 5-10 minutes before that)
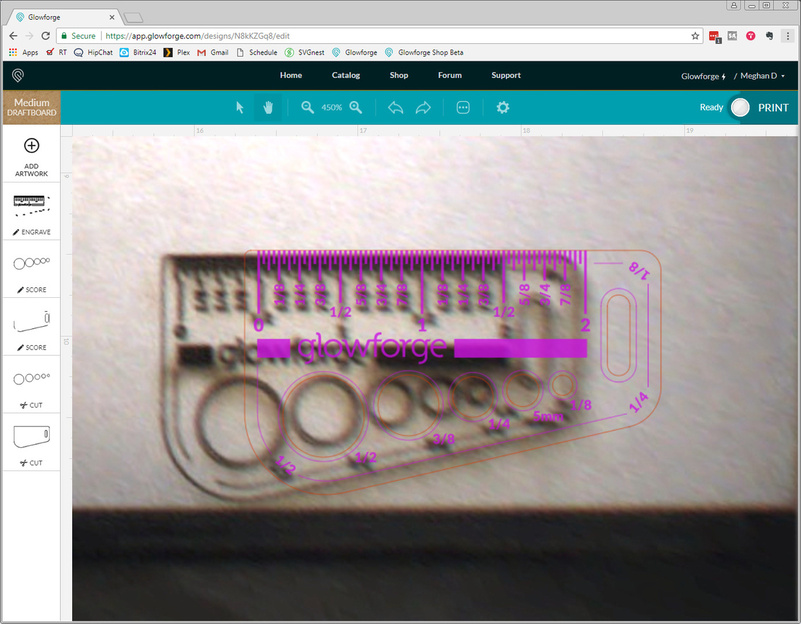
It looked good but it seems like in this particular instance, it’s an issue going to the right edge. The software gave me an edge to go to and I haven’t had trouble going to it before. Not anything like this, anyway.
I stopped it shortly after I noticed the issue so I’d at least have a good sized scrap to work with.
I don’t really have enough information for this guess, but it might be something to look out for when trying to notice what is common:
It looks like you might be losing steps when printing near the front right corner. After you’ve lost the steps, you won’t lose any more until recalibrating (power cycle) which is why a second attempt works. The reason you don’t lose more is the lost steps mean that everything is shifted by that amount and you are no longer reaching the obstruction that causes the lost steps.
The reason I guess this is because we’ve seen a number of machines have this problem. There may be many more in the wild but people don’t notice because they don’t print full sheet designs. Apparently (possibly?) This may be caused by the gantry being not quite parallel to the case.
Other people have lost things in that lower right corner. Some GUI hiccup I think.
One said it was banging on a plastic chunk that extruded out down there.
Will search later and try to find, it had pictures.
I’m sorry you’re having trouble! Would you please:
Turn off your Glowforge (this is important to avoid damage to your unit)
Check for small pieces of debris or dust
Check the lower door to make sure it closes all the way. It may require some force to open, but open it, wipe any dust off the edges, and close it all the way.
Remove the tray and clean any dust or debris from the surface underneath. Pay careful attention to remove all debris from the four dimples where the tray rests.
Check the lid to make sure it closes all the way. Small particles of material, such as dust or debris, can prevent it from closing completely.
Open the lid and, using both hands, gently roll the laser arm to the center of the bed, and then back and forth about 3 inches in each direction.
Continuing to use both hands, gently move the laser arm to underneath the lid camera
Gently move the head under the lid camera
Turn your Glowforge back on
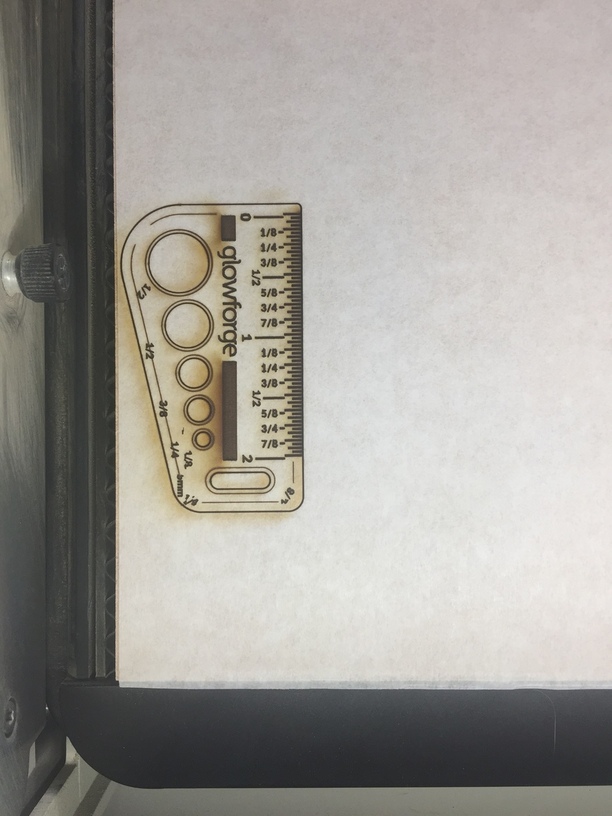
We included an extra piece of Proofgrade Draftboard with your materials shipment for troubleshooting. Place Proofgrade Draftboard in the bed and print the Gift of Good Measure in the front right corner.
Sorry it took so long, the holidays caught up to us. We just now followed the instructions given and the problem is the same. Printed in the front right corner at the edge of what the UI would let me do.
Thank you so much for taking the time to do that test. Based on the outcome, it looks like your unit is experiencing an issue that we can’t resolve remotely. I want you to have a reliable unit, so I’m recommending we replace this one. I’ll be in touch via email to sort out the details.