Perhaps the most useful information I seem to have forgotten !
The pairing of particular lines for cutting out the various pieces.
Starting from the base, use the outermost, light blue, line only.
For the reinforcing ring, use the second, dark blue with the purple line. Top and bottom rings are identical.
Use the dark blue and pink lines for the top frame.
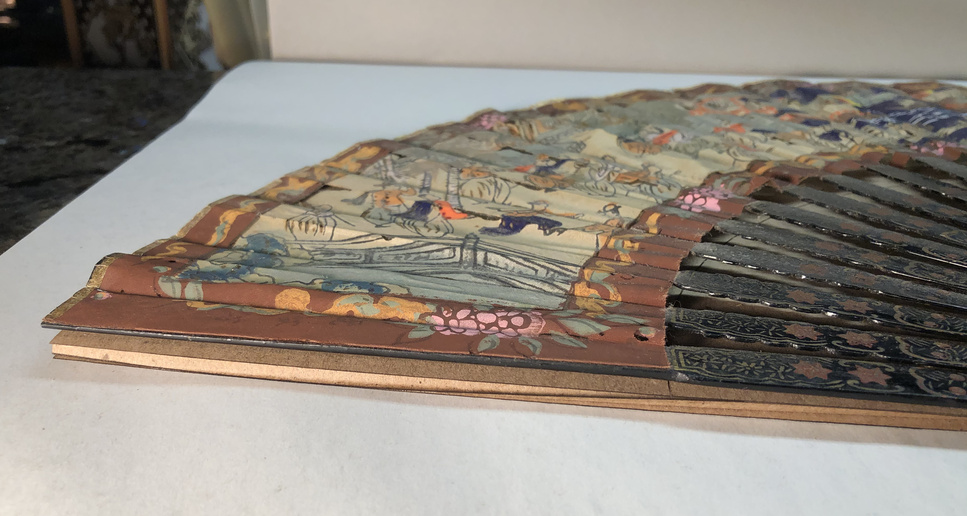
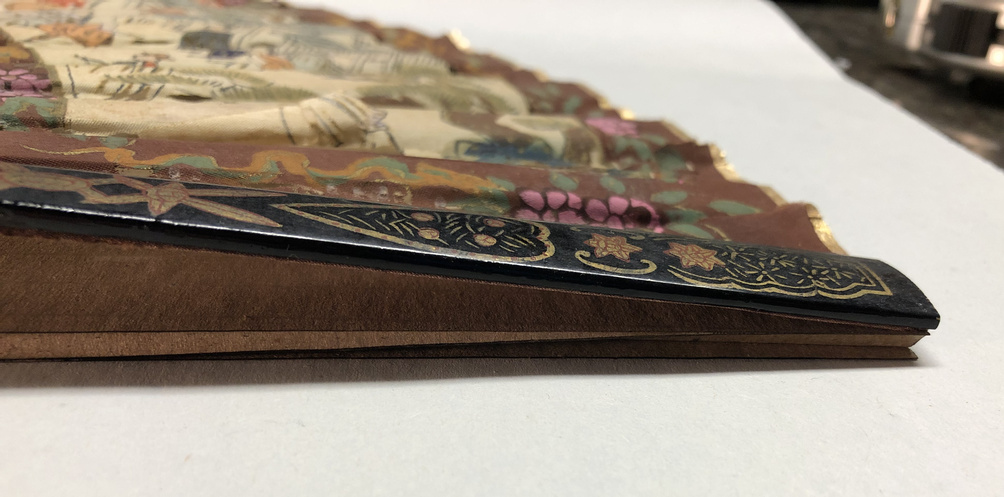
The walls are strips of microply of a suitable width, wrapped around the reinforcing rings, and glued in place.
A second strip is glued inside the lower wall, and the top slides over it.
If you are forced to use a basic, without the extra size that gives you, it gets more complicated, but the approach is exactly the same, and perhaps the technique I use, I’ll keep for a separate thread. Likewise any help needed with fabric linings and assembly techniques.
I’m going to follow this later. I have a similar fan we brought back from China. Still in the box. Several purchases still in their boxes, up on the shelf. Projects for another day.
Okay, I split the first SVG you sent into two interlocking pieces so I could check the fit. The fan and leaf lines are perfect, but the little bump at the bottom will need to be bigger to accommodate that loopy thing. I measured, and it’s 34 mm wide (edge to edge) and 32 mm from the pivot to the bottom-most point of it.
Ah, I just reread your definition of “open angle,” and I measured it incorrectly, that’s why the bottom part didn’t fit. I was using the pivot point as the point of the angle, even though you specifically said it wouldn’t be. Sorry!
Sounds like progress ! The actual fan outline is only created to be the source for creating all the other lines, but it looks like you have got that bottom curve spot on.
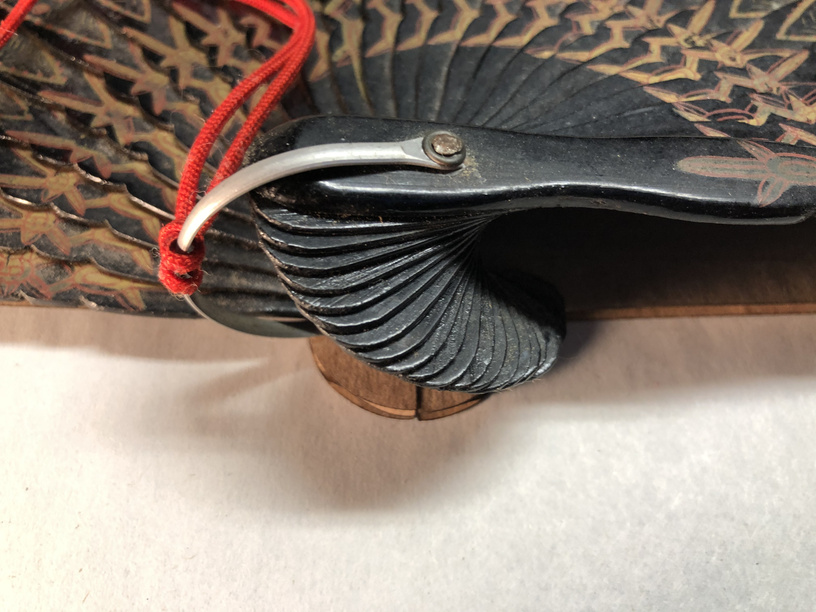
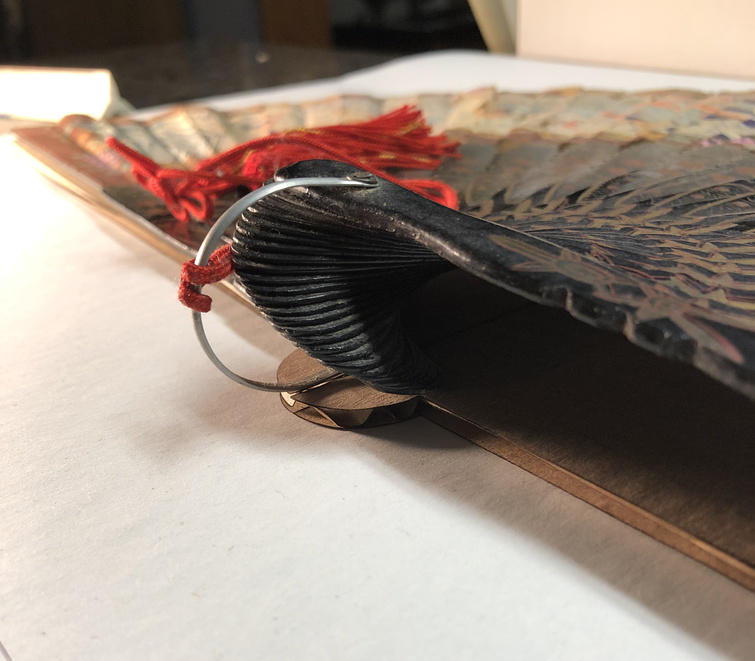
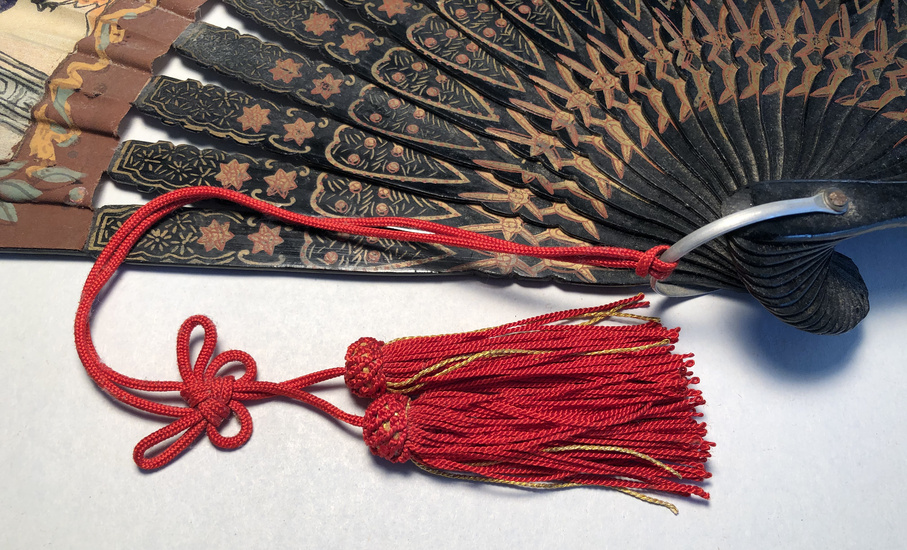
Yes, it is normal to drape any tassel along the bottom of the frame. If it was on an exceptionally long silk loop, or a very long tassel, just drape it back and forth.
The metal ribbon loop will probably look best set straight downwards.
The metal loop only appears in the 19th century, but you sometimes find them added to older fans, so it’s not a definitive dating clue. During a slightly earlier period, a ribbon might be threaded between the middle sticks, it allowing the wearer to cope with a small bag/purse at the same time. Then some enterprising Victorian fan maker decided to attach the metal loop, using the pivot to hold it in place, to act as an anchor for the ribbon.
John
The overall size is about 24 x 13, so turn it sideways, and use the snapmark facility to make each piece in double cuts.
Are you familiar with the snapmark system ?
I’ll do the necessary.
I will cut each line in two, then add snapmarks. It will appear as Fan2.svg.
I’ve just seen that I’d left the inner frame edge as a ‘dynamic offset object’, but have now converted it to a path.
Sorry folks, got head on upside down. I need to divide the drawing in three, not two, and create three files. I didn’t check that the drawings are still too big for the GF cutting size.
My bad.
Excuse - covered in too many itching spots - Christmas tree rash !
So, @johnbrooker, what about the depth? Trying to figure out how much 1/16" ply I’m going to need (and where to find it!). The metal ring is the thickest part of the fan, and it’s 34 mm wide. I don’t know yet what (besides the fan) goes inside the box, so I’m not sure how much deeper than that it’s going to need to be.
Also, does the glass need to be glass, or can it be UV-blocking acrylic?
Christmas tree rash = Pityriasis rosea ! They’ve put me on acyclovir, till they get final confirmation !
Curiously, I’ve found biting hot showers bring relief, even though localised heat brings it on !
Depth - the use of an inner wall as a liner to the base section, allows you to adjust the overall space behind the glass, as well as allow for different thickness glass, or acrylic.
I have built my own set up for cutting the fan shaped glazing, as well as having a Taurus diamond wheel for internal cuts. Pretty straightforward to build a compass cutter to hold an off-the-shelf glass cutting tool.
Back to depth. You only need to allow 1mm or so clearance for glass above the ribbon loop/pivot. If the loop is particularly ‘bulgy’, I’d flatten it to more of a U-shape.
If you calculate the depth of the wall to be 1/2 the depth of the pivot, the two parts, with the inner wall acting as a final height adjustment.
I make this narrow recessed band of the inner wall a ‘feature’ by painting it a contrasting color.
Nowadays, I glue the glass in place with a silicone adhesive, then the top assembly, lowered over the base, is fixed at the appropriate height with small brass screws, sideways through the walls. I also now stick a small wooden block inside each corner of the frame, not only reinforcing the corners, but acts as a safety support for the glass !