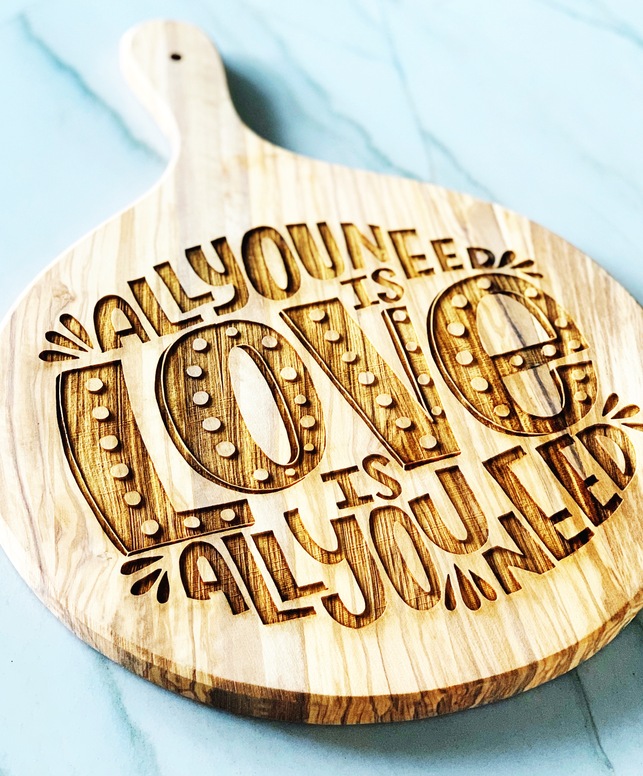
Yet another olive wood engraved cutting board purchased at Home Goods. Settings were based on Walnut PG (Speed: 1000, Full power, LPI: 225 on GF pro). Honeycomb tray was removed and material height adjusted to .03”. I placed 2 sacrificial tiles under my cutting board that equaled .5” + .6” for my board less the 1.33” that I measured for my honeycomb tray. I’m happy with how these are coming out!
Cool design. Can’t go wrong with the Beatles 
3 Likes
So true! A gift got my brother who is a musician and HUGE Beatles fan!
2 Likes
I’ve seen a few things from Home Goods that makes me really wish there was one nearby 
Oh well, at least those of you who can get there are doing some cool projects! Awesome work, came out really nice. I assume you didn’t mask it, so how did you clean it afterwards?
2 Likes
Out of likes, but this turned out great!
2 Likes
I cleaned it with the orange pumice soap from Home Depot!
3 Likes
Thank you!! My brother loved it!
2 Likes
You are really cranking out some unique cutting boards! Love ‘em all.
2 Likes
Thanks @cynd11!!
Hi, I love your cutting board. I was directed to this link as I am a new glowforge owner and want to engrave an olive wood cutting board that I purchased from Trader Joes. It is just under 1’ thick. I have never worked with anything over 1/8’ yet so I am looking for some guidance. I understand I need to take the crumb tray out, which I have done and I am using a second cutting board ( I am doing 2 as Christmas gifts) underneath one I am engraving to raise the high. The thickness with both stacked is 1 57/64". I am lost from here. Any guidance is appreciated! Mike
Hi @mrtoad. You’ll need to do some test runs to engrave the cutting board…basically getting some “sacrificial” material like plywood/hardboard to reach as close as you can to the same thickness of your cutting board. There’s some math involved. This is a great tutorial for engraving without the crumb tray Tutorial: How to cut without the Crumb Tray (Honeycomb) You’ll also want to mask the cutting board. See above for settings!
1 Like