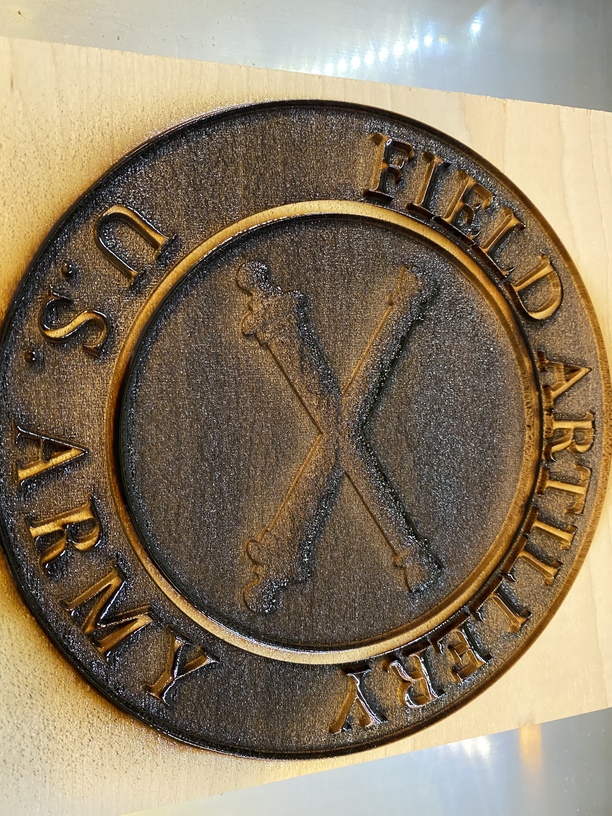
As you likely saw I recently started playing with 3D engraves again. And finally decided that it was time to try a 3D engrave of my own design (i.e. not just download a depth map and print it). So I read the posts on here about using the 3D depth map renderer on MeshLab to take an STL (or other mesh) and produce the depth map. Now it was completely useless. First off whatever programmer made those horrible sliders for minZ and maxZ is just a terrible person. The difference between nothing and clipping is like 1 pixel on screen. I was getting really frustrated. I saw a comment in some forum somewhere that the Windows version of MeshLab worked better. So I put in on my Windows 10 VM on my Mac and gave it a try, and while I don’t quite understand what those sliders do (I conceptually understand, but that didn’t seem to match the 3D model on screen) I got a reasonable output. Then exported that as a screen shot as a PNG and did the rest of the layout in Illustrator and then rendered that out as a PNG:
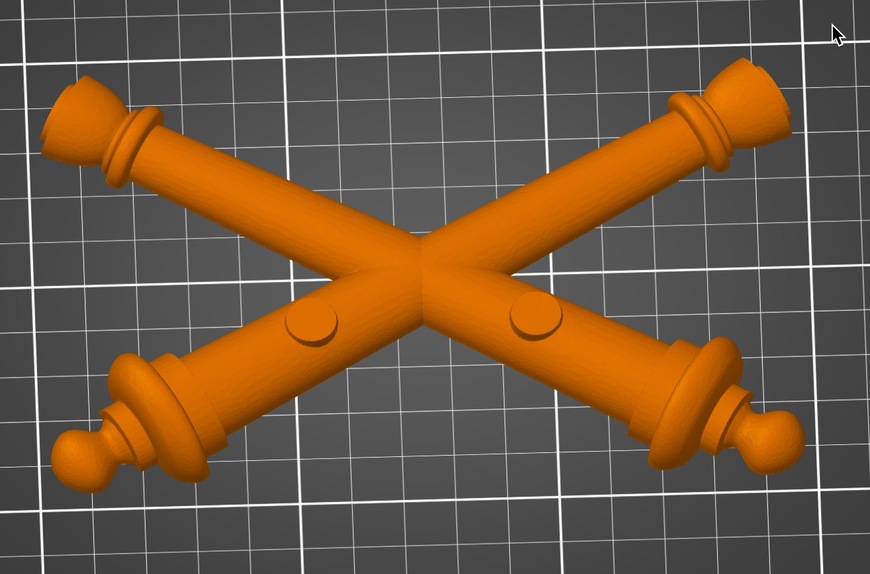
Here is the model to start (in prusaslicer as it does a nice job displaying STL files for screenshots), and for those who are curious these are the crossed cannons in the center of the US Army Field Artillery seal.
I will post an update after the 3D engrave finishes. I was considering doing this on the X-carve except that right now it is apart as I upgrade the steppers to 269oz motors and the belts to 9mm GT3 belts (real Gates brand too!)
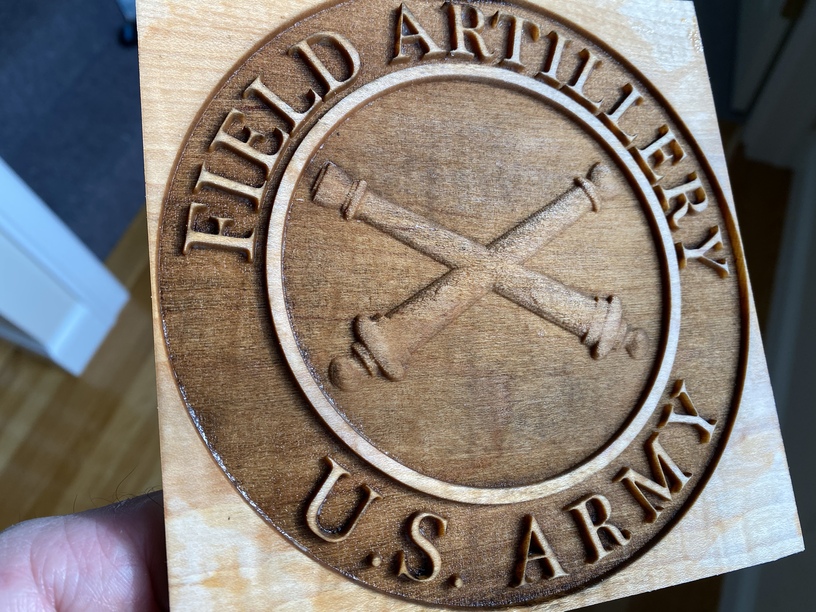
To be honest the 3D cannons looked meh when I engraved them after cleaning, so I did return to using Blender. That video did help me although as I often find with these tools for some reason my UI is never quite what theirs is (tabs do different things than theirs, etc). But with Blender I finally managed to wrangle out a really nice 3D render that was much better than Meshlab’s. So off to the Glowforge for another engrave session.
Oh and speaking of weirdness. So I had always thought this maple hardwood I had was 0.48" thick so “just OK” to sit on the crumbtray, but actually turns out to be 0.51" . But on the last one it failed as it was “too thick”. Weirdly I had just done 2 others using the exact same board (It’s a 6" board which I cot 6" squares off of). So had to remove the crumb tray. Now the total depth with my stacked stuff (aluminum stock) comes out to be 1.74" from the floor of the machine. I don’t have a problem that the focus failed, I have a problem that the first 2 worked!
I had exactly that issue and since I had made sure that the head would clear it I used another piece of wood alongside just under 0.50 and did my set focus there, and it worked better.
I also have used gimp to make sure I get the whole 254 levels of gray when engraving.
Here is the carve from the Blender depth map technique. Looks much rounder on the barrels. Not sure what happened on the charred part at the top… must have been something in the wood