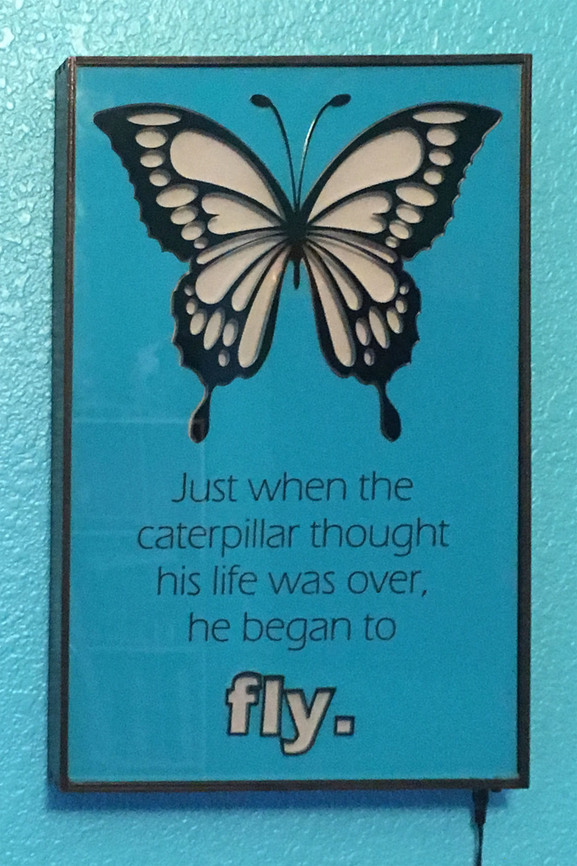
The idea was based on a quote that my son had mentioned he liked.
The frame was based on the one I used for the prior project, but this time the innards included multiple layers of acrylic (teal and black). For the innermost layer, I again used light-diffusing plastic from Inventables (http://www.inventables.com/categories/materials/plastic/light-diffusers).
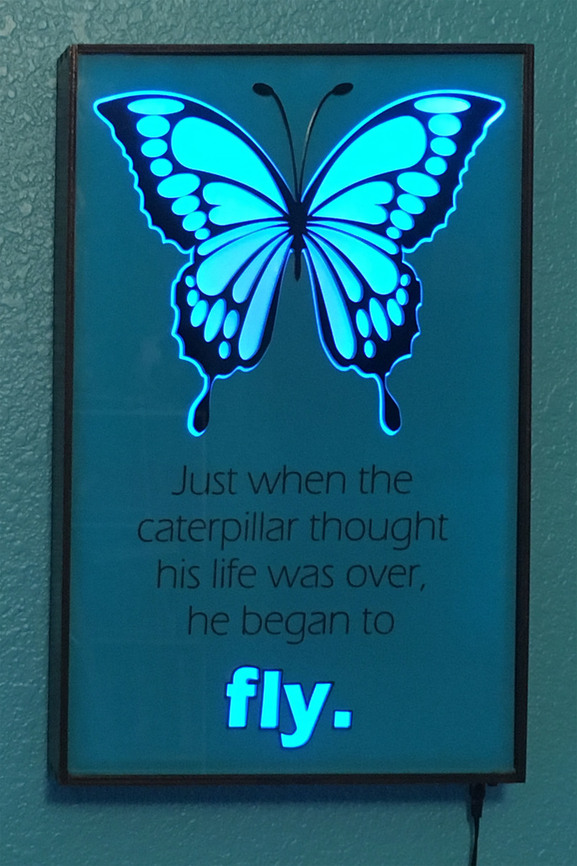
I especially like how it looks when the room lights are out.
(It’s intentional that the other words are invisible in the dark.)
As an added bonus, the $16 LED controller I used (http://a.co/8Fp10pI) is also wifi enabled, so he can control the lighting via a smart phone app or Alexa/Echo. It can even pulse and change colors to music.
(I didn’t even know these controllers existed a week ago, and I’m still amazed at how quickly something like this can go from idea to reality with the Glowforge.)
My other son got something as well, but I still need to take photos of that one…
While I’m thinking about it, I also have a “lesson learned” that might help someone else.
The primary layer for this sign was a sheet of Proofgrade acrylic (opaque teal).
The butterfly and “fly” word outlines were cut from black acrylic, which I glued to the teal layer.
Finally, I taped sections of light-diffusing plastic behind the openings in the teal acrylic.
It wasn’t until my final testing at full power, after the LED light strips were installed, that I discovered that the “opaque” teal acrylic is not fully opaque, depending on the color of the light. Red doesn’t penetrate it (as evidenced by the last photo), but other colors do, to varying degrees.
This created a problem, because the tape and other components – which I had hidden behind the teal acrylic – became visible in silhouette under certain lighting conditions.
To solve it, I switched to a full-frame sheet of the light diffusing plastic, which I taped at the very edges of the frame. I also relocated the wifi controller, which had been attached to the back of the teal acrylic, and instead attached it to the rear panel of the frame itself, so the lights wouldn’t silhouette it.
(I also considered adding another layer of something truly opaque behind the teal acrylic, but I didn’t really have room without making a new frame.)
Yes, if I’d known before-hand it would have been easy to spray-paint the back side of the acrylic before cutting it. I’ll keep that in mind for future projects.
Painting it afterwards would be do-able but a bit trickier, since I wouldn’t want to paint the exposed edges of the cuts.
Life is a learning experience (especially with me and this technology) so we put a little piece of rubber on the end of pencils. Been a long time since I put my shoulder to the wall of my ignorance to this degree.
Can you tell me if the LED controller/strip is capable of addressing LEDs individually for chase FX, or is it the kind of strip where the entire strip must be set to one color at a time?
The strip I used can only vary the color and brightness of the entire strip at once. It’s possible that the controller could handle more sophisticated strips, but I’m not sure.