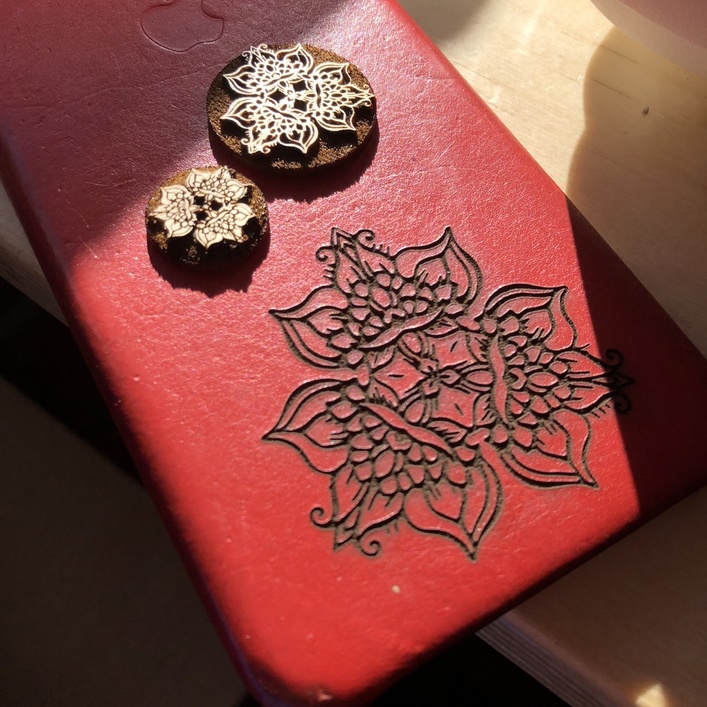
tried a few things today … wanted to see how attempting to etch a button would work. after a few attempts (the small one is my first attempt) i got something i quite like. then i tested etching a design on an older iphone case. the etch turned out great … but the inability to position thing by eye in the viewer is still a problem. i think i’m getting close, but sometimes i’m way off. need to do a comprehensive test of positioning in the future.
52 Likes
all those look amazing! well done!
6 Likes
When placing things by eye, I will typically mark center on the masking, and then line up the guide box markers, if that makes sense. I’ve got my offset down so I know how far to move it once it’s placed where it should print. The only time I notice a variance is if I’m not entirely sure I moved it the correct amount of spaces, or if I forgot altogether 
Love the design and results you got!
2 Likes
this is only my first week with the GF and i’m still figuring it out. i’m usually pretty good with doing things by eye (graphic designer for 25) so it’s maddening when things are so far off. i’m imagining the software and camera will get better … or i will learn how to adjust like you are doing.
4 Likes
Oh, wow! Okay, yeah. When I first got mine I was very confused about the offset, but luckily we have great members in the forum that have outlined ways to account for this. @cynd11’s way worked wonders for me A way to improve object placement
What I did instead of using graph paper (because I didn’t have any) was draw cross hairs onto a blank paper, and then with very low settings engraved a cross hairs image onto the same page. From there I was able to figure out how far and how many spaces my particular machine needed adjusting. As others have stated as well, having your image premade and preplaced on an artboard in your preferred editing program, but this isn’t always viable so falling back onto the method detailed in the post above is always nice.
I wish you luck in your future endeavors, as well as looking forward to seeing more posts by such an experienced artist!
3 Likes
thanks for that link! lots of good info there.
also saw that using Safari may be causing a problem (oh noes!) … i hope that’s not true, it’s the only browser i use 
1 Like
Very pretty design! 
1 Like
Safari mostly works great, but sometimes when you zoom in the placement of items shifts relative to the image of what’s on the bed. So lining things up on material becomes less accurate.
There used to be some other bugs with Safari (e.g., it used to not let you reorder operations) but those bugs are mostly gone now.
I normally use Safari for everything but I’ve been using Chrome for the GF most of the time, particularly if alignment matters.
1 Like
Great experimentation! Maybe you can craft your own phone case, too? 
What are the buttons made out of? Those are great!!
1 Like
i used the maple hardwood with a dark etch, so there’s a large drop off from the pattern on the surface and the background. i still need to figure out how to get the background to be more beveled. i’m thinking it will require a second pass to do just the bevel.

6 Likes
Nice!
Here is an example of how your bitmap needs to include some grayscale gradients in order to get that bevel look you are shooting for:
7 Likes
Did the GF recognize the iphone case or did you have to manually set the focus?
I’ve got a request from a friend to do an iPhone case and not sure whether to tell it the overall thickness(about 1cm) or the thickness of the leather where the engraving will be (2mm)
i used the proofgrade medium leather setting as a test, which worked well.
on my next one i’ll use frisket so i don’t get the scorching.
for thickness you should measure the whole case, since that’s where the focus is.
1 Like