Hi all, We have had our Glowforge for about 6 weeks now and loving learning how to use this awesome machine! But, is it just me, or is the camera alignment getting WORSE? After experiencing some problems I did some research on the forums and assumed this would slowly be getting better.
Anyone else having worse problems vs months ago or am I just loosing it.
Can’t speak to your state of mind… Haven’t noticed any changes to my unit since receiving it in November. There are those that claim changes every 5 minutes. Tend to heavily weigh my on experiences.
I’ve read in some places that it may or may not the longer the machine is left on processing print after print, but that is avoidable but letting the machine recalibrate after a power cycle.
I haven’t had any noticeable changes like this with my current machine, so I can’t say either way, but the current machine (my third forge) has been the most accurate of the bunch. You can perhaps run tests with targets and find your specific offset, and then from there keep tabs, but that will of course take time.
UPDATE #1. after more research came across a user (can’t remember who it was but thank you) who suggested clearing the cache and history in my browser along with a restart of Glowforge and this seemed to help. didn’t have enough time to really test it hard before the day ended and the kids needed dinner…
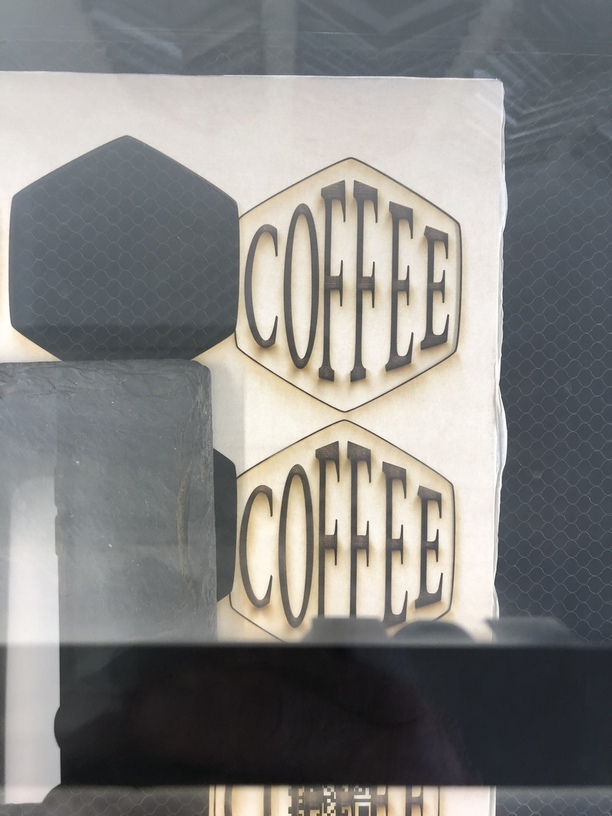
it was getting really bad…these little coasters were printed on PG medium maple ply and were centered according to the camera. for reference they are 3 1/4’ wide.
There was a bug (mentioned above) where the head would drift over time (in the range of like ten thousands of an inch between jobs). It would take a fair number of jobs processed without the unit being turned off to notice that drift. No idea if that’s been fixed.
Warped material can affect the relationship between the screen location and the actual cut location.
Bumping the head and moving it at all while the unit is turned on will impact that relationship.
The further you get from the center will affect that relationship.
The current spec is 1/4”. Was your cut more than a 1/4” off from where it was placed?
I’m glad it helped, but I suggest it was the reboot, not the browser cache. If you were having UI issues, that’d be the browser. Alignment issues would tend to be on the machine side. Rebooting would re-calibrate. As always, clean the things that need to be cleaned per the documentation. That’s always a big cause of alignment issues. It’s funny how when I go to clean the camera it looks totally clean… until I clean it and see all the crap that comes off of it.
I notice that I get better luck with camera alignment by cleaning the camera often. If I’m doing a bunch of engraving(on wood) then I’ll clean it every 5 hours. For sure I will clean it if it doesn’t recognize proof grade materials. YMMV
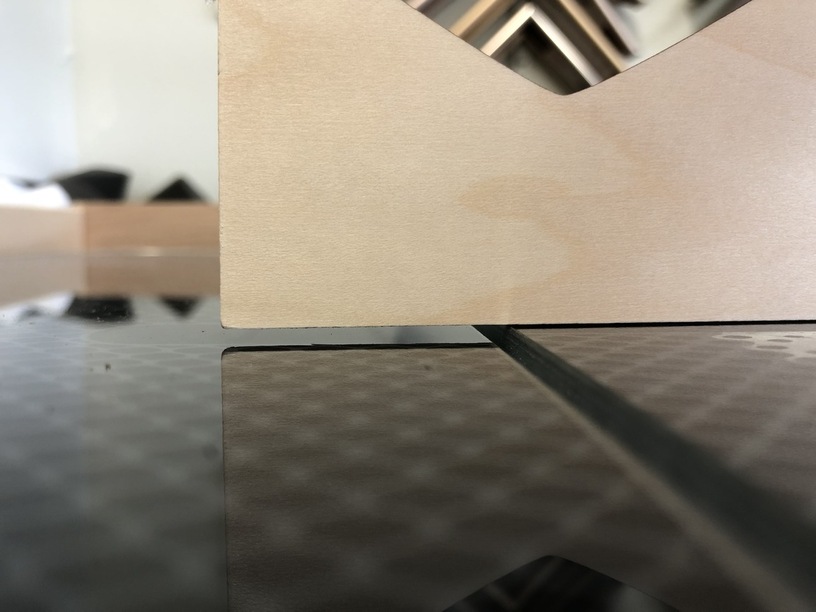
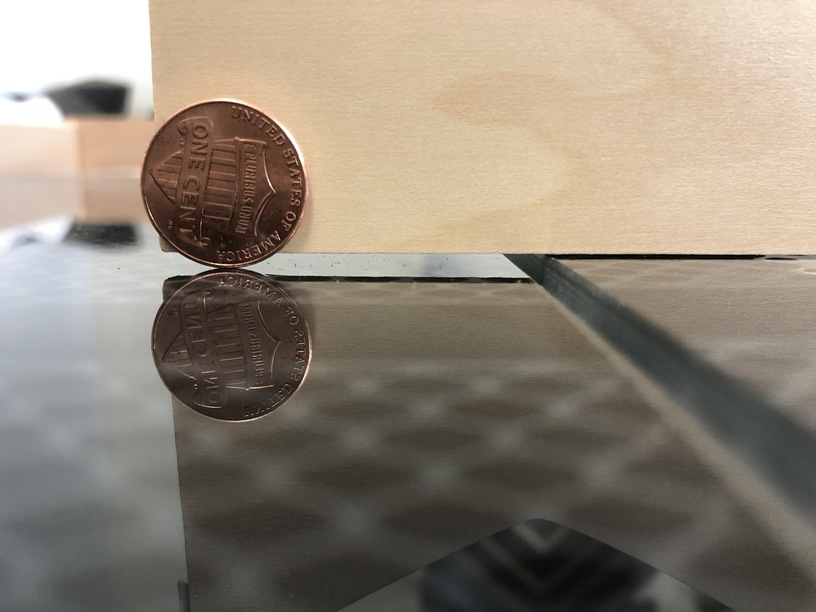
Update 2… after a couple people asked if my lid was laying flush to the machine I went back and checked and I actually seem to have a warp in the lid of just over 1/8 inch in the center of the lid on the left side…anyone out there think this could be one of my problems? Anyone else have this problem on their lid?
The lid issue is because your table isn’t flat. The GF is assembled and calibrated on a perfectly flat rigid surface - a granite inspection slab. This means that if your table isn’t just as flat the plastic in the frame will shift. I stuck a small shim under one corner and it fixed the lid issue. My alignment is just about perfect also.
We’d like to have you try a few troubleshooting steps for us:
Turn off your Glowforge.
Check for small pieces of debris or dust.
Check the lower door to make sure it closes all the way. It may require some force to open, but open it, wipe any dust off the edges, and close it all the way.
Remove the tray and clean any dust or debris from the surface underneath. Pay careful attention to remove all debris from the four dimples where the tray rests.
Check the lid to make sure it closes all the way. Small particles of material, such as dust or debris, can prevent it from closing completely.
Check the surface your Glowforge is on to make sure it’s flat. Ensure it is not twisted slightly and that there is no debris propping up one side of the machine.
Turn your Glowforge back on.
We included an extra piece of Proofgrade Draftboard with your materials shipment for troubleshooting. Place the Proofgrade Draftboard in the center of the bed and print the Gift of Good Measure using the default settings.
When the print finishes, leave the lid closed and wait until the fans stop and the picture updates. Without moving your artwork or your material, take a screenshot of the Workspace to show us the difference between the artwork placement and the actual print placement. Make sure to include the rulers in your screenshot and show as much of the bed as possible.
Mac: Press Shift-Command-4 and click and drag a box around your image. You’ll find the screenshot file saved on your desktop.
Windows: Click on the Start Menu and type “snipping tool”. Open the Snipping Tool > New then click and drag a box around your image. Click the Save icon and name and save your file.
Send us the screenshot along with the date and time of the print, and we’ll investigate.
Just FYI: The lid glass is higher in the center with respect to the sides on all machines. Nothing to worry about.
The front of the lid on the left and right should be relatively flat with the slides though. The lid might have a little play but reasonably flat is what you are shooting for. Shim under the runners to find the sweet spot.
I don’t believe I am mistaken. Without the shim there is a distinct difference in the levels between the sides and the lid. With the shim the lid sits flush. I am not the only user who has found this out. I can’t say if it is a concern or not, but shimming the corner of my Glowforge made the lid fit almost perfectly.
I don’t know if the lid alignment is related to the lid issue.
to fix my problem I would have to shim where the air intake is, left side, middle of the machine. raising the machine there could theoretically bring the machines left side in line with my lid…this is what your proposing?
the glowforge sits on 2 “horizontal” feet so your saying to add a third “leg” by shimming the left side middle