Desperately trying to export this file/Stencil in a format that allows for the Glowforge to cut an outline. I’ve followed countless tutorials, but despite my best efforts & many hours none of them export properly. I’m using illustrator, but willing to buy whatever software simplifies this process.
EDIT: For clarity in ‘help’ in case you meant How To Do It.
Using COREL. First I made your design a black and white bitmap.
Then Outline Trace – High Quaility (this is the inner image now without background).
Copied the trace and selected ungroup on the copy.
Grabbed just the sawtooth part and using knife, I removed the parts not teeth.
Straightened the remaining image to 90 degree and made a mirror copy.
Put the resulting images to either side of design and linked them with straight lines.
Combined the two ends and two lines for a single path outside cut.
Result as seen – engrave image – cut outline
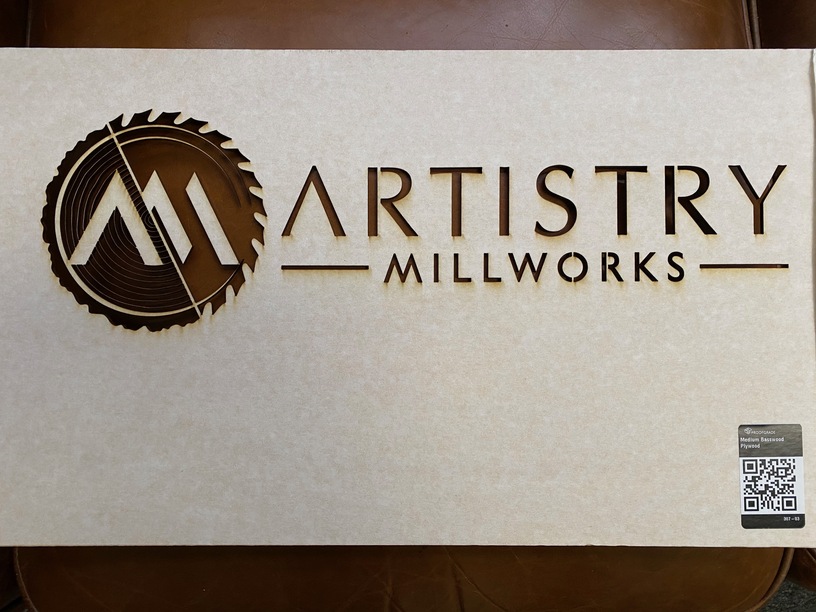
See attached image for the look I’m trying to create (Previous logo stencil). With the new file, I’m trying to recreate the outline effect to create another stencil. However I can’t get the SVG file to export properly to give the “CUT” function in glowforge. Any idea how to create an outline so it will render a cut/vector SVG?
the first question is: do you have a vector file? it looks like your attached file was cut with a vector file. the file you uploaded was a bitmap (JPG).
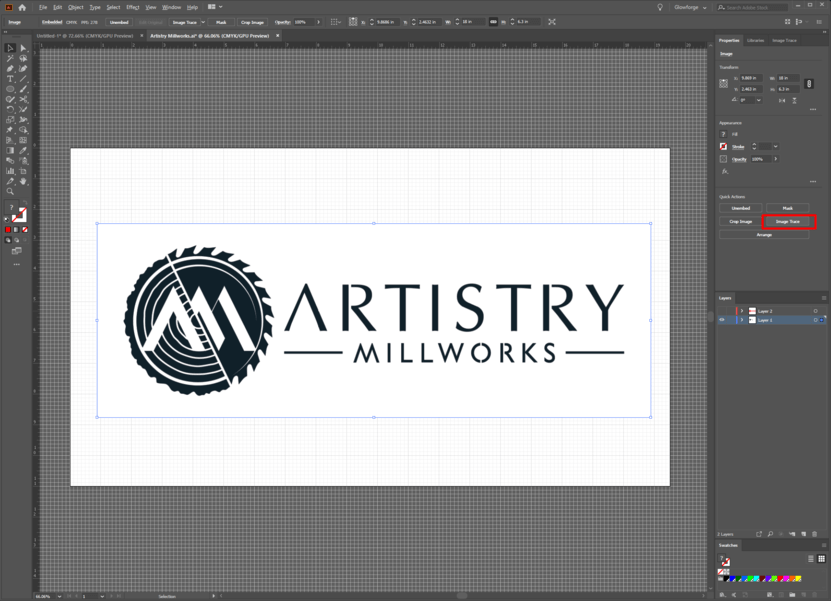
I do not have a vector file. I’m trying to figure out how to create a vector file from JPG, PNG, Etc… through Adobe Illustrator. All the tutorials I’m tried have not converted with this file.
In inkscape it’s called “trace bitmap”… import pic, choose that function, delete original bitmap, save file. Takes less than 10 seconds from start to finish.
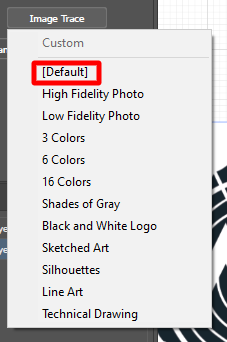
I’m certain an equivalent function exists in AI. You don’t need to buy different software.
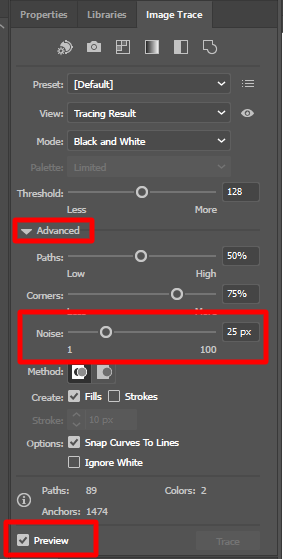
In the image Trace Window, hit the Advanced button to expand as shown below. Also make sure Preview is on. You can get away with tweaking the “Noise” down to 1 on this image.
Also in the Trace Window you’ll note there is an “Ignore White” checkbox that I didn’t highlight. Check it.
Go back to the Properties panel, and select “Expand” then play with colors, etc. to your hearts content. Swap the fill to outlines to get default cuts in the GFUI.
That was some great advice and guidance from the community - thanks, everyone! Since this has been resolved, I’m going to close this thread.
If you run into trouble again, or have any questions, feel free to post a new topic here on the forum or email us at support@glowforge.com and we’ll be happy to help.