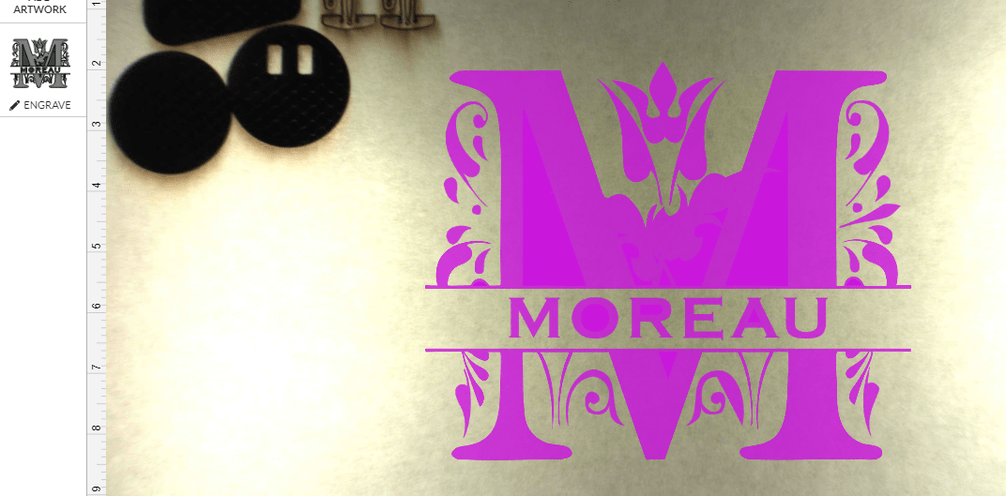
I am wanting to engrave the following SVG. but I don’t want the gaps to be a different shade such as the middle of the O, R, and E and parts of the image. I just want engraved and non engraved rather than tones. In CNC software I could manually select the paths and tell it what to do, but how do I make that happen in the GlowForge Software?
You don’t…you make it happen in the design software of your choice before you load it into the Glowforge User Interface. (All design work happens in your outside design software.)
No vector is fine. The engraves are based on the fill color for vectors…you will get a different operation set up for each colored fill.
So you can control it that way in the GFUI, or, and this might be easier, set it up as the black and white result that you want it to be in the design software of choice. (Illustrator, Inkscape, Corel, etc.)
Here is an example of a pure vector of what you are looking for.
The font is PN Stars and Swirls Monogram. Once you make the Initial and the name text, turn it into paths.
If your design is a pure vector, post it here. We can fix it. Looks like it has some extra fills or something, that is making the top of the M all the same color.
One thing that might not be evident…for things like the centers of "O"s and "A"s you need to turn those into a compound path, and actually subtract out the centers from the engraved areas, or the interface will interpret the centers as being filled.
There are a couple of getting started tutorials here that explain what’s going on:
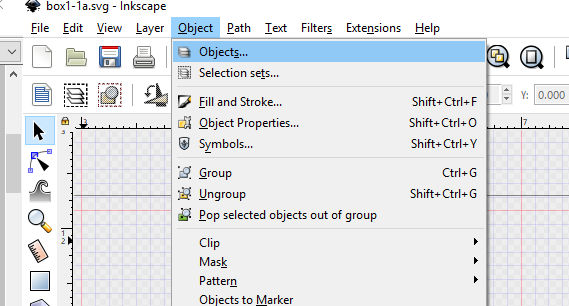
You can do most manipulation in the software but if you want the inner part of the "o"to not be engraved then you have to use subtraction in the design software. In Inkscape the command is in Paths and called Difference. Uniquely it makes a difference of what is subtracted and what is subtracted from. You should have the object floater activated here…
I was actually using my CNC program (VCarve Pro) to make the SVG. It was what I am used to and that is a file I have CNC’d before. Looks like I am going to have to finally learn inkscape.
By the way, your file is there. It just needs to add a few zeros to the h&w in the tag for sizing purposes. Discourse has some strange display stuff for SVGs.
Here is the result of doing the booleans. You were almost there. Select the counters of the letters and the little cutouts and subtract from the part as they have suggested.
I also put a cut line around it.
Edit: 5:50 PM CDT 5-31-2019 Fixed an open path on the flourish on the bottom right of the bottom of the vee. Also tweaked a few nodes that bugged me.
You’re good on the winding rules… Corel and Affinity Designer have the issue pop up every now and then. I see why they were knocked out (because it didn’t make a compound path out of them when the text was converted). Carry on
Thank you everyone for your help! It looks like you’ve got the answers you need, so I’m going to close this thread. If you need any more help, please post a new topic.