Celtic Key Pattern Embossed Velvet

(For some values of “made on a Glowforge.”)

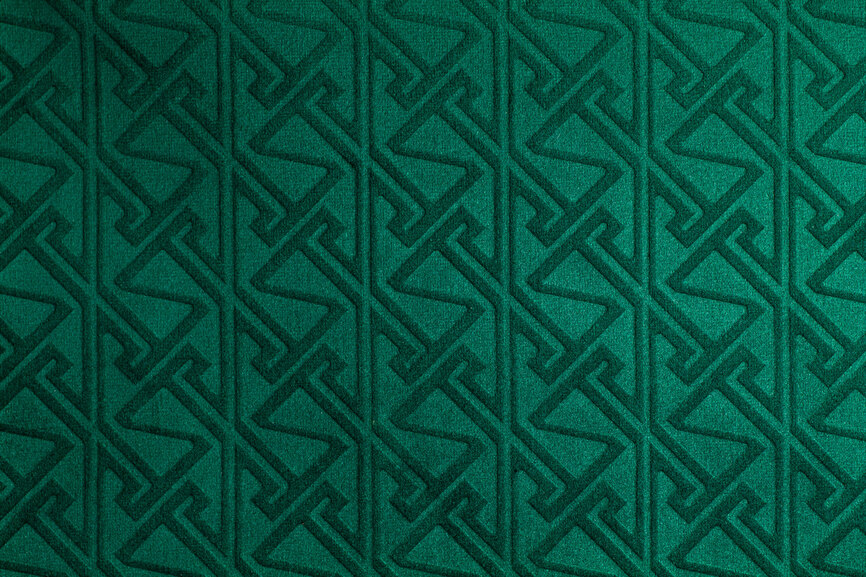
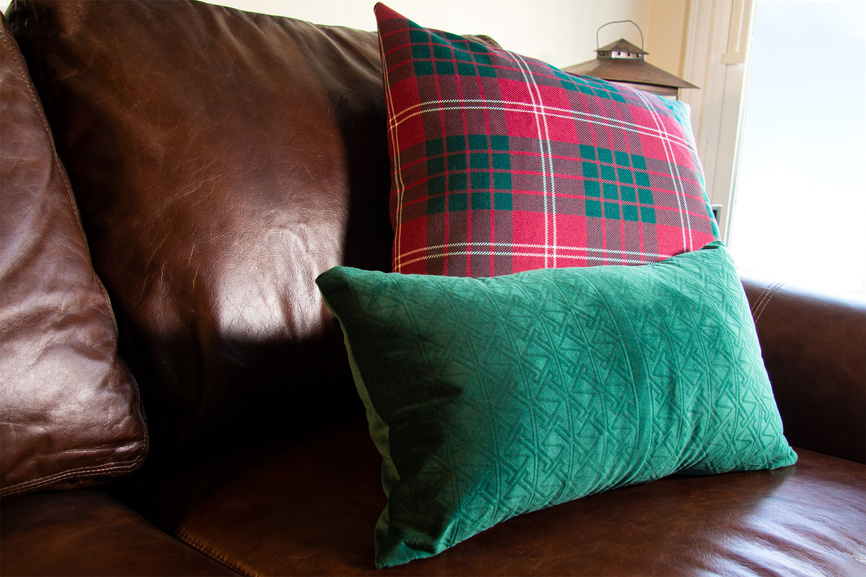
I wanted some pillows for my new couch that resonated personally. I hit on the idea of embossing one of my Celtic key pattern designs into some forest green velvet. I figured I could make a form/stamp/die with the Glowforge and, do the embossing with my old heat press.

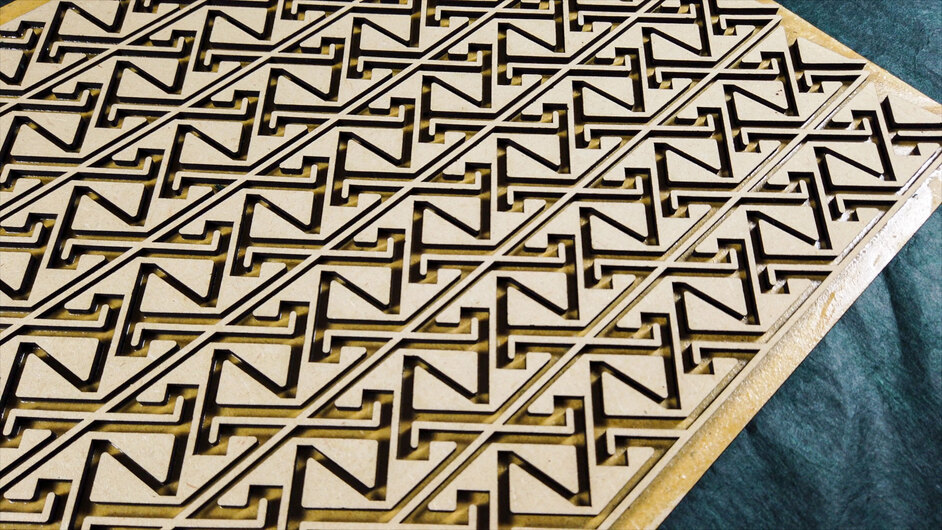
I figured MDF would be sufficiently heat-resistant to get me at least a few impressions. I cut the design from one sheet of 1/8” Draftboard and, glued it onto a backing sheet.

Clamping the heat press down until it just holds a single 1/8” sheet and adding an additional quarter turn gets the pressure set. The range that works well seems to be pretty narrow.

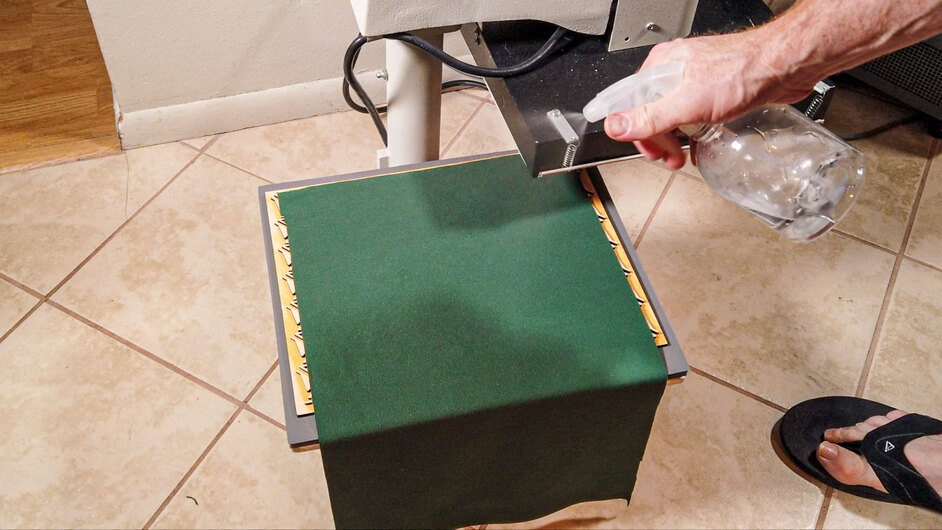
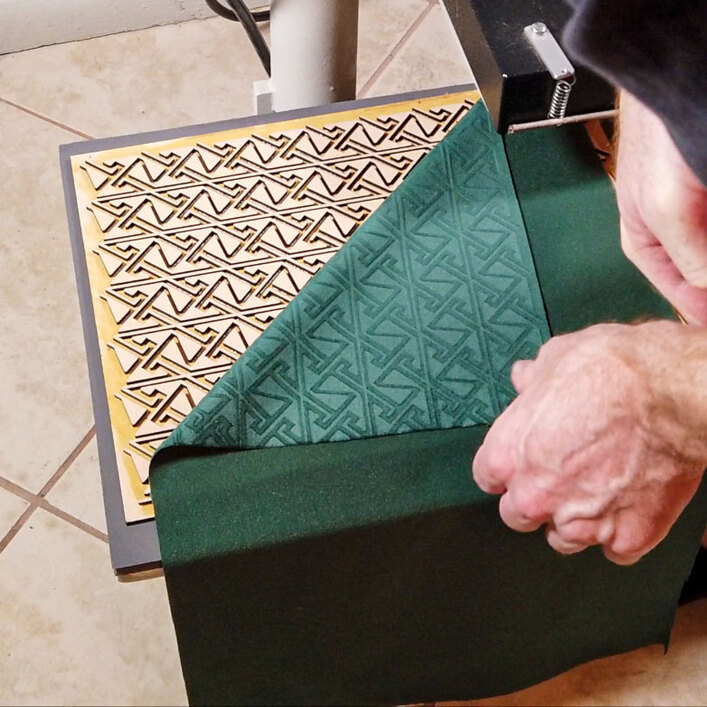
The form goes on the lower platen of the heat press, facing up. The velvet goes on top of the form, facing down.

Mist the back with water.

Press at 400º F for 15 seconds.

The velvet came out great. The forms held up really well.

I made a short video of making the forms and embossing the velvet:

… and, a separate video (which is even farther afield of MOAG) showing off my fancy vintage sewing machine and, making the actual pillow:

Blog post with essentially the same content (and a few more photos): https://evermorestud.io/celtic-key-pattern-embossed-velvet/

90 Likes

That is so cool!! Very unique - you could do so much with that!! So happy you showed us this!

3 Likes

I already did something else with some of the leftovers. I am just behind on documenting things …

5 Likes

Beautiful! (I actually bought some velvet once a long time ago to do that technique, and never got around to using it.) Now I wish I had. :grinning_face_with_smiling_eyes:

5 Likes

Wow! I didn’t know I could do that at home!!! I’m going to have so much unnecessary velvet around my house now…luckily I just cleaned out my fabric hoard… so I have a little space…

5 Likes

That’s fabulous! I technically knew how that worked, but seeing it step by step makes it way clearer :smiley:

5 Likes

What a nice way to personalize your living area. This is a whole new rabbit hole for me to dive down into.

4 Likes

Looks awesome, I never knew how that was done.

4 Likes

Oh wow, how cool is that? Letterpress for velvet! I’ve done that with rubber stamps and an iron but it never occurred to me to try it this way. Kudos!

5 Likes

I feel like such a slacker; I don’t even sew as well as you do. I love the inspiration though, and your explanations.

Fabric: silk, cotton, or poly?

2 Likes

I’m in love with this! Something to aspire to for me as I can barely sew! Maybe I could start with a wallhanging!

3 Likes

While I usually prefer natural fibers, this is polyester upholstery velvet. It’s what I could find that was the right color and the right weight.

Most of the silk velvet I see is like 20% silk and 80% rayon (~wood fiber).

I am excited by the positive response from everyone! I hope to see some other embossed velvet projects in the future!

9 Likes

This is gorgeous!

2 Likes

Well I’ll be dipped! This is so cool. Thanks for the write up and video.

3 Likes

Thanks for all the info, very interesting and great results!

3 Likes

Wow, a project and tutorial all in one post! The pillow turned out great and I look forward to seeing your future creations!

3 Likes

That is beautiful!

2 Likes

OOOOOOHHHH, this gives me ideas! Great job

2 Likes

That is lovely. Thank you so much for the inspiration!

2 Likes

Wonderful!

I used to hand carve blocks for embossing various designs on velvet for scarves (used an iron w/out steam vents, which took a while to find!)–but your idea of using a heat press with board cut on the GF is brilliant!

You can also emboss thin leathers this way, too… (e.g. lambskin).

4 Likes