After a request from a friend to do a job for a new Eagle scout, I finally got around to testing out some CerMark.
Here’s where I got my starting info from:
A couple of notes:
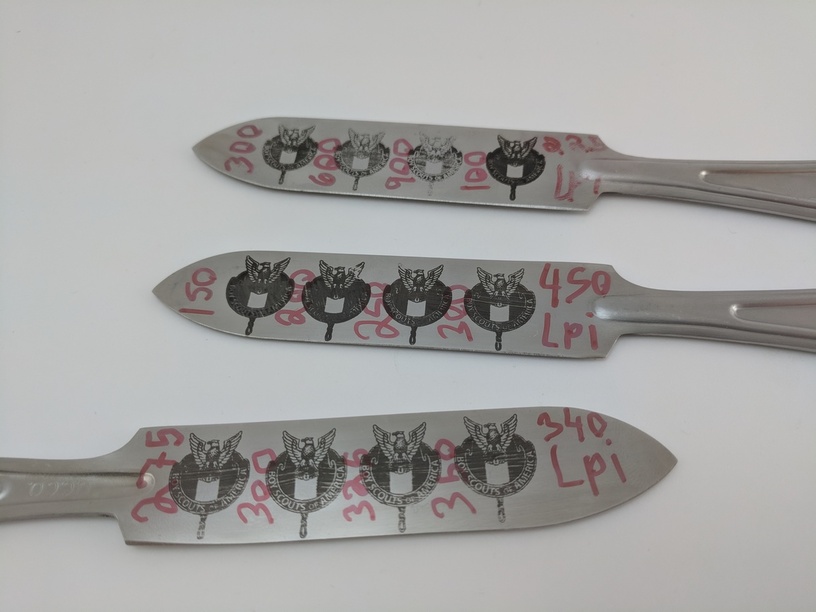
These tests were done with a Pro unit on full power, which is different than full power on a basic.
You may notice streaks. That, I believe, has more to do with my application of the product than anything else. There were streaks in my sponge brush strokes.
This is CerMark 6060, which is made for steel, stainless steel, brass, bronze and aluminum. It’s supposed to be an upgraded version of the 6000 stuff, which lists “uncoated metals” and nothing more specific. If you have version 6000, your results may vary, but this could be a starting point. Edit: I saw more specific information for 6000 that lists: Aircraft Grade Aluminum, Brass, Bronze, Chrome, Pewter, Stainless Steel, Titanium, Tool Steel. Also, the list for 6060 includes “polished aluminum and chrome products.”
For this knife, it worked well to stick a flat magnet to the bottom of the blade and then slap the other side of the magnet to the honeycomb.
The video says it’s always done at 100%, which is why I used full power. The sideways numbers are the different speeds and I’ve also listed the LPIs. Not sure how good you can tell in the photo, but 340 LPI, 325 speed, and full power is what I’m eyeballing. I chose that on account of the legibility of “of,” as that seemed to be the biggest problem spot.
I’ll certainly take requests for more test as I have a ton of this “U.S.” cutlery.
I tried a green scouring pad and there was no effect on the markings. That made me a little braver and I scratched it a little with the point of another knife and didn’t remove the black at all. Next test I will use my airbrush to apply it and make sure the streaks are from my method of applying the paste.
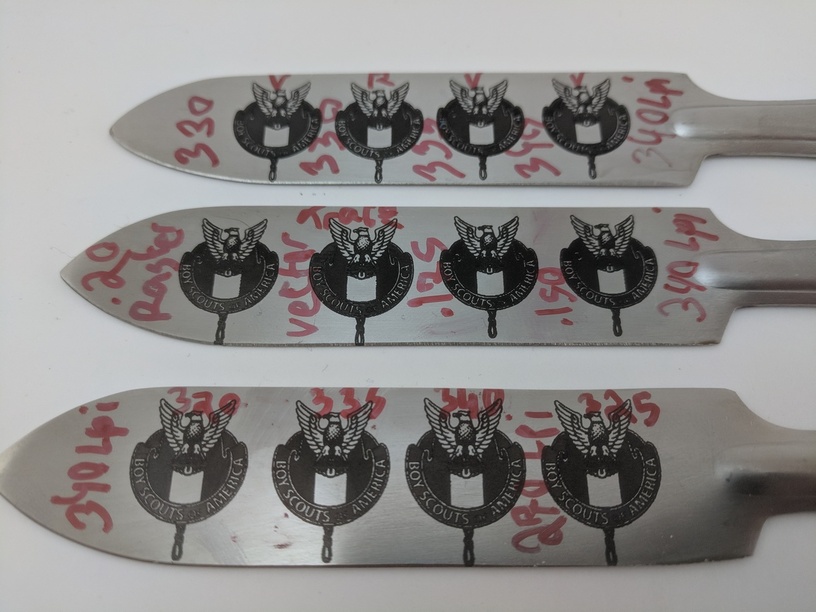
Got some more testing done. This stuff, even thinned as instructed, is too heavy to really be practical in an airbrush. I did, however, make it happen after thinning it further and cranking up the air pressure. That is how the top and bottom knives were coated. The middle one, I just put a few drops at various spots on it and tilted it around 'till the surface was coated and then tried to shake off as much excess as I could. I may see if I can work out the airbrush thing later, but the second method worked just fine. Anyway, it does show me that the streaks in my first batch were due to the brush.
Played around with seeing if using a vector for the engrave would change things. Not too much. Also tried focusing at different spots without much change. I’d like to get that “of” just a bit more visible, so there will likely be another round of tests.
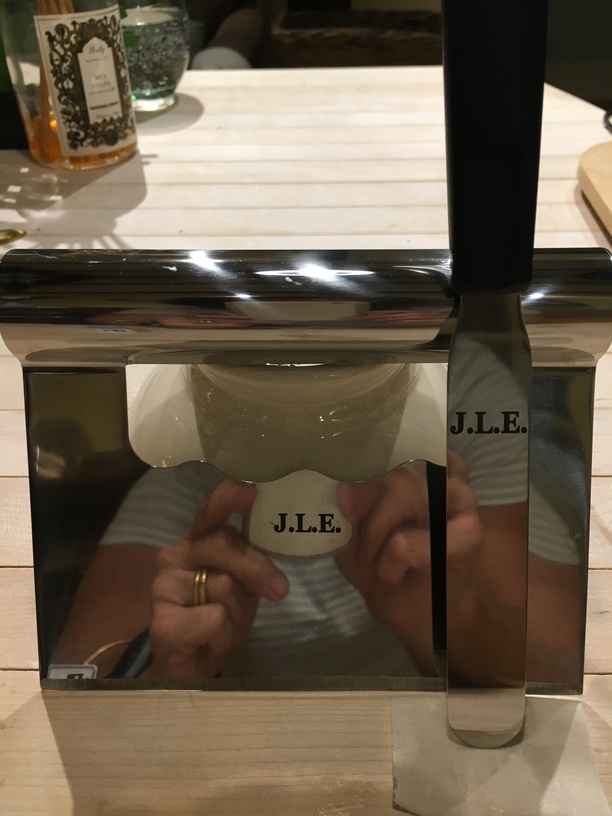
I used used this post - since I have a basic I used full power and 340 LPI but dropped the speed to 300 to accommodate my less strong machine. This is on some stainless steel products from Wilton - a cake decorating company. My daughter is taking some courses at the local college and I didn’t want her utensils to get mixed with others. Worked great.