Continuing the discussion from How We Troubleshoot:
Hello,
I just received my Glowforge and have only completed a few prints. I purchased the Chess Set and am unable to resize the image to its default size. I accidently changed the size when I moved the image. When I printed it out the squares are larger than the chess board. How Can I get the image back to the default image size so that everything fits?
Open the design in the app. Click the icon with 3 dots and select reset/reload design.
1 Like
Ha Well I’m feeling pretty dumb! Thanks a lot that worked like a charm.
No worries – it’s all new until you do it the first time. 
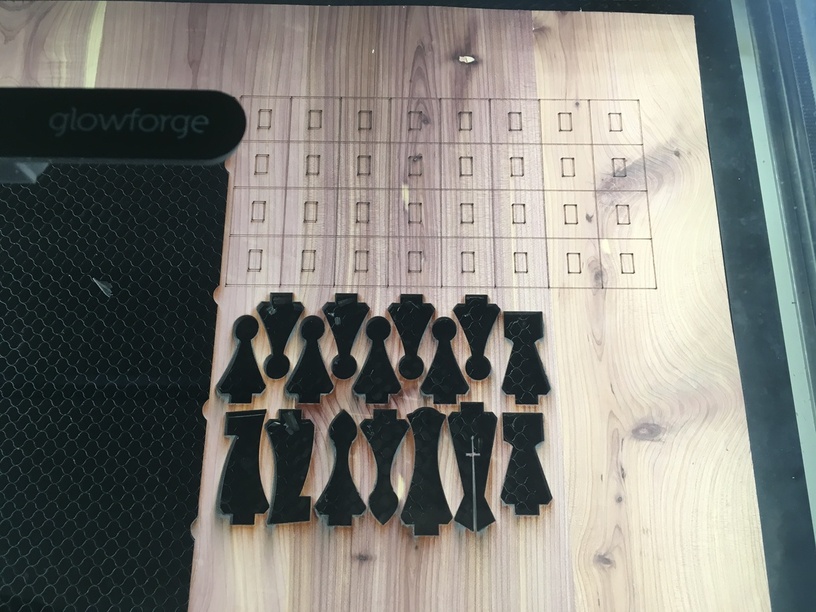
Ok new problem, now the squares are not being cut out. It seems like they are being etched but the board and chess pieces are being cut out correctly.
That isn’t Proofgrade so you’ll have to do some fiddling with the setting in manual mode. Actually, to me it looks like the cuts have been changed to scores, so you might check to make sure that didn’t happen. And that you are using the correct thickness of material that the design calls for. I.e., if you are using 1/8” material and the design calls for 1/4” (thick) Proofgrade, it will not cut all the way through.
2 Likes
Hi, Thanks for the input. Yes I am using non-proof grade material because I had other issues and didn’t want to burn through my proof grade material. The design calls for 1/4 inch plywood which is what I am using. The Board and the Chess pieces cut fine but the squares didn’t. I reset the design and retried but still got the same result (it would cut out everything except the squares). How do I check to see if the cuts have been changed to scores? Also would that not be reset when the design was reset? Thanks for you help.
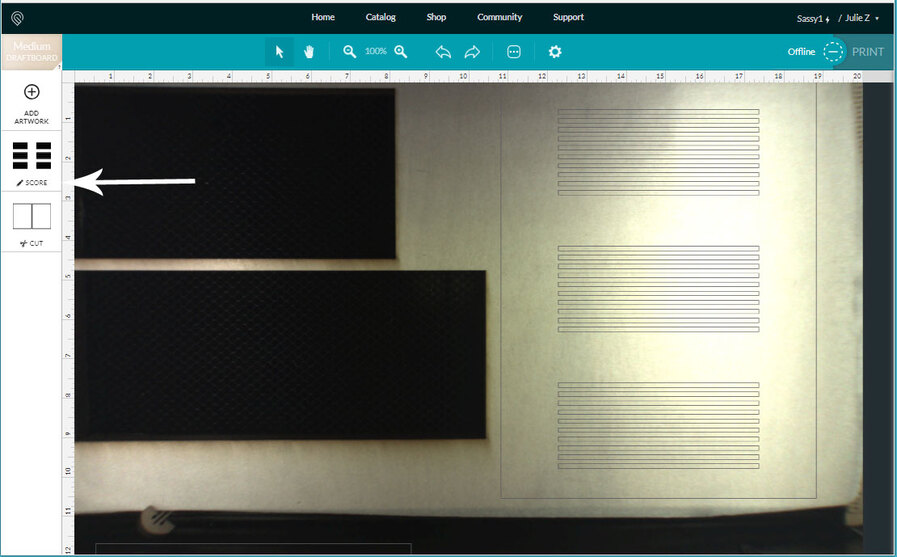
If an operation has been set to Score, it will say Score in the thumbnail on the left column.
1/4" plywood will not generally cut as well as Proofgrade plywood - i see all kinds of knots in that piece - you’re going to have to slow down the speed a little (probably) to cut all the way through it.
You’re going to have better luck trying to cut that out of the Proofgrade if you are using the default settings - and you have to make sure that you have the correct settings for speed and power when you are cutting whatever material it is that you are working on.
For instance, the settings for 1/8" thick material are different from the settings for 1/4" material. Did you change the settings to reflect the thick material, or are you using the Proofgrade settings for 1/8" thick wood? It’s going to make a big difference.
I would like to recommend a few tutorials that will explain how to use the machine, and get you started a lot more quickly with the machine than trying to figure it out by luck.
First, run through the examples that the Glowforge team has put together here:
Then the following short writeups will help you to understand what the machine is doing and how to work with it:
Then if you want to get started doing your own stuff quickly, the Design Matrix has a lot of tutorials and video links showing the best of the tips and tricks:
For using the Glowforge:
For Using Photoshop, GIMP and Paintshop:
For using Illustrator, Inkscape, CorelDRAW and Affinity Designer:
For using Fusion 360, OnShape, Openscad, Rhino, etc.
They’re not very long, and can save you months of frustration up front.
Thanks so much. That helped a lot.
Thanks @dwardio, for the troubleshooting solution for resetting the catalog design.
What a beautiful set of links, @Jules! Thank you for the assist. While we can’t offer support for prints that don’t come out as expected on materials from other vendors, you can post in Beyond the Manual so other folks here can help. Should this happen with a print on Proofgrade materials, please open a new ticket in Problems and Support and we’ll help you right away!
I’m going to close this thread. Thanks for letting us know about this.