Okay, I’m getting beyond frustrated here.
I’ve attempted to calibrate my GF Plus multiple times after tightening my right side belt.
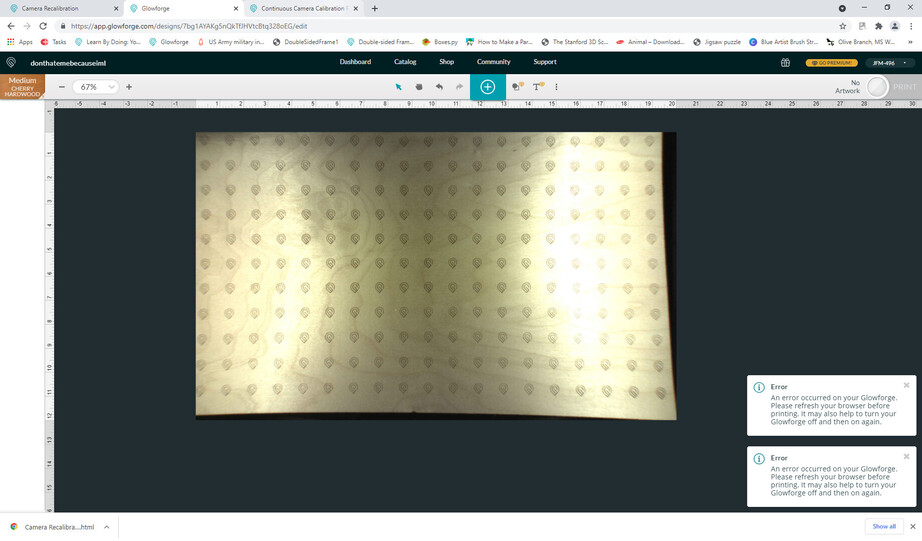
While engraving mulitple items during the same print, it will engrave clearly ONLY on the items dead center after setting focus, cleaning all lens/fans. View from cam is only clear dead center and not on left or right sides.
It repeatedly states that the calibration was not completed and that nothing has changed due to wifi disconnect. I’ve changed my networks and my machine is near my modem.
Now what?
Camera is attached and secured…No direct sunlight/light on or around machine… Help?!
EDIT ADD-ON** Also, repeatedly receiving notifications of errors with my glowforge. I’ve reset my browser and also turned my machine off and on. Help?!
Oh no, I’m so sorry to hear you’re experiencing trouble with your Glowforge.
I extracted the logs from your Glowforge to investigate, and it looks like the orange button is appearing because the Glowforge is having trouble communicating with the printer head. There are two key connections I’d like you to check for me.
Could you please do the following?
Turn off your Glowforge.
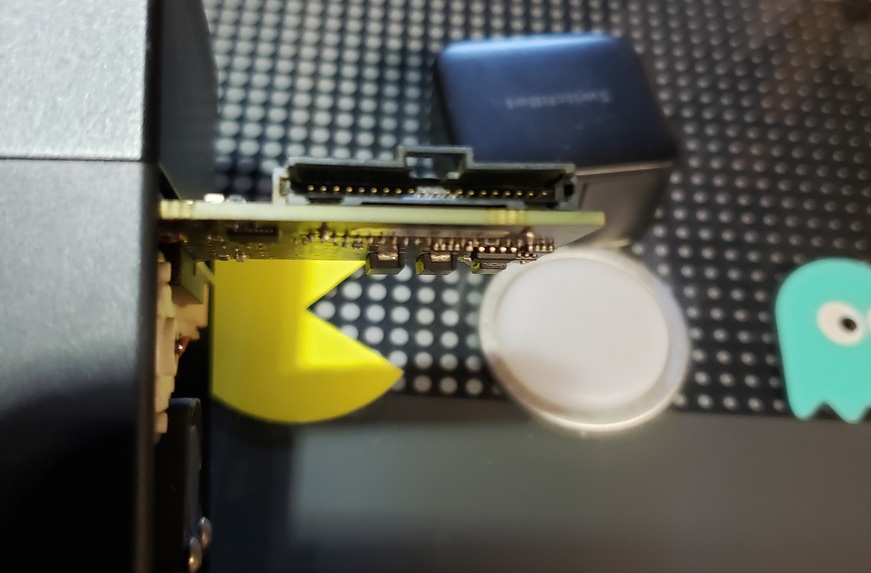
Holding only the finished black surfaces, grasp the printer head as shown. Pull gently up and back to disengage the magnets and remove the head.
There is a small tab in the center of the wire ribbon. Push down fully on the tab to release it, and gently pull the wire ribbon plug from the printer head.
Pick up the printer head and wire ribbon. Make sure the tab on the wire ribbon is facing up. Slide the ribbon back into the head until it clicks.
As shown, lower the printer head over the metal plate so that it rests next to the two round posts. Then push it gently away from you – you’ll feel a “click” as magnets pull the printer head until it sits snugly atop the metal plate.
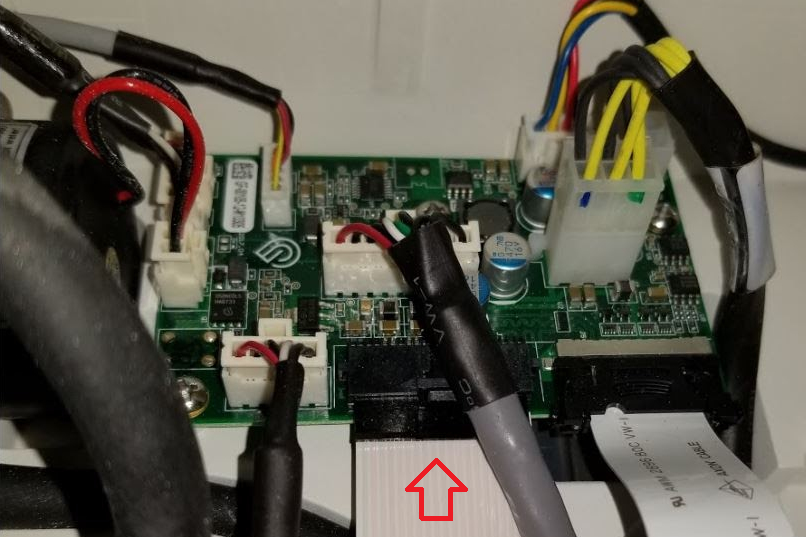
Take a photo of the circuit board. If the cable I’ve indicated above with the red arrow appears to be loose, please reconnect it and try printing again. This cable should ‘click’ back into place.
Hello @stephani.chow
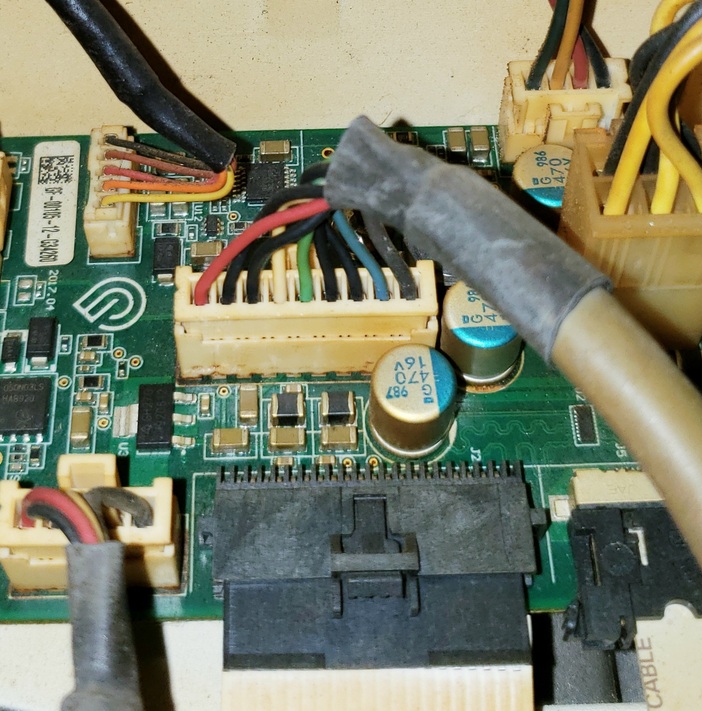
Thank you for providing the photos as requested. The connections at the Internal control board appear to be fully seated, and the pins within the Printer Head connection appear to be undamaged.
I’ve recently checked the logs from your Printer and noticed you have been able to successfully run a few prints. Can you please advise if you’re still running into any other troubles? Thank you.