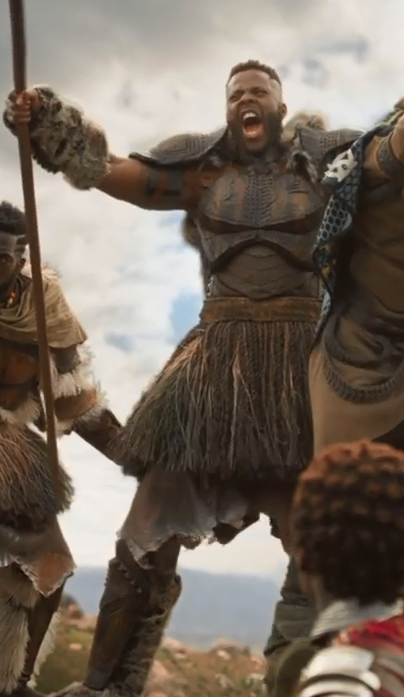
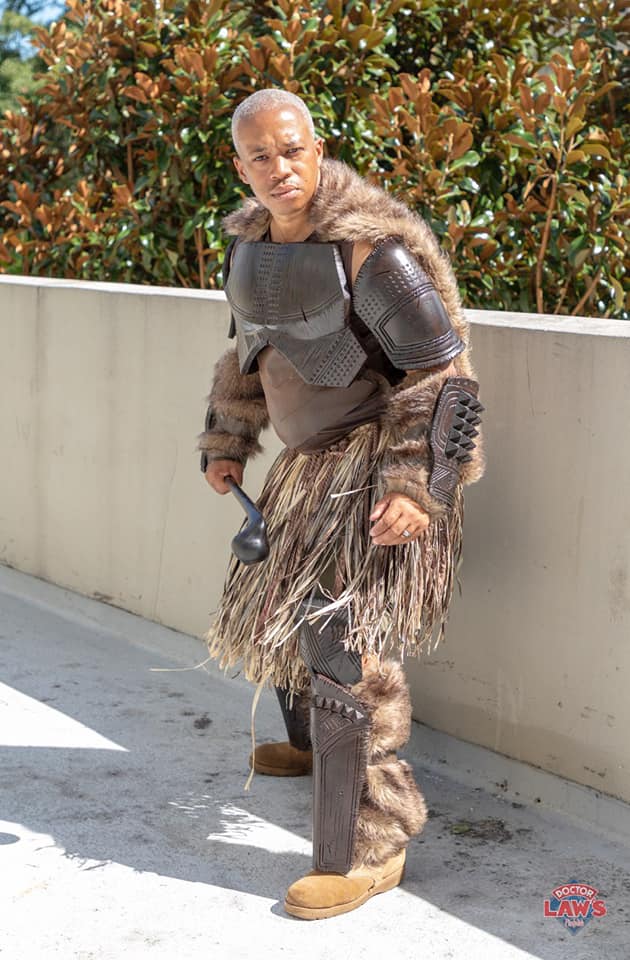
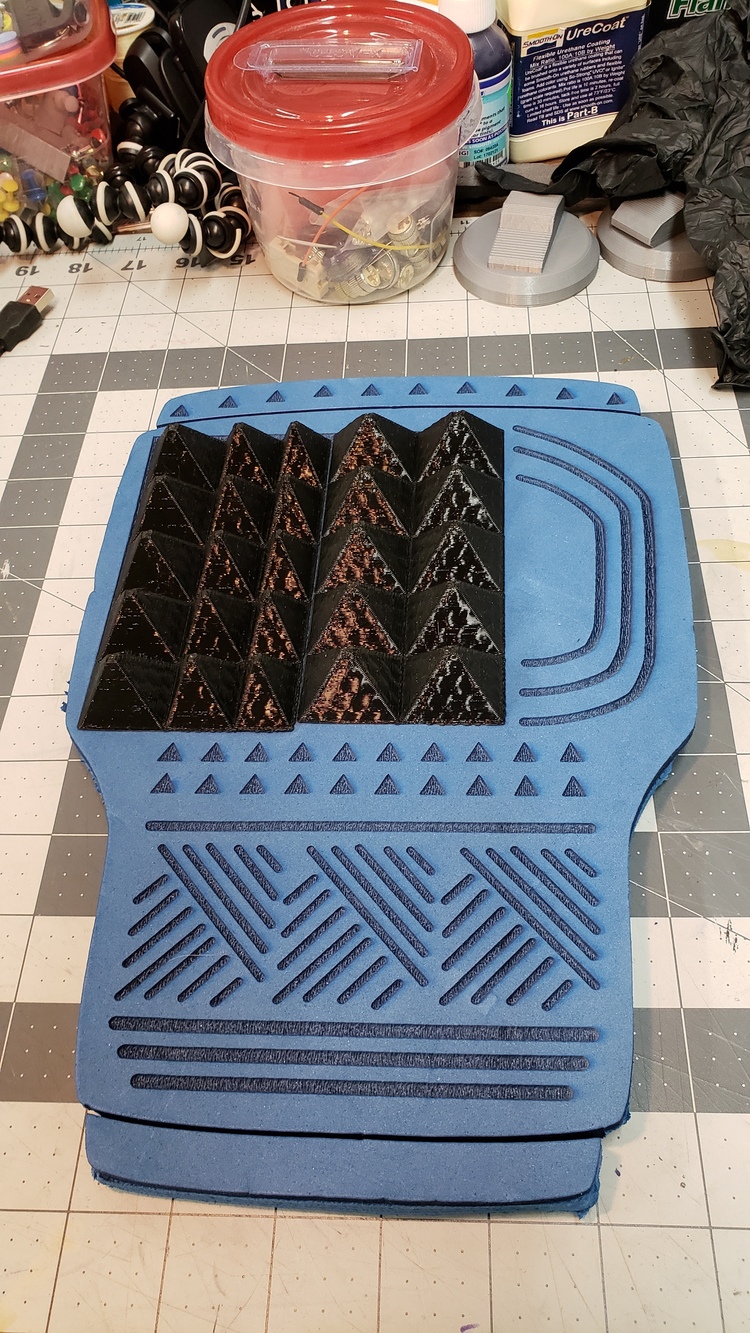
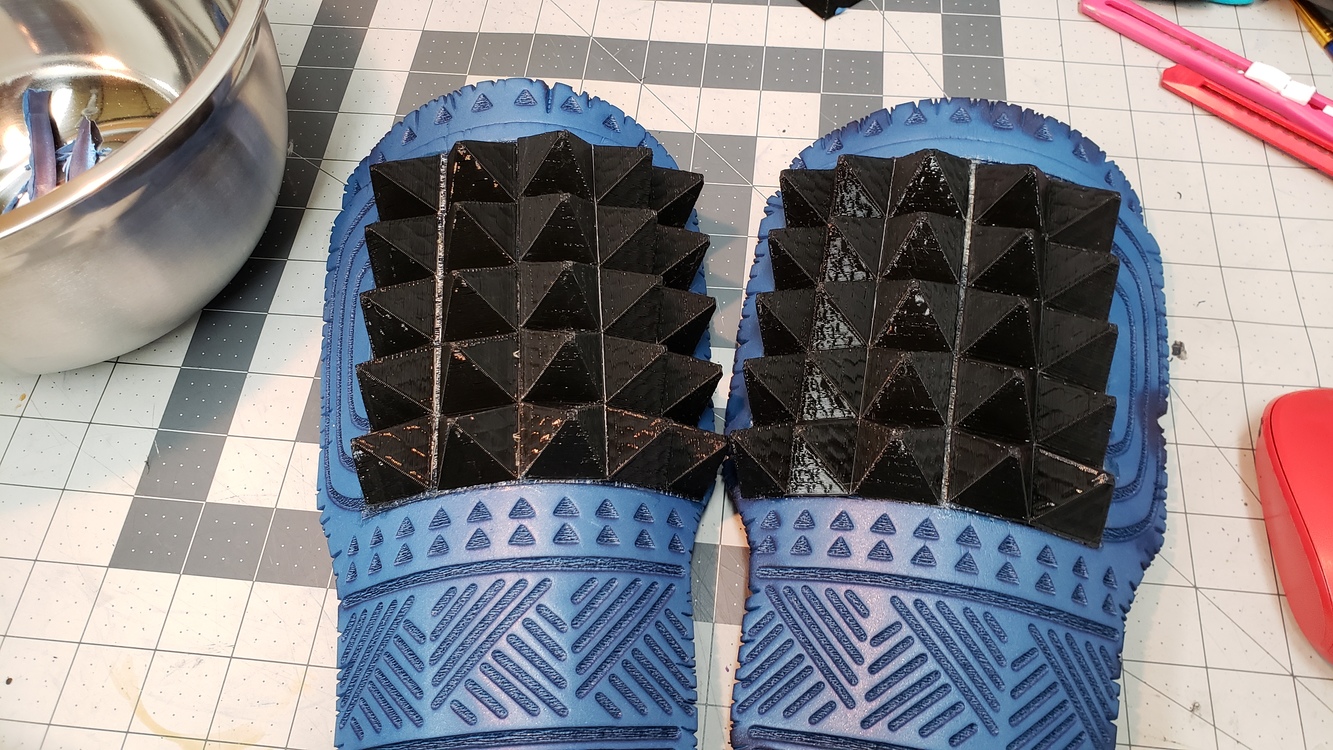
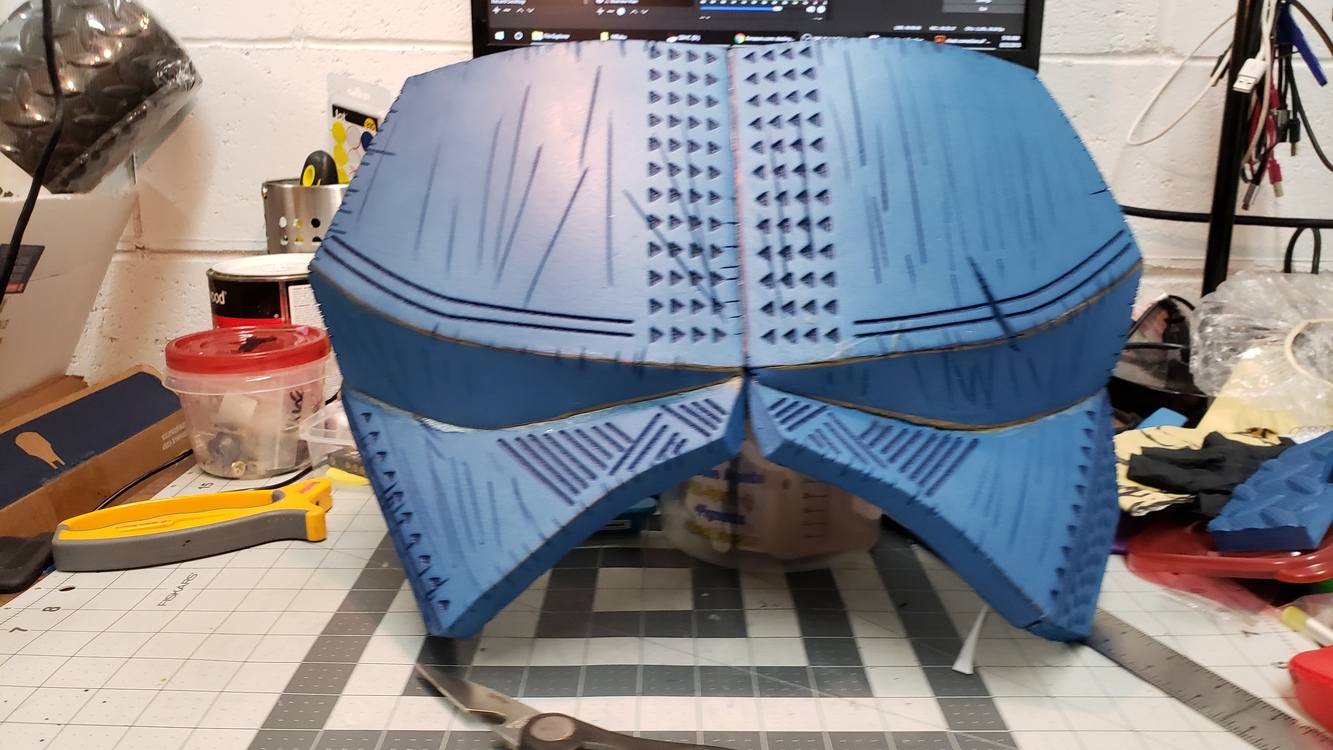
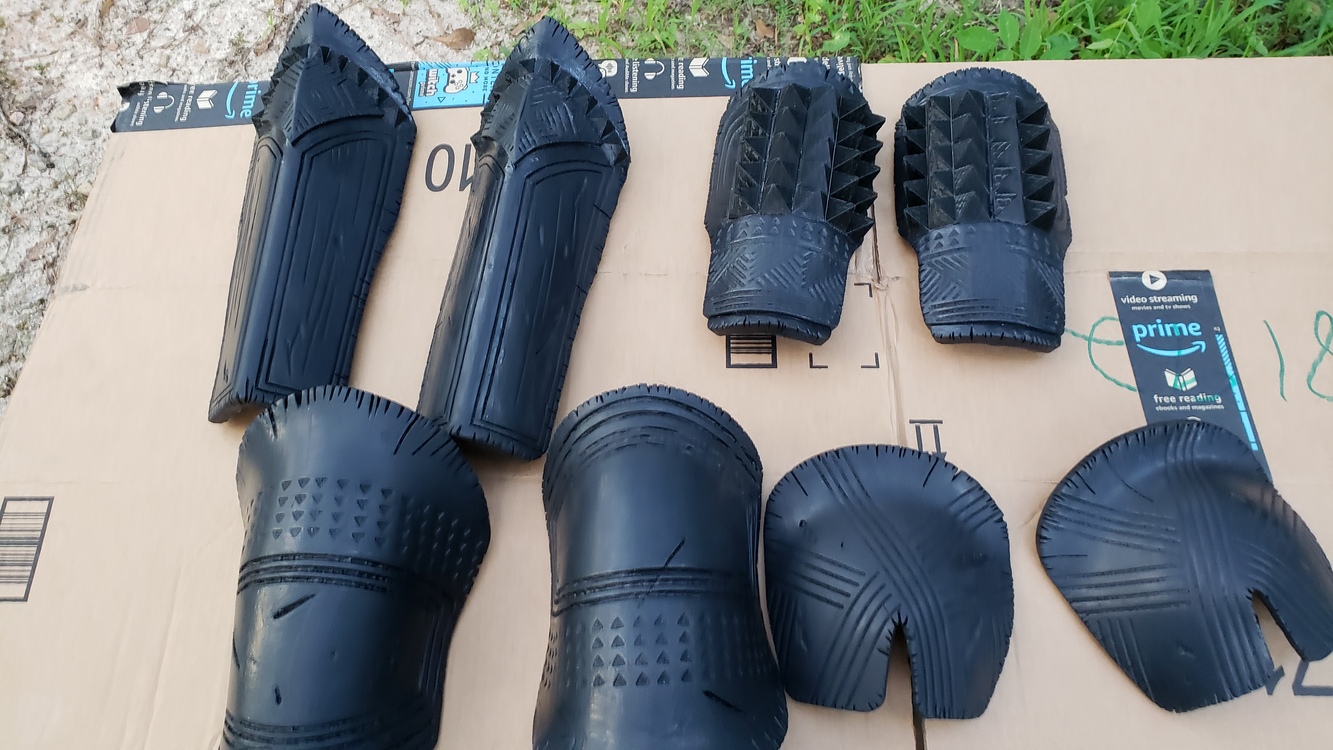
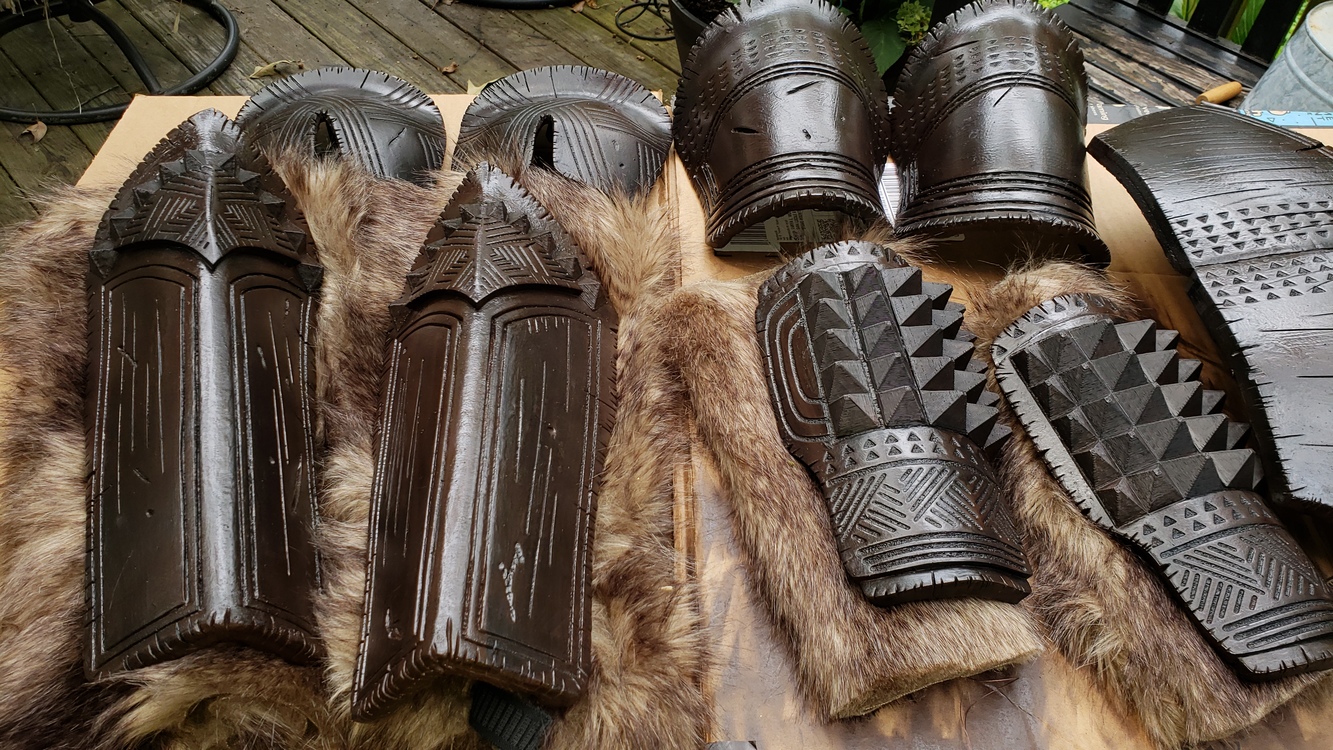
Hi, folks! I bought my GF mostly as a tool to aid in my cosplay commission workflow (I despise trying to cut circles in EVA just that much). I craft most of my armor using EVA or thermoplastics and was amazed at some of the small engraving work I saw folks at my local makerspace accomplish with the GF. I had a few client’s at this year’s DragonCon including a very happy client who rocked M’Baku from BP! I used a combination of craft foam, Amazon EVA tiles and some 3d printed pieces (the pylons). Word to the wise, the Harbor Freight tiles now sometimes say they are neoprene. Since, I don’t trust their quality control (I’m seeing a lot of thickness variance and pockmarks, too) I’m sticking with Amazon, foamies and TNT Cosplay for foam.
I patterned both the cuts and engraving in Illustrator then hot-knifed the edge detail and shaped all pieces with a heat gun. The rest is a combination of fabric, raffia table cloths and a lot of vinyl.
EVA is indeed safe. The trick is making sure that what your are buying is ONLY EVA. Some folks have copper strand tested neoprene and said it was fine, but I’d rather err on the side of caution.
Thanks, ya’ll! This project was a rough one and I had plenty of do-overs, but I was very pleased with the end result. I’m currently working on my long shelved Gears of War rig and will post about it later. I would love to see what everyone else is working on!
Excellent work. I want to do cosplay stuff on the GF too - fills me with confidence that the hardware is up to it - not sure if my artistic skills are though
The. Costume. Is. Fantastic!! I just love everything about it! Thank you for sharing the process/tips. I can’t wait to see what else you create. PLEASE share your Gears of War rig when finished.
Hi, Groove! Most of the pieces here were just shaped and then cooled. The key is to get it hot enough, it should feel like a soft cookie, and then use something as a buck to create the desired curve. I have a bunch of random items, but my two favorites are a pair of metal mixing bowls. One is a bit wider than the other, so I can press a piece of foam between the two for a domed shape or use one side or an edge to create a shallow curve. For the pauldrons/shoulders, I created a shallow dome first, then added a curve and the lip, by heating and pressing into the edges of the bowl. I wear a pair of cheap heat resistant mechanic’s gloves, which really helps with how long I can manually hold or sculpt a curve with my fingers and where I direct the heat. Sometimes, if it’s a very complex of steep curve I may rubber band or otherwise affix the foam to my shaping aid until it cools.
For areas like the chest and shins, there’s a combination of angled cuts before gluing pieces together and heat shaping. To get the steep peaks on the front of the shins, I cut a shallow valley, perhaps halfway through the thickness, on the reverse side of the foam, which allows a greater curve when heated. A written explanation probably isn’t that great, but I highly recommend you check out both Evil Ted and Punished Props on YouTube.