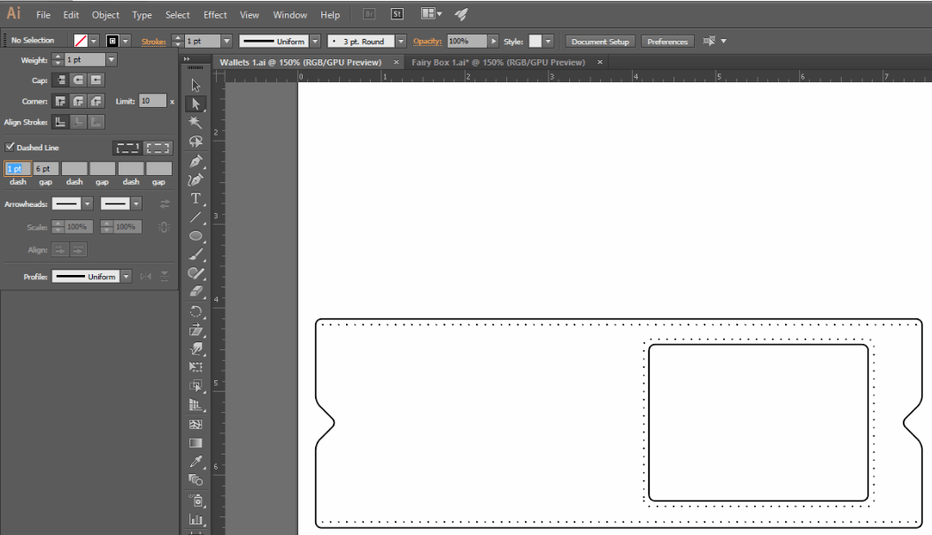
I’m semi-new to Illustrator and had two questions. I’m working on some designs for some wallets and how do I increase the dpi (ppi?) on an artboard without increasing the dimensions? So my artboard is still 12x20 (GF bed size) but the 1pt strokes are thinner. If that makes sense. It’s probably super simple, but I’m having a brain fart.
Also, for making stitching holes, I have been doing dashed lines along a path (settings in photo). Will the GF work for this? Or is there a better way?
Hi, you need to go to the Effect Menu and choose Document Raster Effects Settings… there you can change the dpi/ ppi between Screen/ Medium/ High and Other. I’d take Other, 'cause you can choose freely your dpi e.g. 600.
For the stitiching holes I’m interested too, because I’d done the same.
Or set it in the “New document” dialogue under the “Advanced” tab. And don’t forget that you are not limited to 1pt as the smallest line size. For example, you can drop it down to .5pt if you want (you have to type it in), or change your stroke units (from pts to mm, inches, pixels, etc) in Preferences>Units.
Also, Remember that if you are using the file for vector cutting/engraving, the stroke size does not matter. Raster engraving is where you will be concerned about stroke size/width.
re: the stitching holes : from a different thread:
Thank you @ylene and @jbv!! That helps a ton!!! Fantastic!
I know the stroke size doesn’t matter which is why I wanted to get the stroke to look smaller so I could get a better picture of what the cut will look like! This helps!!
I’m glad you asked @JeremyNielsen. I had the same question. I am also wondering do the holes for the lacing need to be cut a certain size. I assume it will vary based on the lacing you use. Is there a standard sizing? The Glowforge will be my first attempt at leather working.
As for the question about the size of holes, it does depend on what’s going through those holes. In any case, the holes should be just big enough to allow through both the stitching material (thread or lacing) and whatever’s pushing it through (a needle with an eye, a Speedy Stitcher, etc.).
This, BTW, is a Speedy Stitcher. The thread goes inside it, so you don’t have to push doubled-up thread through your piece, and can interlock additional thread on the bottom side of the piece.
If you want to use thread, the holes should be just big enough for a needle and the doubled up thread to go through them. If you use leather lacing, you need to base hole size on both the size of the lacing and the insertion method.
Whatever the case, you should do what you can to make the holes dots instead of slits (which are more likely to rip), and keep the holes as far apart as you aesthetically and structurally can, unless your object is getting very little wear. The smaller the stitches, the more holes you’re putting in your leather, and the weaker and more likely the leather is to rip along the line of stitches (which is a nonrepairable failure). That said, I sew leather decorative elements onto leather all the time just using my Singer Heavy Duty sewing machine, with stitches that are quite tight because I know the objects won’t be getting hard wear. Things like belts and wallets need to have well spaced stitching, though.
Thanks @morganstanfield!!! Would not have thought about slits vs. holes. Good to keep in mind. As well as spacing. I would have thought the opposite, so this is good to know!! I’ll have to invest in a speedy sticher!
Just for perspective, I’d say that in general, a 3/16" stitch length is pretty ideal for most non-garment, non-saddlery uses (belts, wallets, purses), unless you’re using lacing or very heavy duty thread, or using a hard leather. In those cases, you just have to experiment. I’ve played around with very fine stitches on kangaroo and split pigskin (1/16") and been able to tear the leather in my hand after a half-dozen abusive handlings. (And when testing out a design, I always abuse the heck out of it to simulate the vagaries of normal usage.)
This, and the entire rest of your post, made perfect sense. Anytime you ‘compromise’ any type of material, it weakens it. Over many years, I’ve done lots of sewing with cloth, but some principles are the same or similar. Thanks very much for your input. I eventually would like to work with some leather, too…but I think I need to concentrate on one direction at at time for now.
Merci viel mal - Thank you @morganstanfield!!! Since we will get an GF: I somehow thought it would help to make notches (hope that is the right word for the German “Nute” - had to look it up in the dictionary - or is it “small channel”?) between the holes. This way the thread wouldn’t wear off that fast/easy. Or is this wrong thinking?
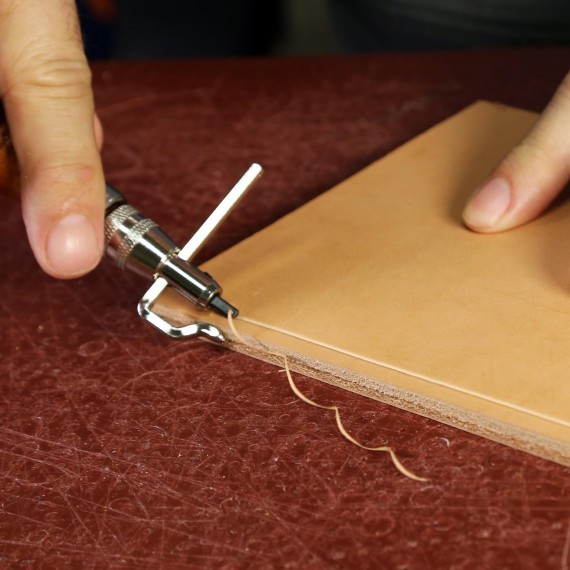
The tool doing the cutting is called a stitching groover. I am hoping the glowforge can cut a channel for the stitches and the stitch holes without months of experimentation and countless cows sacrificed for the cause.
Actually this part is quite fun, and I rather enjoy it. Just set your width and go! If youve never done it before just try it once on a small scrap to get the feel of it and you should be good. The feel of the leather being cut and watching that little string of leather pop up always makes me happy haha. The groover you have shown in this photo (I own one btw) is a good tool, as it generally comes with a few different pieces, The ONLY gripe I have about it is that they did not include round spacer bar as well. Using the square bar leaves you unable to rotate it down to cover the depth of the leather which will sometimes cause you to make a mistake and slip a bit. This is why the guy in the video has a slightly different groover for making the channels which helps prevent those errors.
I personally cannot wait for the glowforge so that I can have it cut my sewing holes for me. I really hate the amount of time it takes and the amount of noise it makes to hammer through leather. Especially if you have a few pieces stacked on top of each other.
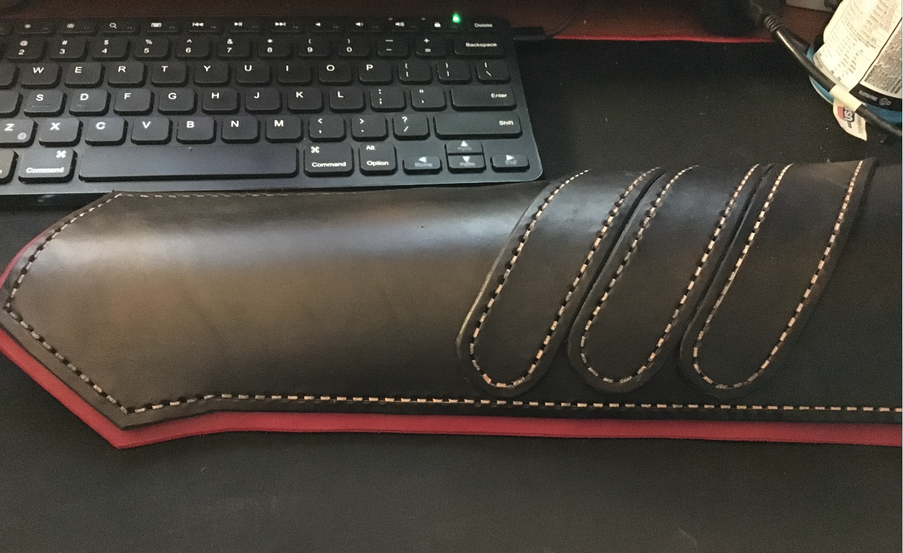
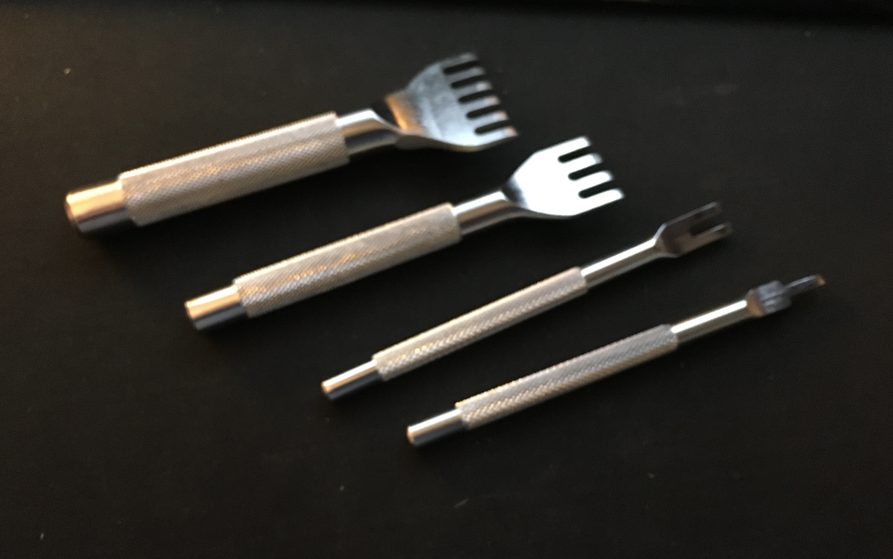
This is a piece im working on that hasnt been sewn yet, but all the holes have been punched. It takes long time. I dont use an Awl however, I use these:
They take a lot less time, and I can use a hammer to get it through multiple layers of leather. If youre planning on sewing leather together I highly recommend these. You can pick up a set from tandy, or get them online really cheap ($8 maybe?). Some of the lines arent perfectly rounded on my projects, and some of the stitch holes are a little crooked, but once I get my GF all of that will change! I cannot wait. So excited.