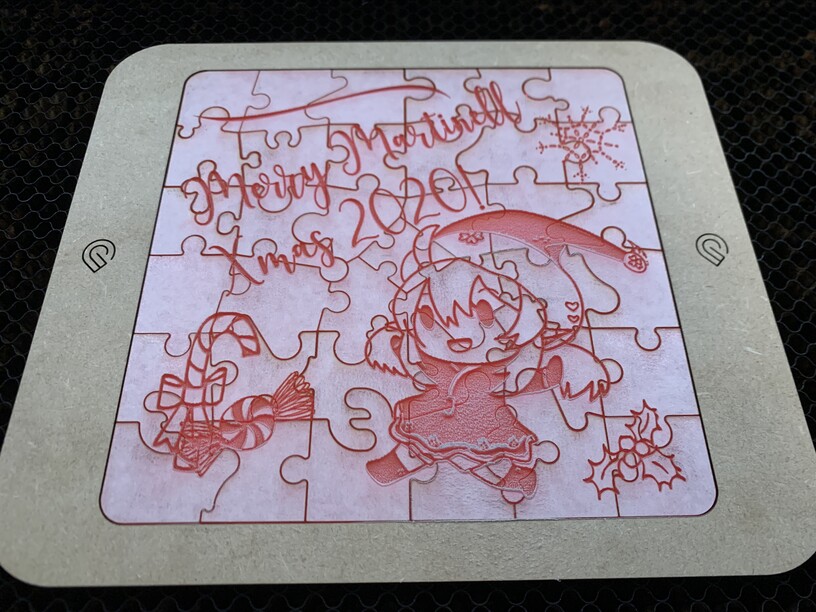
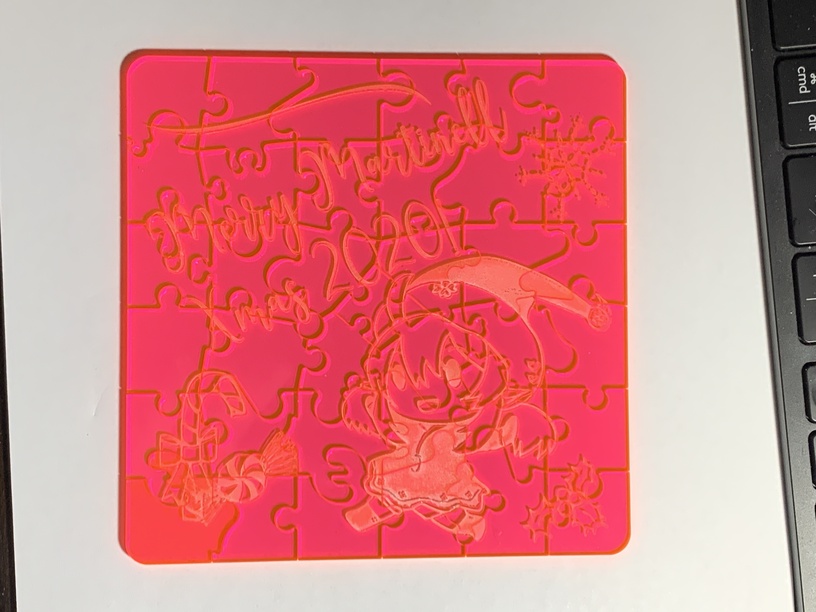
Our family has a huge tradition centered around stocking stuffers. This years theme is to give something that reminds them of 2020. I decided that a lot of people worked on puzzles early on in this pandemic, so I thought I would make a custom puzzle for each person. These are 40-piece, and just a bit over 6" square. I probably went a slightly different route than most. I wanted to account for kerf so that the fit wasn’t loosey-goosey. I also… probably stupidly, decided to make all the piece cuts custom. Thankfully I’m doing all of the puzzles with the same pieces, just changing the engrave… but it means cutting the pieces out, then assembling the puzzle into a frame and then engraving the image and finally weeding the masking off. In all between cut, engrave, weed, etc… the process will take a couple hours per puzzle. The design can take me 20 minutes or two hours depending on how complex. The first one complete is for my niece. I may have made a mistake in doing in fluorescent pink clear acrylic though…
I plan on everyone opening them at the same time, and then competing to see who can build theirs first, and I’ll offer up some cash prize for the winner!
That’s awesome! I’m actually in the midst of making puzzles as presents too Can I ask what your strategy was for accounting to the kerf? Did you do it manually or draw out the puzzle as if you were going to cut them out of one square (the loosey-goosey way) and then somehow just enlarge each piece by half the kerf automagically?
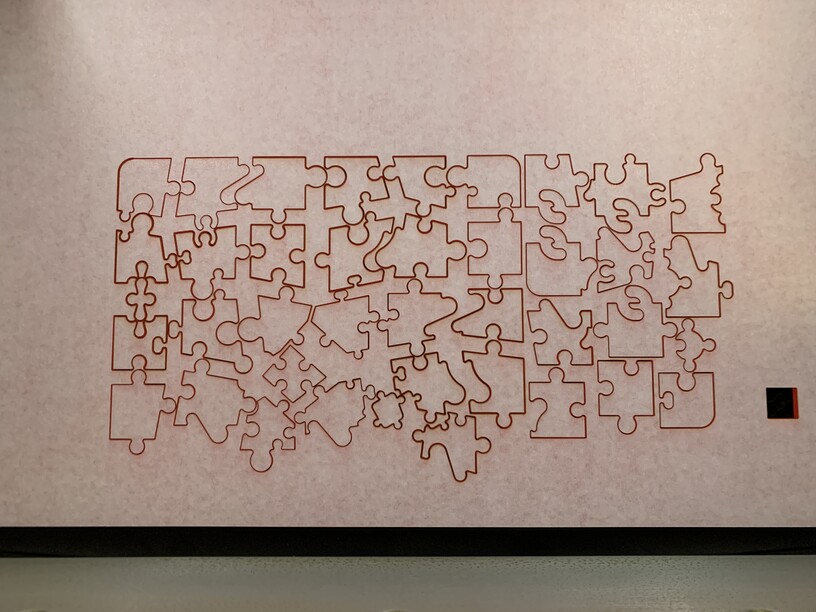
I have all the pieces laid out as the cut in the first image.
Then I test the material with a 1/2” square to find the kerf.
Then, in Inkscape I make the stroke size of all the pieces a bit smaller than the kerf (I don’t want to have the pieces “press fit” and sticking together, or hard to put together).
Then I use the stroke to path command and “break apart” the objects.
Then I have to go piece by piece and delete the smaller of each object.
Then I’m ready to cut (after making sure my stroke/fill settings are correct of course!)
So I’m really confused. Why not just cut and engrave the whole thing as rectangle right from the start? Which would be a lot less cuts and save the hassle of making the jigsaw into the frame.
Is this because of the kerf? I have the reverse opinion about the kerf, that extra wiggle room makes it nicer and easier to fit the jigsaw together, especially for smaller hands.
Ohmygosh, amazing! Love your puzzle and really appreciate the description of your design strategy. And, nice to see more of your work @chadmart1076—we’ve missed you!
I went this route for two reasons. 1st, I’d made a puzzle in the past in that way and did not like how lose the finished puzzle was. I couldn’t even like slide the thing around a table without it falling apart. That one was a thinner chipboard though so maybe the thicker acrylic and wood wouldn’t have that problem as much. 2nd, I find that the thicker cut line takes away from the visual of the finished product.
I originally took this is trying to make a wooden puzzle that much more difficult by swapping around the grain This is quite a different take on any puzzles that I have seen being made, and thank you for sharing how you go about it!
Hah! No, in fact I made sure that all the pieces stayed in the same rotation (i.e. if the grain is going horizontally, then it remains consistent. That said, it is wholly possible, especially on the hardwood ones that I’m doing for any patterns in the grain not to match… but that was not the reason for working this way.
I also never rotate pieces out of their designed configuration because I have found in most cases there is a difference in horizontal and vertical kerf. It generally isn’t much of a difference, but it is enough that I worry about pieces fitting together properly if I go rotating them around. (I should clarify that I do not attempt to account for this difference in vertical and horizontal kerf in my design. But in the case of a puzzle, if you design two piece edges to fit together, then rotate one of those pieces in the design, it is likely that it wouldn’t fit exactly the way it was supposed to because of that difference. Straight edges or things like finger joints are far less likely to have this issue.)
That said, the latest one I finished was Basswood Hardwood and the kerf was minimal. I may have added too much correction slightly as the puzzle is pretty tight on a couple of the more complex joins.
I am also trying to make sure that there is at least a little bit of engraving on every puzzle piece, primarily so that you can tell which side of the piece is the “top” and don’t flip the things over. This example isn’t too bad, but that’s why that large snowflake is in the upper right corner. Others have come out a little “busier” as a result. In fact that first acrylic one the holly, snowflake, candy and the swishy line in the upper left were all added for this purpose.
Thanks @cynd11! I tend to use the for more utilitarian things most of the time that wouldn’t be all that exciting… and of course, long bouts of the thing collecting “stuff” on it since I share a working desk with it. The thought of cleaning it off to work on a project is sometimes daunting. Even right now there are a few things just shifted to the edges enough that I can get the lid open!
Where is the fun in consistent grain? I sell small puzzles, and the harder I can make them, the better! Considering my size is 6x6", it still takes most people about an hour to assemble. I like that you have gotten creative with your piece shapes and didn’t stick with the grid-cut shapes. Thank fully I don’t worry about kerf, since I like to make mini-puzzles within the bigger puzzle, with the mini-puzzle’s pieces redistributed throughout. Great work!
@jamely: So your 6x6s that take an hour… how many pieces are they? When looking at this one would you say they are more or less complicated? I want to do a speed-challenge for my giftees, but I don’t want it to take an hour! For me it takes a few minutes to assemble into the frame (without any art mind you)… but I designed the thing!

 This is quite a different take on any puzzles that I have seen being made, and thank you for sharing how you go about it!
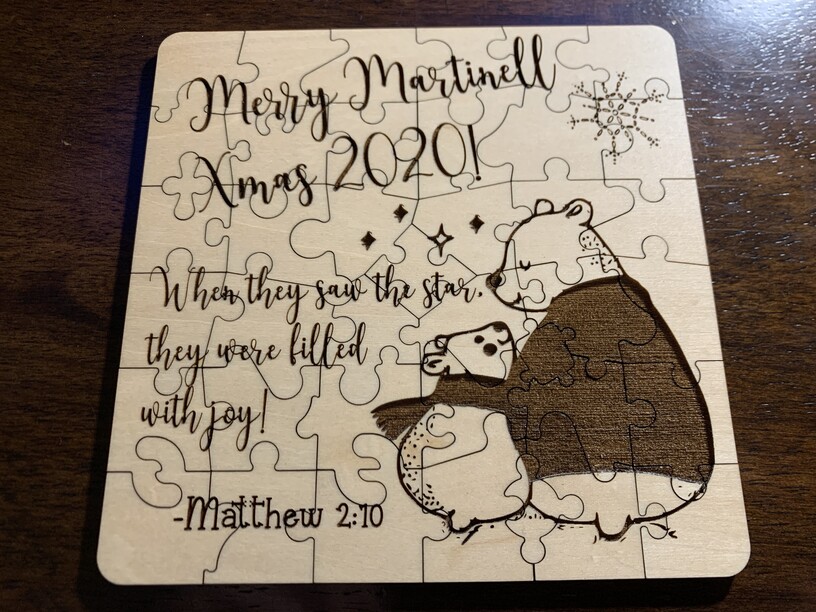
 for more utilitarian things most of the time that wouldn’t be all that exciting… and of course, long bouts of the thing collecting “stuff” on it since I share a working desk with it. The thought of cleaning it off to work on a project is sometimes daunting.
  Even right now there are a few things just shifted to the edges enough that I can get the lid open!
