TL;DR= Puzzle project created for a curriculum ended up getting me a custom commissioned puzzle job.
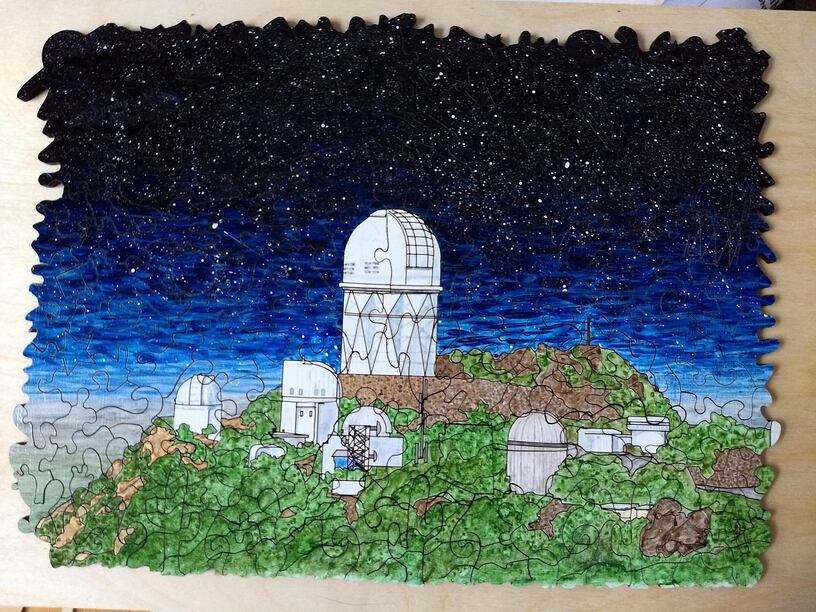
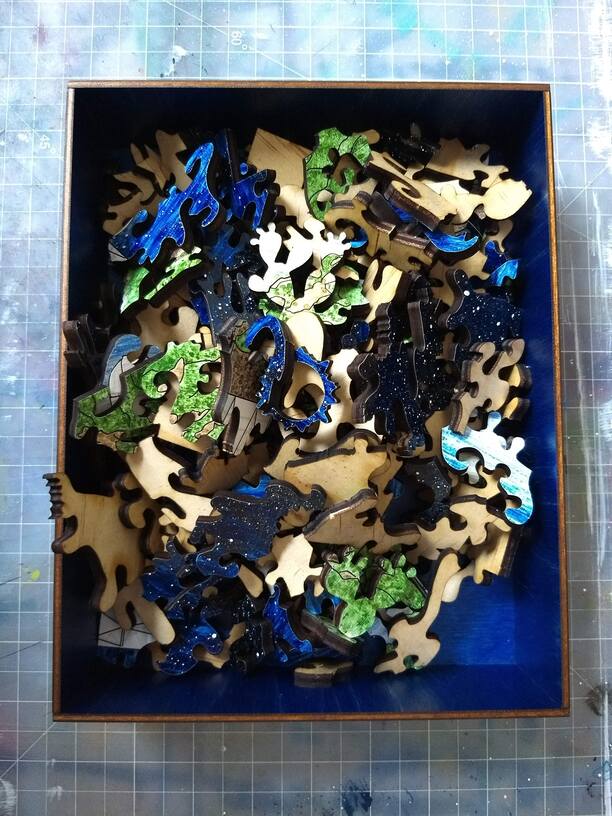
Project Finished Pic:
I’ve been playing with cutting unique puzzles out of HD 1/4" plywood, and made a couple of
~10" prototypes to test my preferred artsy finishing technique: painting a primed, laser cut piece of plywood with watercolors and then sealing it.
So. The idea came about from being tasked with creating a constructionist-style learning curriculum for laser cutting. One of the open-ended projects that I came up with (and subsequently fell in love with) was to create a puzzle with uniquely shaped pieces with iconic pieces added in.
This project starts out as a partner project, analogue-style with paper and pencils. The partners choose an exterior shape, and then draw puzzle pieces within the shape. Then they scan in the hand-drawn paper and hand-trace with the pen tool in Illustrator (something these high school students have to certify in). Then add in individually created vector icons of “self”. That means, icons (silhouettes) that have significance to that student and would make good puzzle pieces.
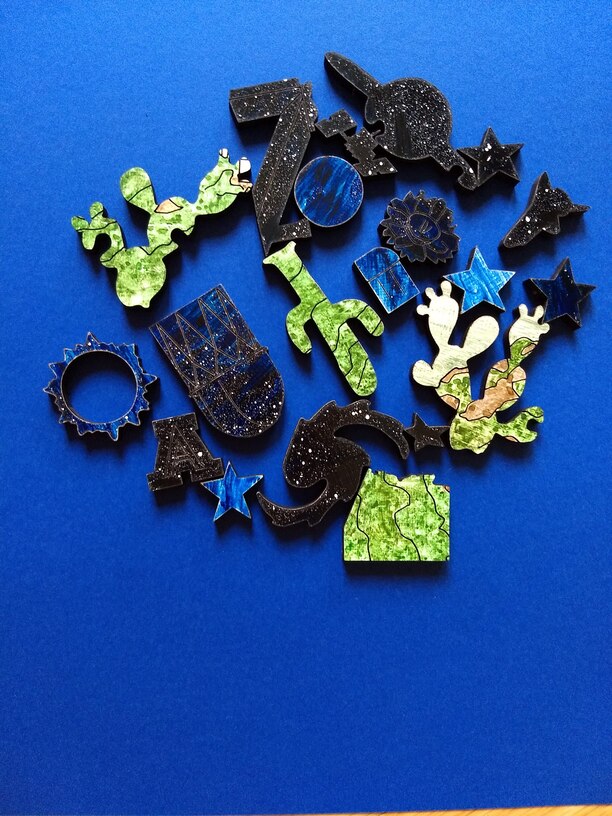
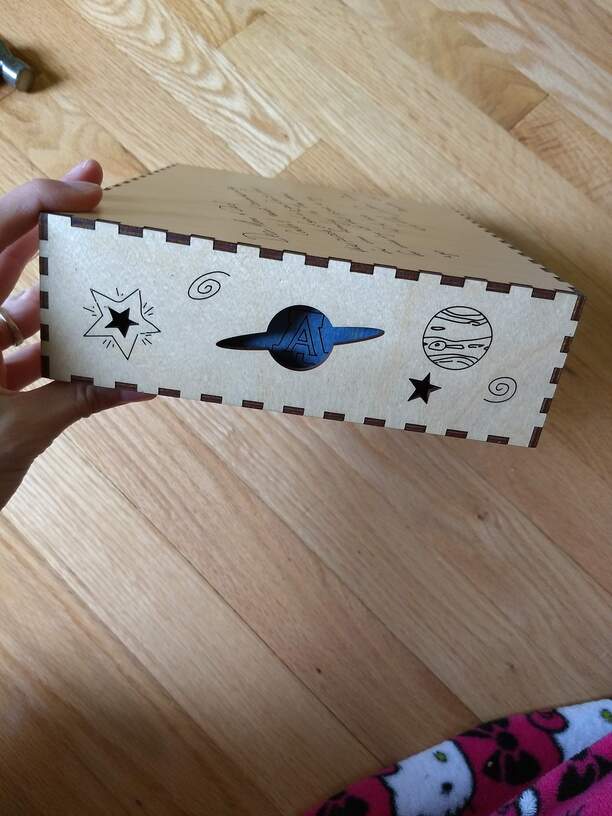
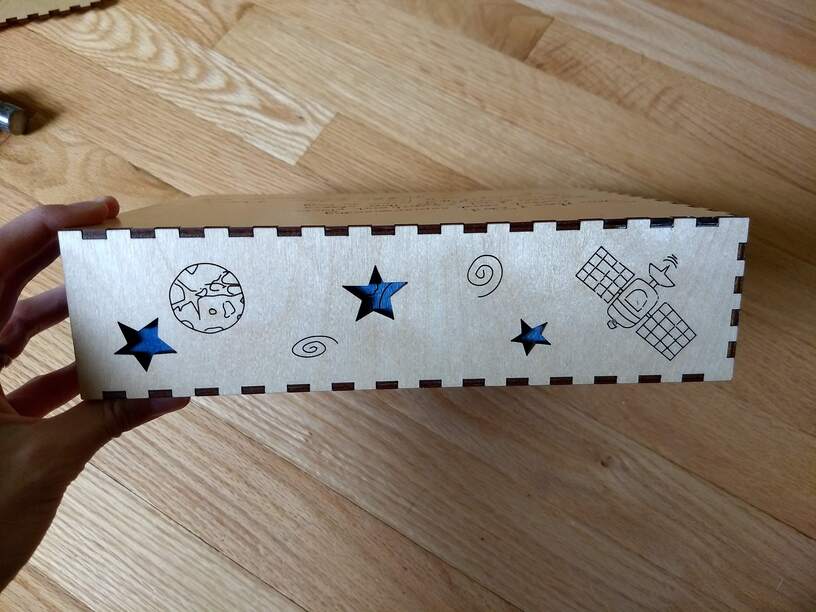
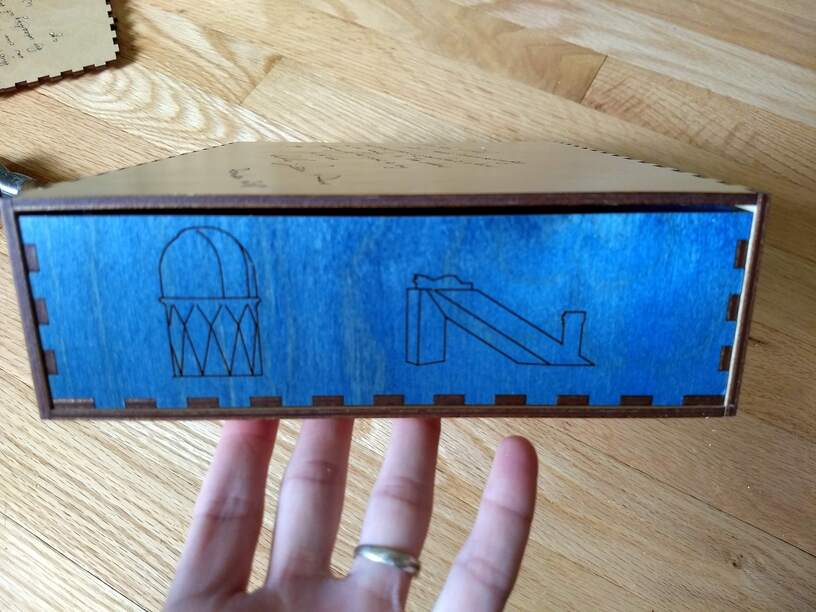
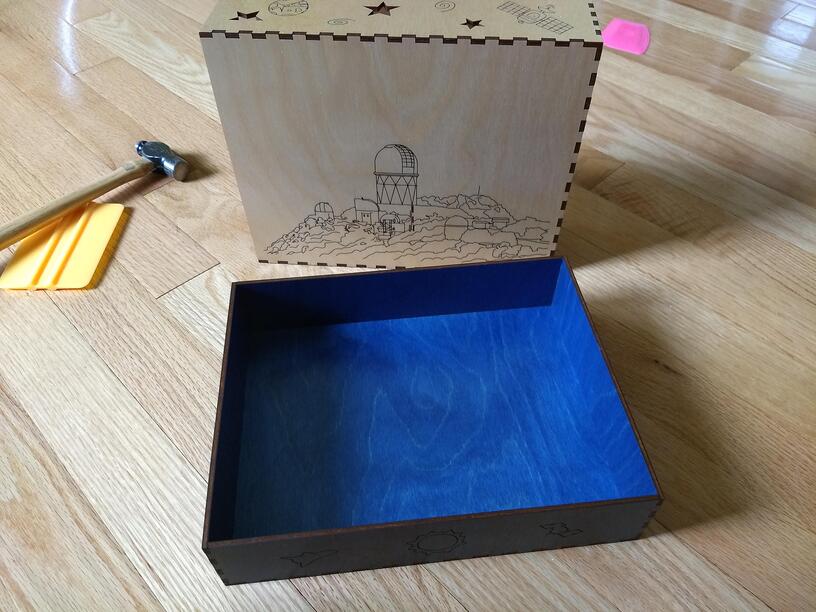
Turns out my mentor loved the idea so much that she commissioned me to create a custom painted puzzle of a place of huge significance in her family, Kitt Peak National Observatory. I required that she send me ideas or icon pieces so I could test out the difficulty of adding individual vectors into an already created mesh, and she sent me several: multiple types of ginormous space telescopes, the U of A “A”, the logo for her father’s Astronomy Camp, a saguaro flower, and the shape of Arizona. She sent me an image that she liked, and I took off with it from there.
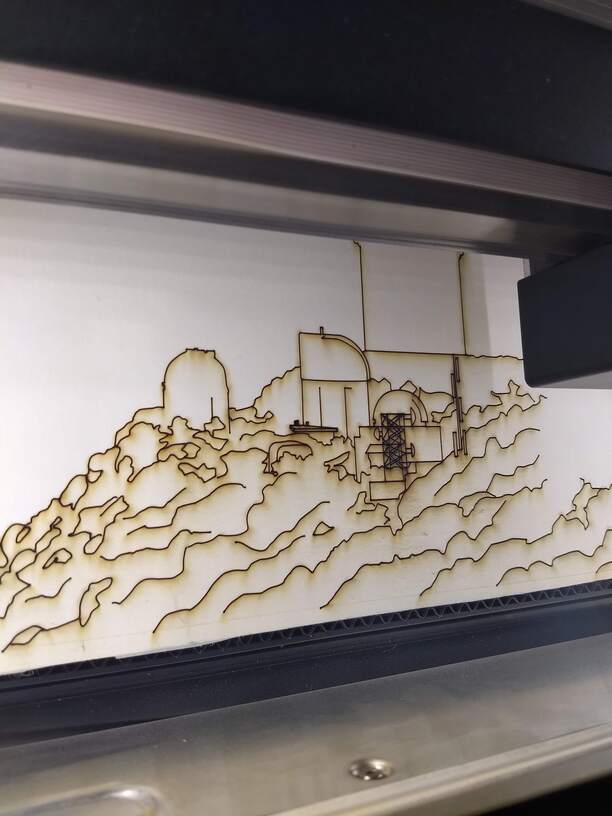
First step: take the image and trace out major section, score the plywood to make some painting outlines.
Second step: Paint the primed and scored plywood. Seal the water colors, then cover with adhesive masking paper to prep for lasering.

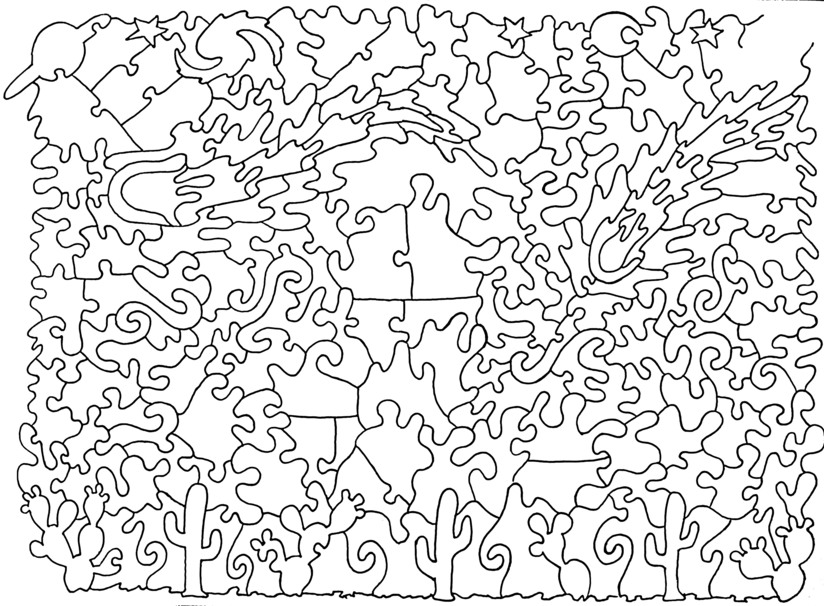
Third step: draw out the puzzle pieces. I included stars and a nebula in the sky span, and saguaro and prickly pears in the ground span.
Fourth step: trace and cleanup in Illustrator. Add in the individual sentimental icons. (not shown)
Fifth step: laser cut out the shapes from the painting, clean up all the pieces.
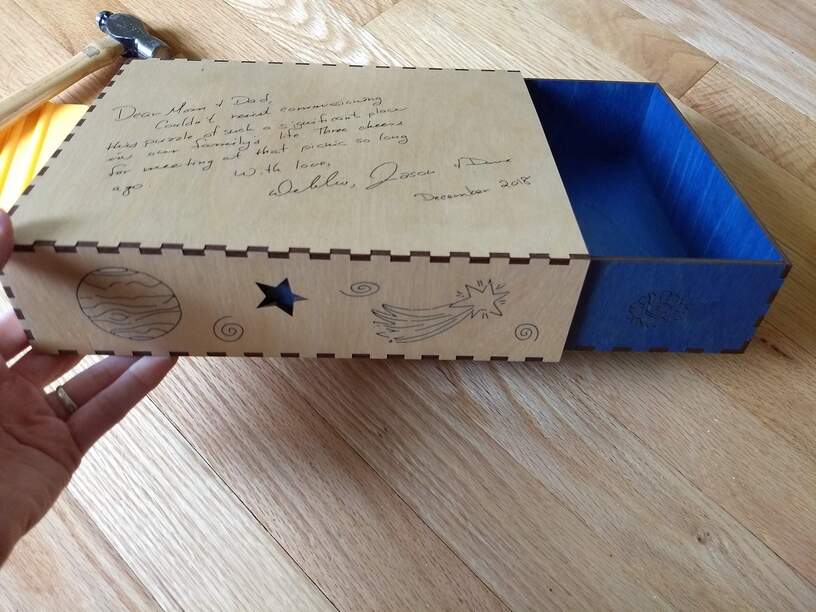
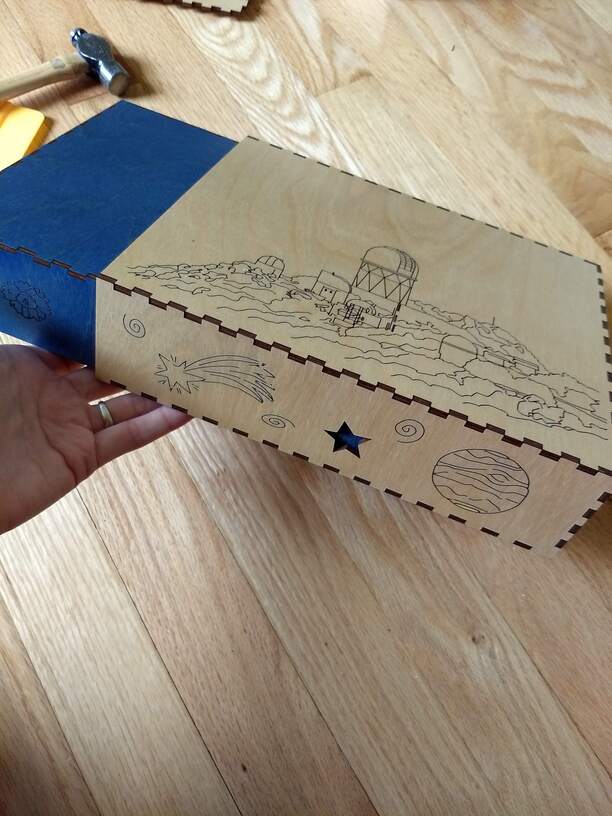
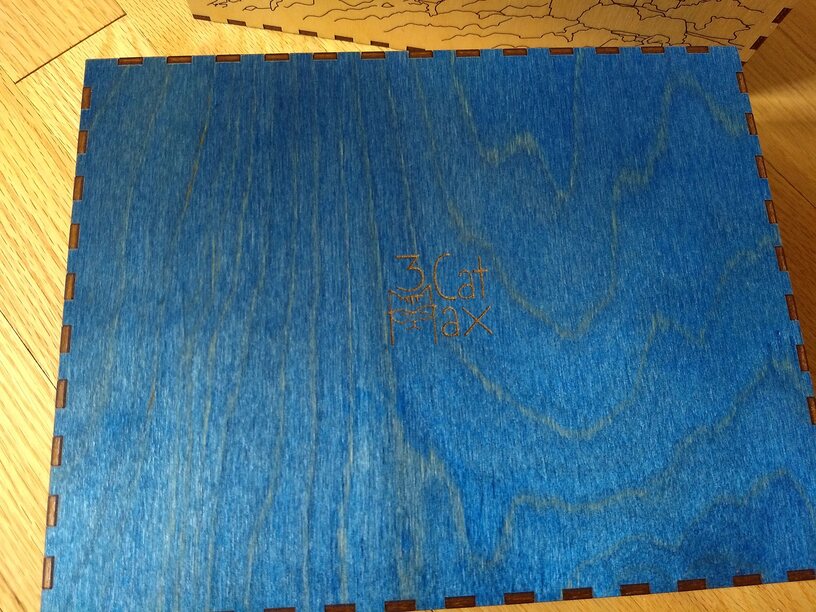
Sixth step: Box! I used pre-colored the Wood Gallery ply to cut out a box, added some of the previously used vectors, and added a hand-written note scored into the top of the box. I made this puzzle box to be a sleeve box to better protect the pieces.
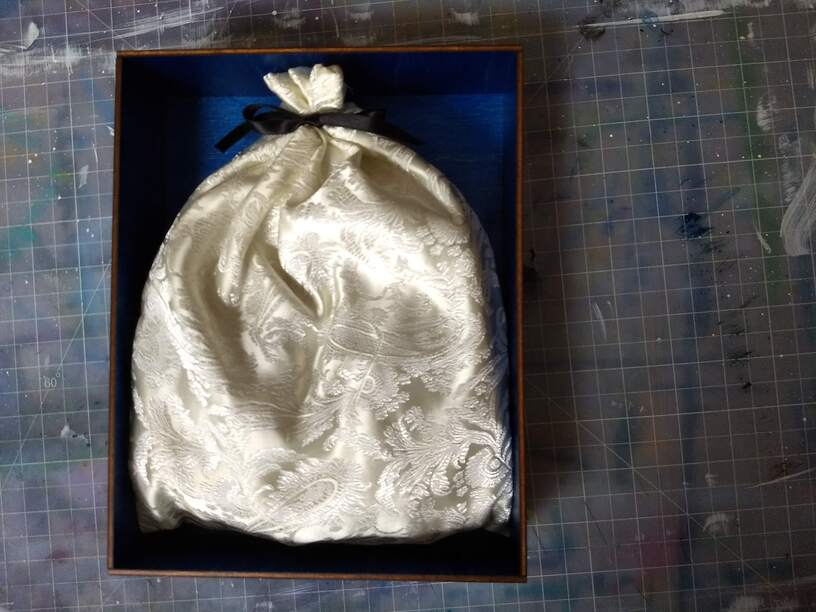
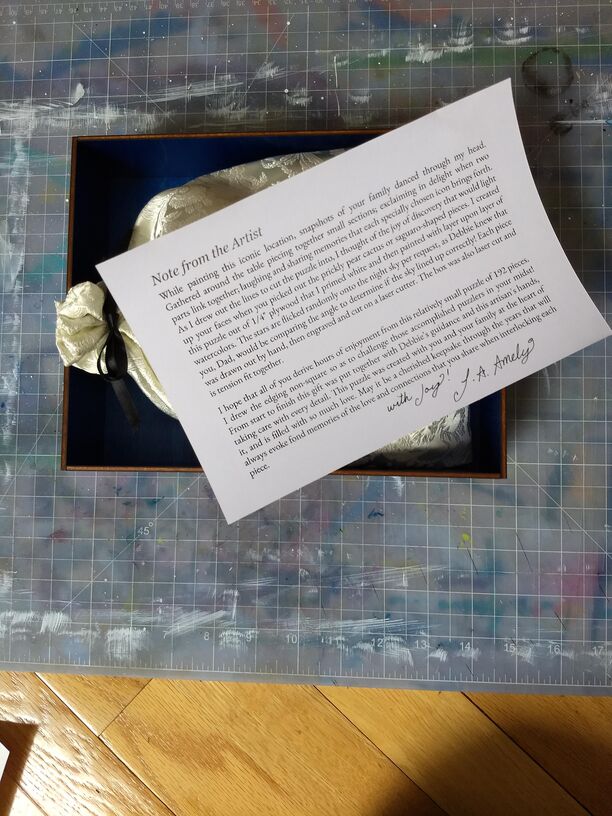
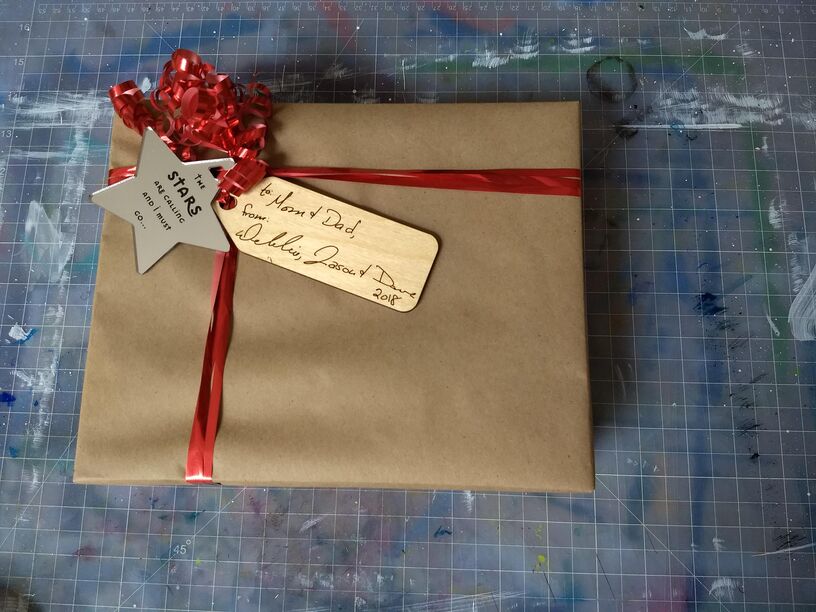
Seventh step: Presentation! I added an artists statement (value added ![]() ) and put all the puzzle pieces in a custom sewn brocade bag to add a little more protection when shipped. I love wrapping gifts, so I wrapped up the box, created a gift tag with text stolen from the custom note, and added a sparkly ornament star, with “The stars are calling and I must go…” engraved on it. Just a slightly tweaked quote ;p
) and put all the puzzle pieces in a custom sewn brocade bag to add a little more protection when shipped. I love wrapping gifts, so I wrapped up the box, created a gift tag with text stolen from the custom note, and added a sparkly ornament star, with “The stars are calling and I must go…” engraved on it. Just a slightly tweaked quote ;p
Hope ya’ll like ;p Job commissioner is thrilled, and I can’t wait to get some family-putting-together-puzzle pics soon;p


