Overview: This is my third Glowforge. Awhile back, it stopped cutting through material very well. I mitigated this by doing multiple passes, or changing the settings. Eventually it became enough of a hassle, and I had already exchanged two other machines, I just put her to bed for a year or so. Came back to it recently to see if I could get a project going. It seems to be getting worse as I use it.
Secondarily, there are other issues that may or may not be related to this or to each-other, such as:
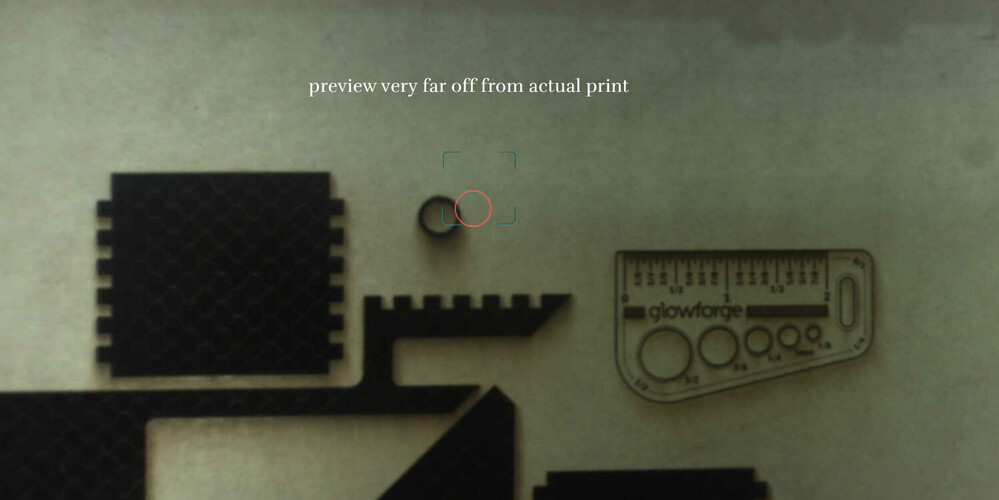
- Lid camera preview is very skewed and off-center (more than previous units)
- Discrepancy in preview vs. print location (further off than my previous units, and perhaps related to above)
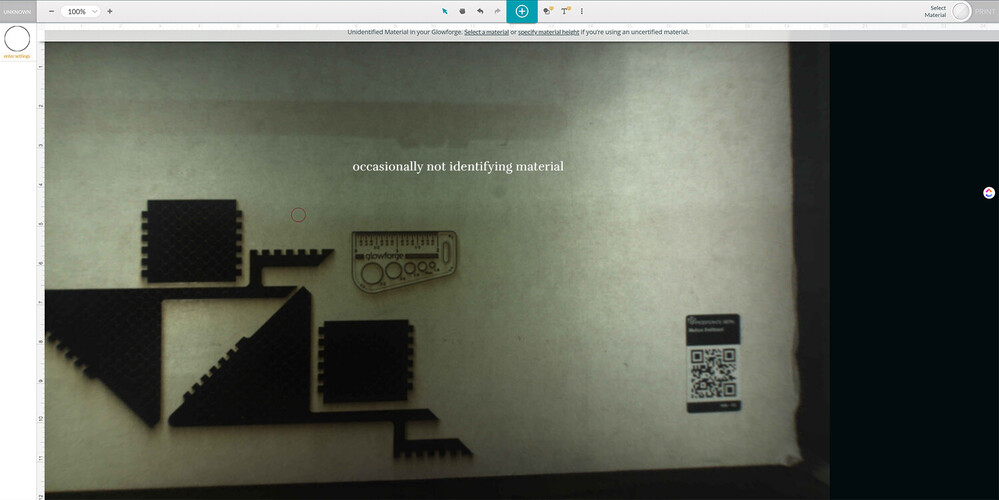
- Occasionally not capable of identifying proofgrade material (perhaps because of above camera issue)
What I have tried to fix it:
- Cleaned all lenses, camera and mirrors as recommended in troubleshooting and in the forums, only ever with recommended Zeiss lens wipes
- Made sure the machine was level
- Cleaned the crumb-tray and made sure it was seated properly inside the machine, without obstruction or debris
- Made sure materials sit flat on the crumb-tray, even using magnets to secure
- Everything you can imagine settings-related. Of special note is that the machine does occasionally identify proofgrade, but it doesn’t cut through in any case
- Power cycling
- Printing only in different places in the printing bed
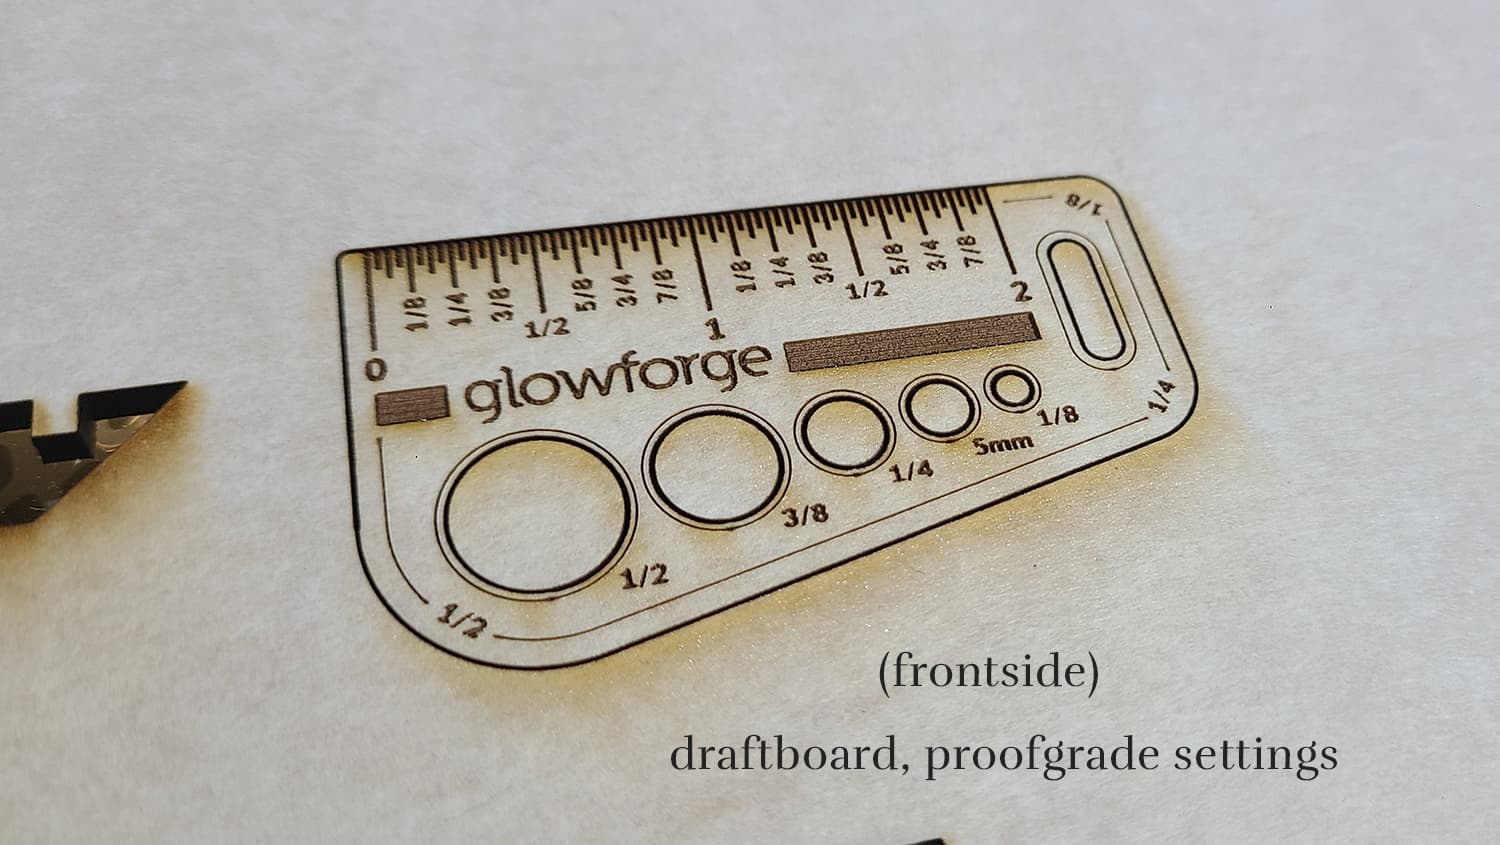
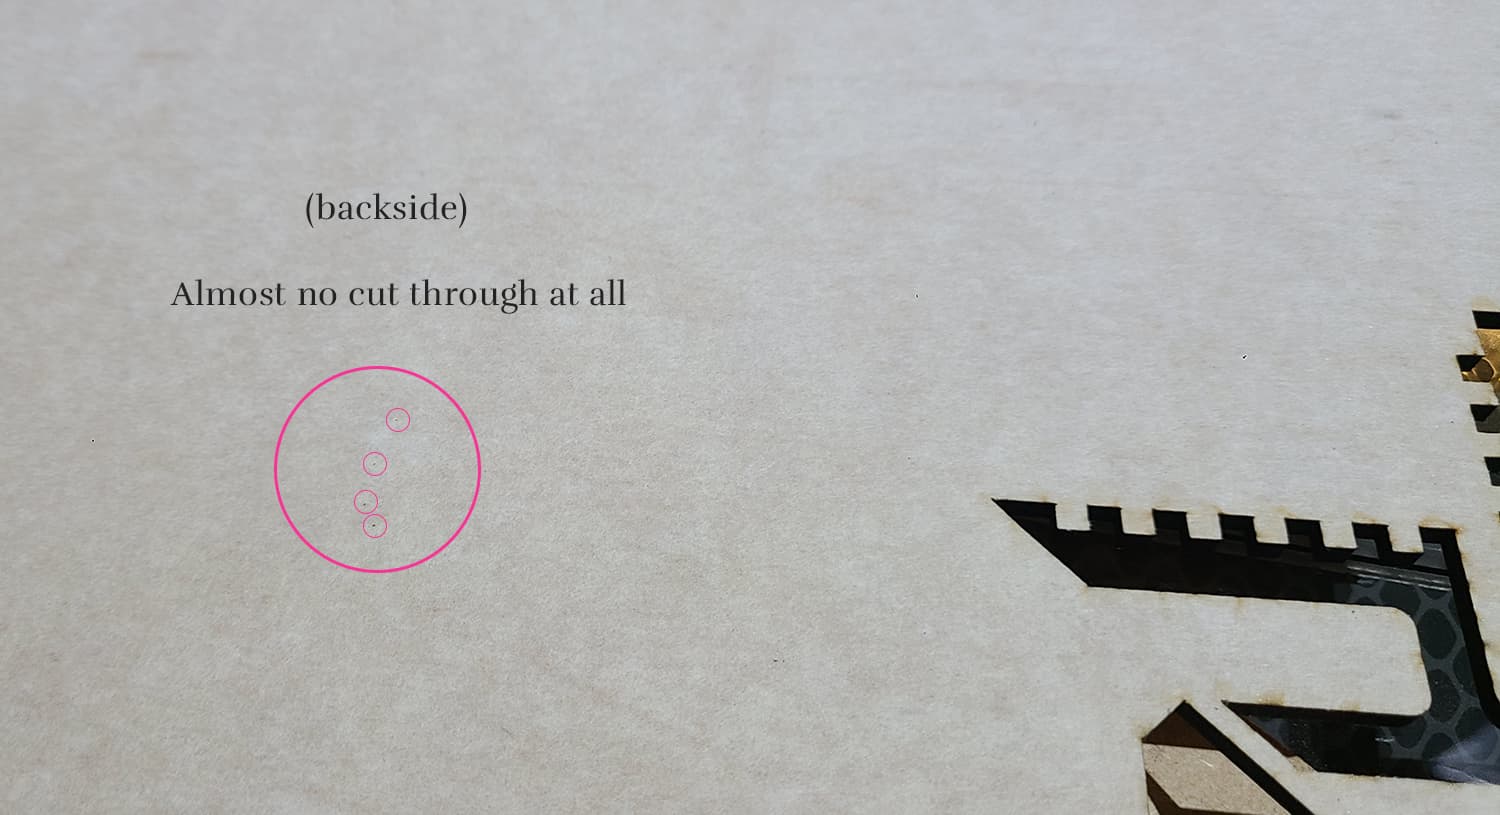
- Testing the “Gift of Good Measure” using recommended settings and draftboard material (above pictures)
A possible problem?
In my most recent attempt to clean the lenses and mirrors again, I tried really hard to photograph the lens to look for scratches. I did notice some, but the word “scratches” really feels heavy-handed - they are barely visible to the naked-eye. I used photoshop to pop the contrast and color in this photo to try and make them more visible:
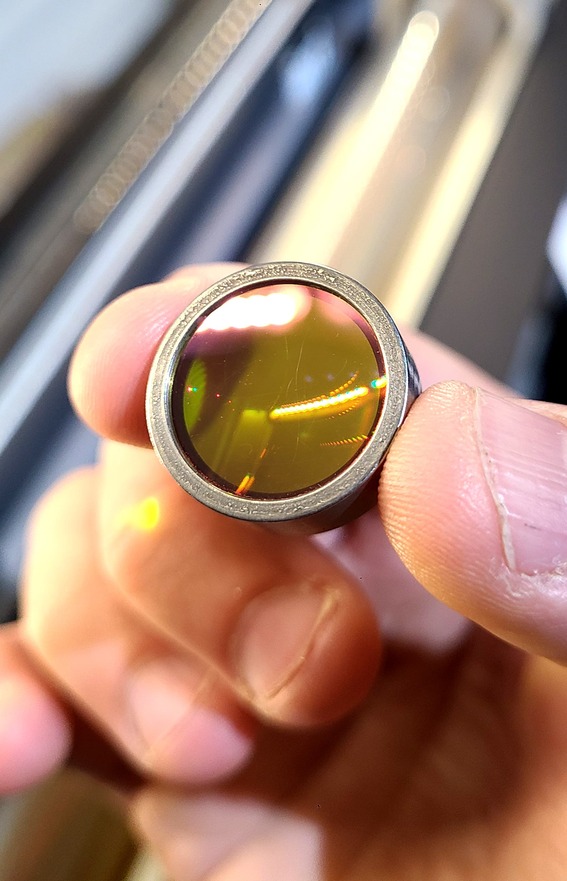
All other mirror/lens surfaces seem pristine to my eye.
I can no longer “fake” the cuts by doing multiple passes or higher power, because it seems to have gotten worse, and now cutting requires enough power/passes that I end up scorching and burning away an excessive amount of material, effectively doubling my kerf at the surface of the cut, and in thicker materials, creating a wider burn-away cone at the flip-side of the kerf.
Any ideas?