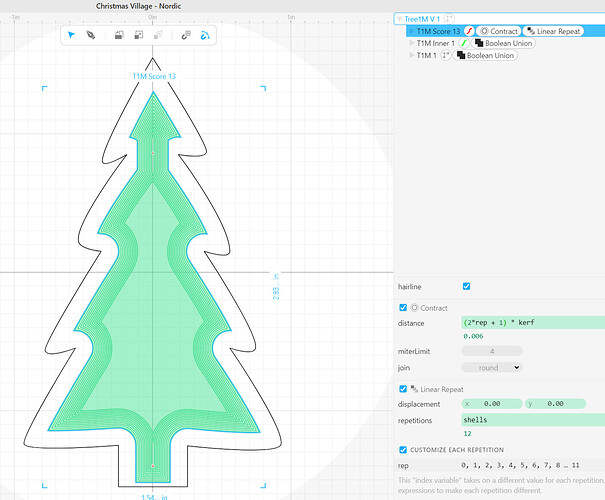
Using multiple scores instead of engraving isn’t new. I was doing some manually in Cuttle.xyz, and then remembered that Cuttle has a Customize each repeat option, and Google’ed how to use it, and voila, they had an example with Expand, to make bigger shells around an object - that’s almost exactly what I wanted, I just want to use Contract instead of Expand.
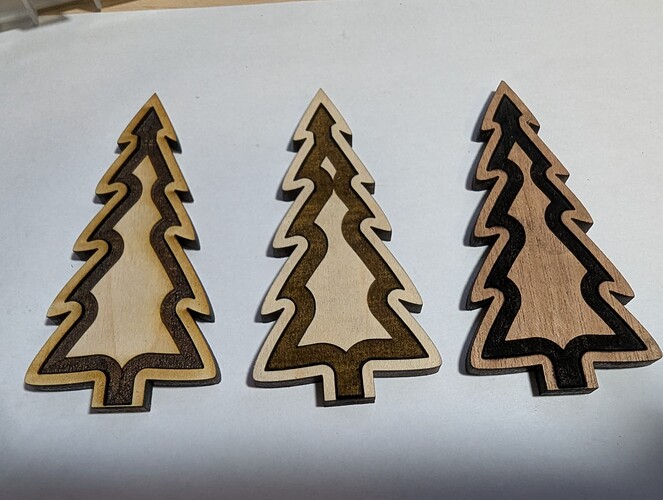
Pictures - middle is engrave, outer 2 are scored instead (like previous examples)
(left one has smoke, because the sheet wasn’t masked - other two were done on scrap pieces already masked, but as this surface of the middle piece is never seen, I’m not masking or cleaning up the smoke).
And brought the 4 hours down to 1 hour. AND, the whole multiple score thing in Cuttle just a few steps (although from the picture above, you can see the scored versions don’t go quite as wide, so probably more like a 3x reduction in time for apples-to-apples width):
- Copy the vector shape
- Apply Contract (don’t worry about the contract width for now).
- Apply Linear Repeat and select Customize Each Repetition
- Go back to the Contact section and change distance to be an equation based on ‘rep’.
I’m using a defocused score, with the height about 2x my material thickness, and it ends up being about 2x my normal kerf (aka each score takes out twice my kerf width). The outer edge of the scored section is cut away, so I want to start scoring 1 kerf away (so -1 kerf is @ 0 kerfs and +1 kerf is @ 2 kerfs), and then do it again 3 kerfs, 5 kerfs, 7 kerfs, until I have the thickness I want. That’s simple math: (2 * this repetition’s number) + 1, which gives (2 * 0)+1 = 1, (2 * 1) +1 = 3, (2 * 2)+1 = 5, etc. So my equation is (2 * rep + 1) * kerf.
BTW - this hole engrave thing is on a piece I'm throwing out - definitely want to save time if possible!
I’m making some holiday decorations - small display with 3 houses and 2 pine trees, with some embedded LEDs that run off a cheap USB plug / remote. To get everything tidy / hidden, the LEDs and wires are hidden in a hollow inside layer (just a frame on the outside), based on this Etsy design (not mine, I bought it and am tweaking as I like).
On the 1st prototypes, I had problem with the frame staying aligned all the way around during glue up, as not only was it hollow, but it had a big chunk missing out of the bottom, for wires to run down, so I want to use the cut-out piece of the frame as a glue-up jig and hole the outer stuff in place.
And then when I did that, I ended up super-gluing the cut-out piece to the front piece the first time. Super glue is pretty thing, so I thought if I just engraved down the outer edge of that cut-out piece 1mm or so, that’ll prevent most of that problem (and if some glue does try to stick in there, it’s not a solid surface, and is charred, so comes off pretty easy).
1st full sheet I did that way with Engraves took 4 hours (that’s middle frame for 4 sets of the 5 pieces (3 houses, 2 trees). I needed do at least 2 more sheets, so dug into that Score vs. Engrave, and since I’m a Cuttle fan, and that’s where my design is, had the wait a minute, there’s gotta be a better way idea.
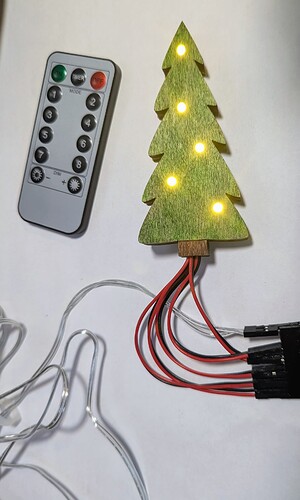
I haven’t finished a full final build yet (I’m cutting the 3rd sheet of frame layers now, and have to go apply the 3rd coat of polycrylic to the front / back / base sheets when it’s done), but here’s a picture of the last prototype of one of the trees (green color is a wood dye marker - I’m using Keda dyes for the final ones).
And the engrave piece? It’s in the garbage - it did it’s job helping align middle frame piece to the top piece during glue up.


