What kinds of camera offsets are YOU experiencing with your glowforge? My offset has gotten worse over time. It’s bad, but it’s not unusable. In perfect conditions (proofgrade material, centered exactly under camera) horizontal alignment is good, vertical is off by less than 1/4". In less optimal conditions (e.g. burning at extreme corner of bed) offset is pretty terrible: 5/8" vertical, 3/8" horizontal. I’ve carefully tried cleaning all lenses, making sure GF is level, no debris under any parts, etc.
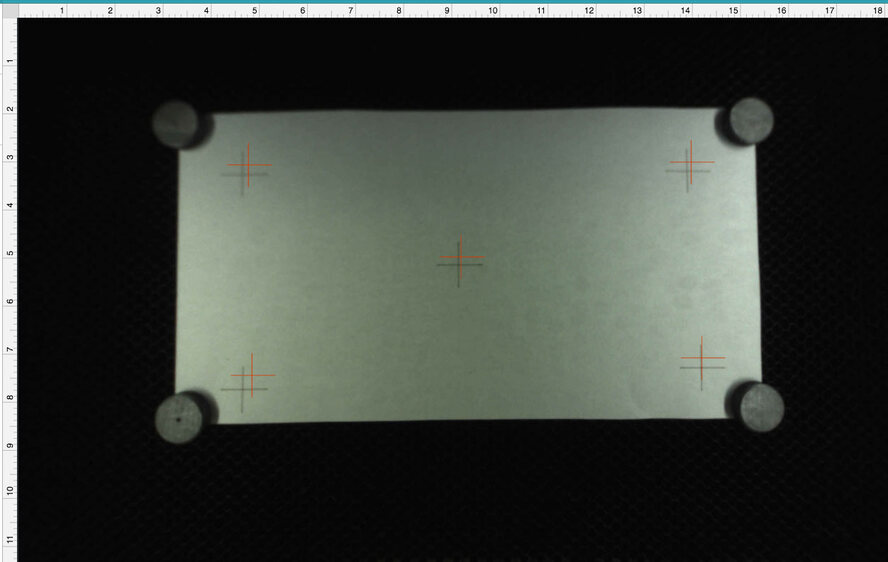
Here’s what it looks like when I burn on paper centered exactly under the camera.
Is this fairly typical? I’m happy that support has offered to repair/replace my GF, but I’m really reluctant to ship it cross country (and be without it for who knows how long) if the offset I’m seeing is in fact fairly normal.
The other thing I’ve thought about doing is trying to improve at least the persistent vertical offset (which is apparent even dead center under the camera) by printing my own glowforge logo sticker and applying it off-center on the head to fool the calibration process… Anyone tried this yet?
Directly under the camera should be better than that. I’d let them fix it.
I’m on my 2nd machine; it’s oddly best at center front, but still close enough in the middle to keep me happy while they’re getting the software algorithms perfected. Here’s mine:
If you print right to the edge I could see that as a possibility. Though like the OP my issue is the vertical displacement, so probably not a real problem.
I’m trying to work out in my head whether this would really work or not.
If they have offered to recalibrate the machine, you should probably let them do it while it is still under warranty.
Just my opinion, but they aren’t going to offer to do it unless they see an issue with it that they can fix.
It’s up to you though ultimately, if you are able to work around it and you don’t want to be without the machine…I can understand that. I went into withdrawal when mine was down for a couple of weeks once. Fortunately that fix didn’t require a round trip.
I wouldn’t recommend it. Might work temporarily, but you’d mess up your individual focus/warp profile. So when they make improvements to the optical alignment, yours wouldn’t end up applying the proper correction information (making it worse again).
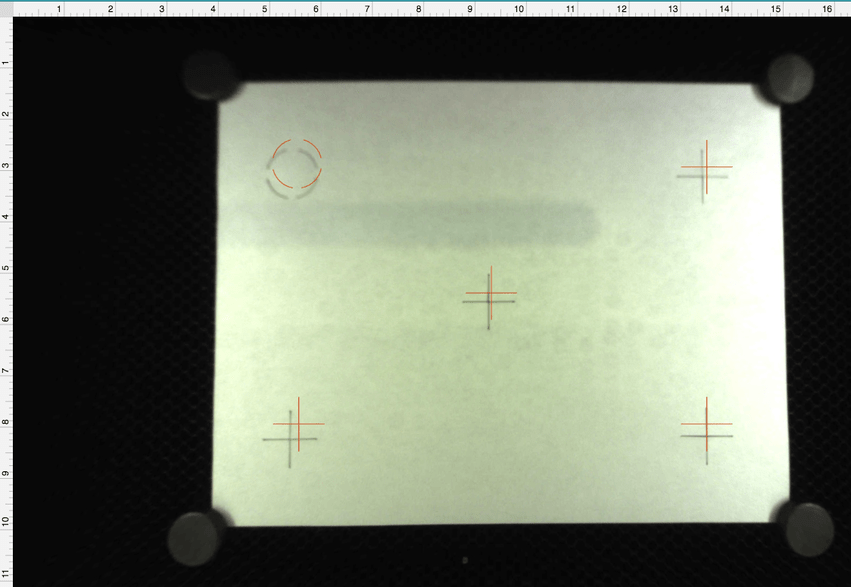
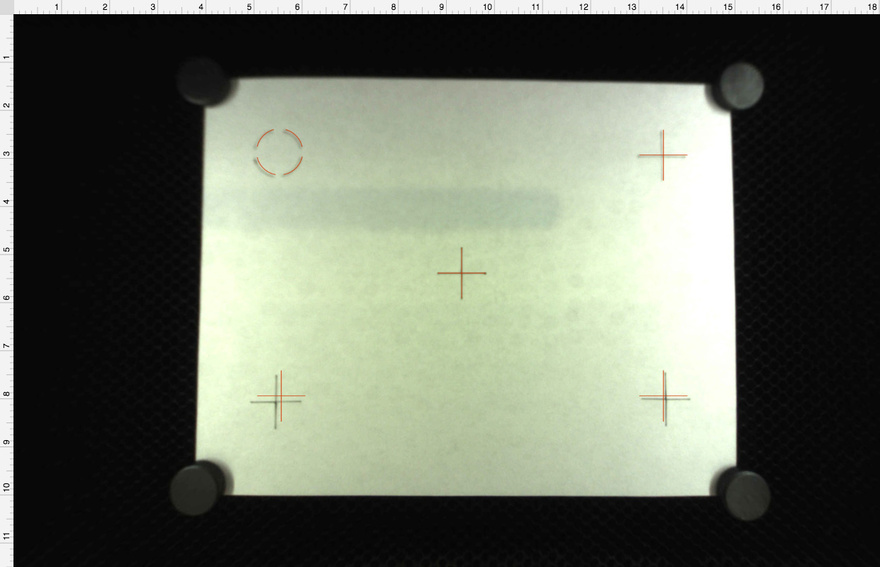
Well, the sticker technique worked pretty well for me. I’ve attached before/after shots, as well as a PDF of the properly sized logo to print if anyone else wants to give it a try on their own machine. As this work-around brings the machine’s accuracy into the spec range I see from other people’s screenshots, this is probably sufficient for me. Despite GF support’s generous offer to recalibrate my machine, I’d really rather not do without my GF or subject it to a full round trip with UPS.
For anyone else who wants to try this (at your own risk of course), the basic idea is:
Power off GF. Make sure it’s level, lid is flush, nothing lifting the crumb tray, etc.
Power on. Burn TEST TARGETS.pdf. Note the offsets.
Power off. Gently tape logo to head with a little bit of offset. Left, right, up or down you ask? Look at your initial test targets print. If your red targets are up and to the right of your actual burns, then you will offset the logo just the opposite: down and to the left. As for how much to offset, for me it was about 1/16" horizontal, and 3/16" vertical. (If I had to do much more of an offset, I’m sure I’d rather just send it in for repair.)
Power on. Burn targets again. Note the offsets. Repeat process if necessary.
The power on/off cycles are important, because it’s during the power on sequence that the camera snaps a picture of the glowforge logo.
I hope that the GF team eventually provides the machine with a self-calibrating sequence: A way where you load in a piece of paper, it burns it, it takes a picture of the result, and recalibrates itself. I remember I once had a printer/scanner that did this without the benefit of a full sized screen for instructions. The printer would print out a test pattern, then you’d put that page in its scanner, and it would use that information to recalibrate its printing.
I seriously hope this isn’t possible! Otherwise if you powered on when the lid was warped or very slightly open, I imagine the resulting change to the camera angle would have substantially the same impact as changing the logo placement.
Also, FWIW, after my own logo reseating, I did a test to every extreme corner, no issues – other than the persistently aggravating issue that the GF isn’t capable of getting very far into those corners in the first place.
Whoah, across the entire bed? Like a burn to the extreme lower left corner is fairly accurate? Is your machine fairly new? I wonder if they started using different optics or something…
I’ve always had really good alignment. I’m careful with my material height settings, and I make my materials super flat, and I get really good results. The very few times that I’ve screwed up and cut off the edge of my material or into a magnet always come as a surprise to me.
Seems like this would throw off any ongoing calibration for your unit. They did extensive data collection at the factory so that moving forward the alignment upgrades can be calibrated to your specific unit. If you’re “fooling” the unit by changing where it actually is, I’m not sure what that does to any future adjustments that get made.
I figure that if my GF suddenly becomes less accurate, I’ll try removing the sticker, rebooting, and see if the cloud software has improved things. At the moment, with my sticker, it’s back to being totally acceptable. If it gets unacceptable again, I’ll peel off the sticker and see how it goes?
Very curious to see how it goes for you. Will you post your results please? I know this is a pretty janky “solution” but heck, if you’ve got a Glowforge it’s because you’re a maker and why not make it work better if it’s in your power?
I’m not sure if doing something like this wouldn’t skew the data that they are collecting from everyone to try to improve the alignment.
The machines are calibrated at the factory and data is collected on each one as it is used…what you’re doing is a modification to the machine that might wind up actually hurting your alignment in the long run. (Which I see @Tom_A and @geek2nurse also mentioned above, so I’ll just go do something else now.)