Anyone know what would cause the engraver to not engrave; but rather just smudge… and in some areas, not even smudge.
Machine has been cleaned several times. Seem to have worked after messing with the settings, but has now just gone kaput. is this a head or a tube replacement?
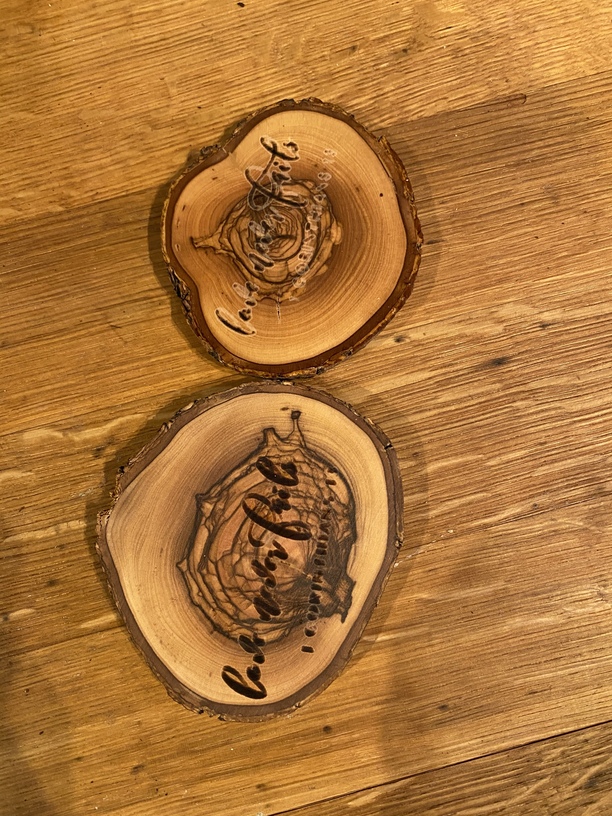
Looks like it’s engraving, but the char isn’t showing up. (Might just be a function of that kind of wood.)
What kind of wood is it? You might want to try running the Gift of Good Measure print on a scrap of Proofgrade material if you have any around, and if not, try selecting the settings for an equivalent thickness material from the dropdown menu to get the settings into the correct range. (Thick = 1/4", Thin = 1/8" thickness.)
If that doesn’t help, Support can probably take a look at it for you.
it’s olive wood and i have been running the same wood for a year with beautiful results. i think the laser tube is going out. where do i buy a replacement tube? i looked and can’t find it anywhere on the site.
It’s a bespoke tube, the only ones who can get one are the Support team. They currently have an agreement with us for complete replacement including shipping (round trip) of $500, but it does require shipping the whole machine back to them. (For safety purposes.) Since the tubes are in the $300+ range, and the shipping likely runs about $200, it’s a hell of a deal.
Wait to hear from them after they review your logs, they can see more than we can guess. They’ll let you know what your options are.
Yeah, they are not cheap. (On any laser.) Timing depends on how many machines are ahead of you, and there’s no way to know. (They can give you a better estimate.) Couple of weeks at a minimum I would guess. Maybe longer.
Just to make sure you checked everything, did you check the mirror, the lens, and the two windows including the one hidden under the left side of the machine to make sure they’re all clean?
I’m so sorry to hear that you’re running into trouble while engraving, but I’d be more than happy to assist!
I’d like to have you perform a specific test print, so that we can create a baseline for your Glowforge and ensure that it is performing within specification.
We’d like to have you try a few troubleshooting steps for us:
Turn off your Glowforge.
Check for small pieces of debris or dust.
Check the lower door to make sure it closes all the way. It may require some force to open, but open it, wipe any dust off the edges, and close it all the way.
Remove the tray and clean any dust or debris from the surface underneath. Pay careful attention to remove all debris from the four dimples where the tray rests.
Check the lid to make sure it closes all the way. Small particles of material, such as dust or debris, can prevent it from closing completely.
Check the surface your Glowforge is on to make sure it’s flat. Ensure it is not twisted slightly and that there is no debris propping up one side of the machine.
Turn your Glowforge back on.
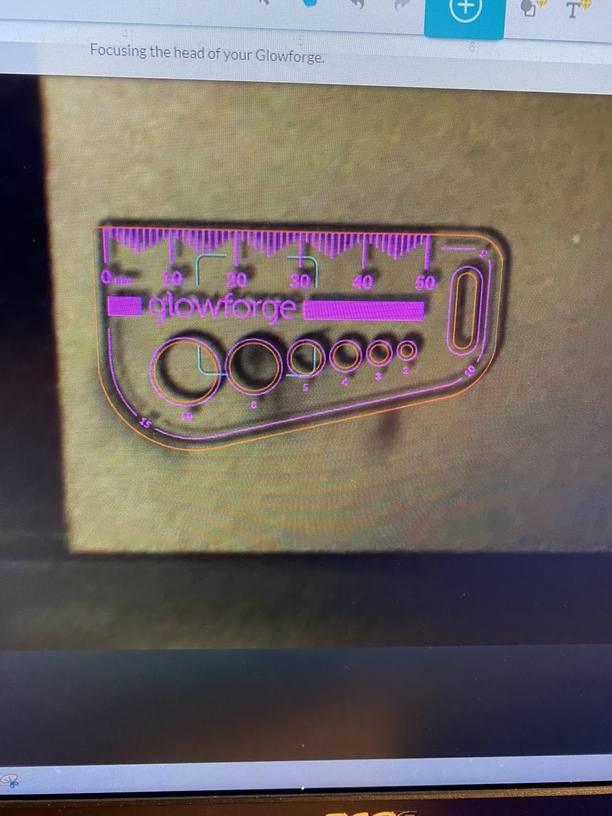
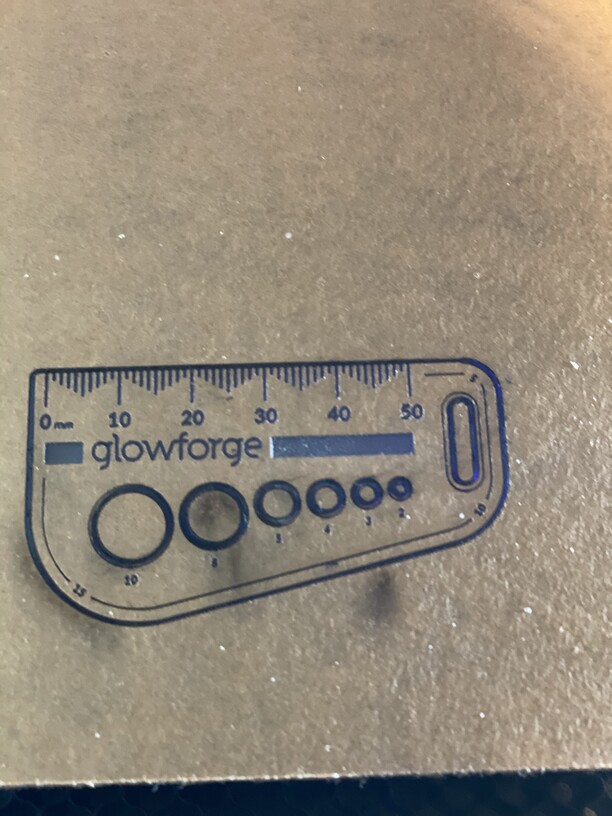
Place Proofgrade material in the part of the of the bed that you are having the most trouble and print the Gift of Good Measure using the default settings.
When the print finishes, leave the lid closed and wait until the fans stop and the picture updates. Without moving your artwork or your material, take a screenshot of the Workspace to show us the difference between the artwork placement and the actual print placement. Make sure to include the rulers in your screenshot and show as much of the bed as possible.
Mac: Press Shift-Command-4 and click and drag a box around your image. You’ll find the screenshot file saved on your desktop.
Windows: Click on the Start Menu and type “snipping tool”. Open the Snipping Tool > New then click and drag a box around your image. Click the Save icon and name and save your file.
Send us the screenshot along with the date and time of the print, and we’ll investigate.
Also, I would like to check over just a few more things. Could you do the following for me?
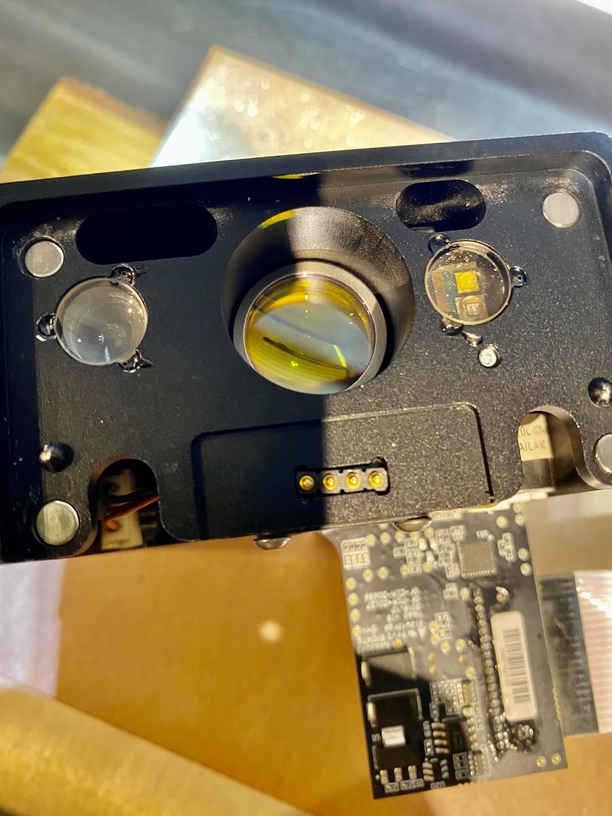
Please send photos of all your cleaned optical components, with special attention to any damage you might find:
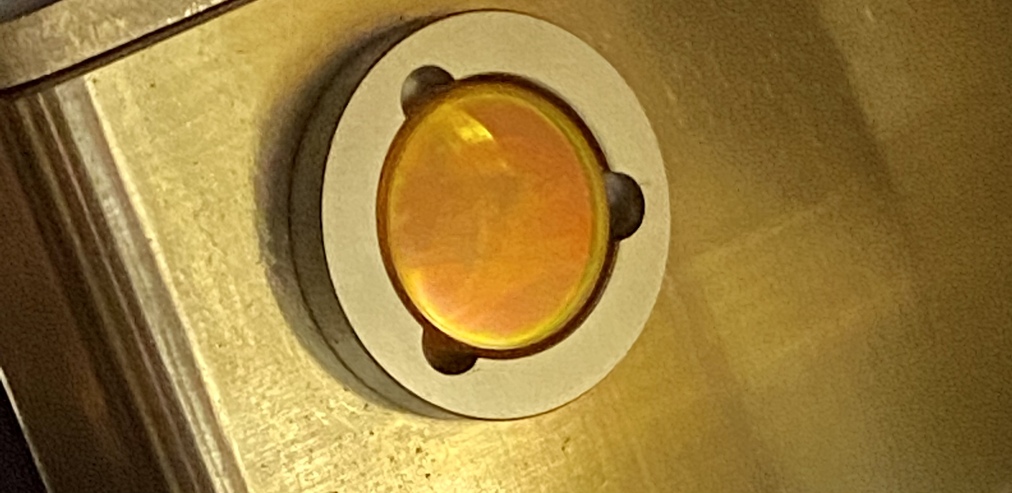
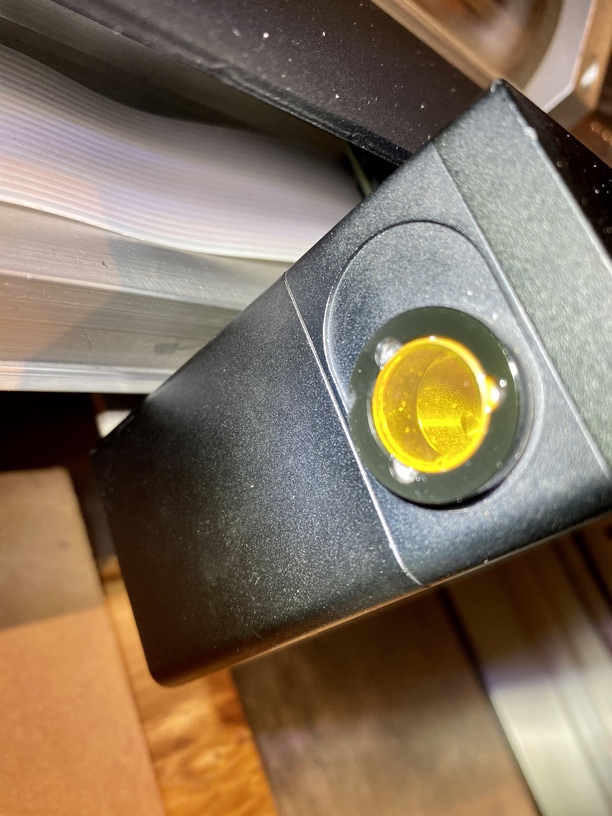
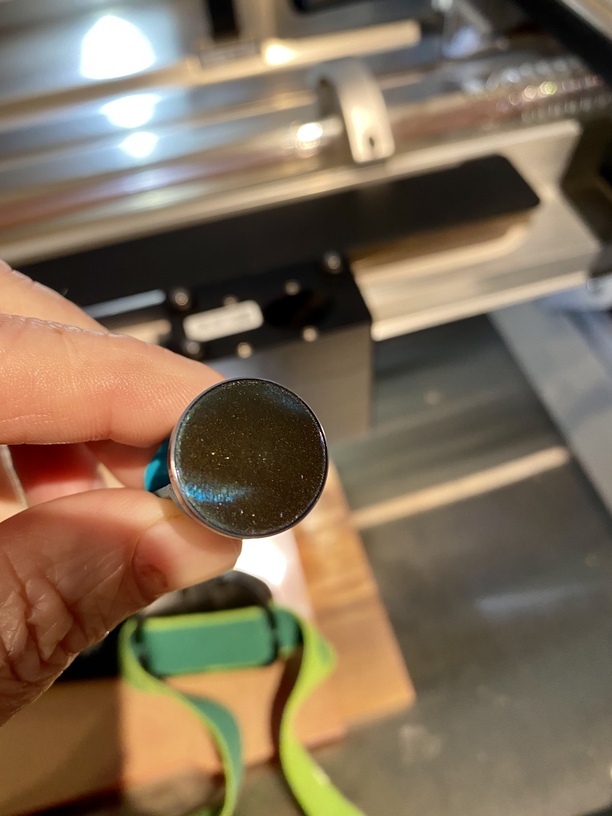
Both windows
The printer head window, on the left hand side of the printer head
The laser window on the inside left of the Glowforge
Followed your instructions, thoroughly cleaned everything again, ran the gift of good measure. note: i do not have any proof-grade material but instead ran a clear 1/4 acrylic from e-street plastics.
also note, the laser lens is new but getting that same result from the old lens as well.
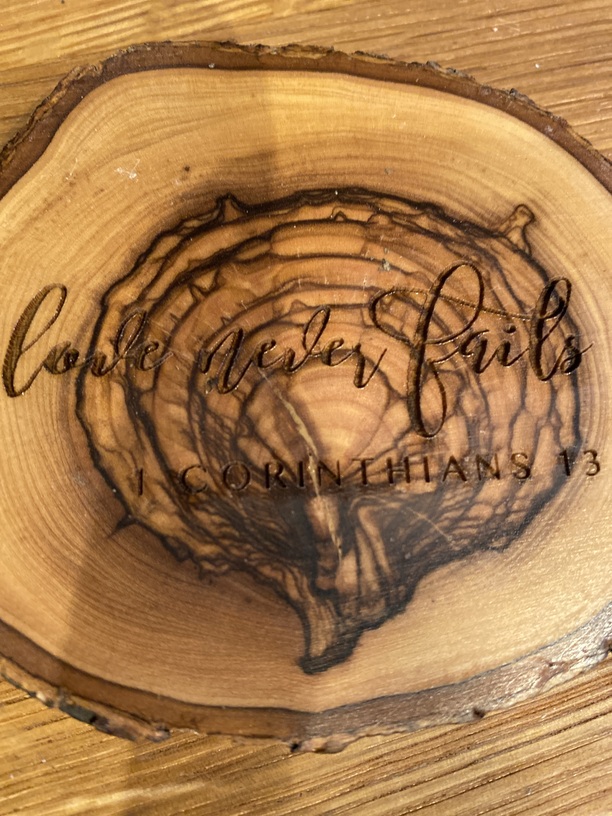
The gift of good measure ran. Everything is aligned but it did not cut and the engraving is light.
Hi @MilSpecOpsMonkey. Thanks for running the requested Gift of Good Measure test print, and I’m sorry to hear that it wasn’t able to cut through. Could you post photos of the front and the back of the test print? That will help us get a better gauge of the current performance of the unit.
Next, photos of the optical parts would be the best next steps to troubleshoot this type of engrave and cut trouble. I’ve included the referenced images from Marc’s response below:
Both windows
The printer head window, on the left hand side of the printer head
The laser window on the inside left of the Glowforge
Thank you so much for sending over those photos @MilSpecOpsMonkey . Rest assured, everything appears to look as expected.
Upon further investigation into the print from 5/13, it appears your Printer Head had a difficult time measuring the material.
This could occur for a number of different reasons. Can you work through the following steps and let me know how it goes?
Can you confirm the material you’re printing on is a uniform height?
On the next print attempt with this material, can you confirm that the red dot from the Printer Head lands flat on the material, and not on the edge/curve/side?
Can you verify the Printer Head is sitting flush on the Carriage Plate?
Can you verify the Carriage Plate is installed correctly
Lastly, can you tell me the thickness of the material you’re printing on?
yes. material is flush on print surface all the way across.
yes. red dot is on the surface.
yes, it is flush on the plate and operation is smooth.
carriage plate is installed correctly
current wood is approximately 1/2 thick; but wood thickness varies across projects.
these projects are the same ones I have been doing over and over and over. these smudging is sporadic. works fines one minute, does not the next. it’s costing me a small fortune in material as this olive wood is from israel.
question for you: can you tell me how many hours this glowforge lasted?
i just bought another one as a replacement/ back up because i feel like I certainly made enough from my business to pay for the last one; but debating if i am going to continue on with using glowforge given that I can’t get parts to repair it and waiting days for a response really doesn’t support my business needs.
i would like for the “pro” model that was lightly used and lasted about a year and a half to be repaired if possible. otherwise, i will just use it for spare parts to keep the new one running until i move on to a product that lasts longer and i can buy parts for…
Are you using the tray with the 1/2 inch wood, or are you removing it and propping the slabs up into the correct range? (Because 1/2 inch thick is borderline for on the tray. It would explain why sometimes it works and sometimes it doesn’t.)
i have tried it both ways. normally it gives me an error msg of it’s outside the parameters.
typically, i don’t use the tray unless i am running acrylic sheet.
the stuff i am running is the same stuff i have been running for a year. never had any issues until recently. seems like maybe the printer head could be the issue as i go through all of these steps… i would buy parts and plug in play; but you can’t buy parts for this thing…
so, yesterday i just bought a new machine and i will use this one for spare parts if they don’t want to repair it even though it is only a year and a half old.
i don’t run this machine but maybe 30 hours a month on a busy month. typically way less than that… not too impressed so far.
I hate to see you give up on it…and your lens /windows all look fine. Have you ever cleaned the grate behind the exhaust fan? If that gets clogged up, it can cause smoke to pool in the machine because it’s not drawing well, and that can affect how well the laser engraves. (You need to remove the hose at the back to clean it, and it helps to have a stiff brush, and pipe cleaners to get that buildup knocked off. Then vacuum it out from the back.)
yes, just cleaned that too in this process as well as the little fan inside the printer head.
one strange thing i have noticed. the lens inside the printer head after a print seems to have a little fog around a clear spot. out of all the times i have cleaned the lens, i have never seen that before. makes me think there is something going on with the printer head.