This evening I engraved my phone number and email address on my KeyBar key organizer. This is made out of titanium. I wasn’t able to find any GF-specific settings for titanium, so I am posting this here to share the info.
Note that when lasering titanium it seems there is some risk of a mirrored surface forming that might reflect the beam and cause damage to the GF (or in extreme cases, the individual). From what I was able to read, this is something that occurs when lasering at high power for a long time, or repeatedly. I did not find any references to it happening at lower power engraves, but if you try this, be aware that do so at your own risk.
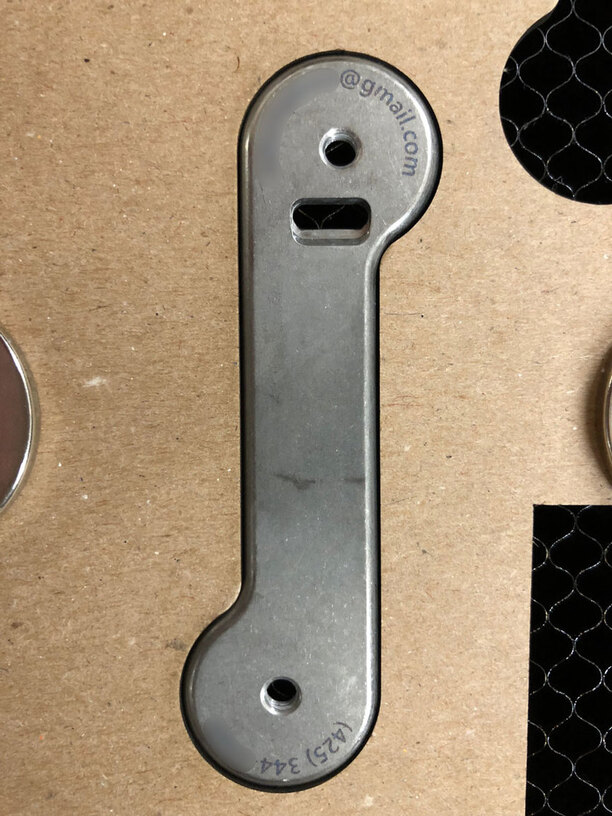
I did two engravings, some larger text inside the KeyBar, that was a bit of an experiment. I engraved at 50 power, 140 speed, and 270 LPI. This left a faint but readable grayish anodized (oxide) layer. This was the subtle look I was wanting, so I used similar settings on the outside: 50 power, 140 speed, 625 LPI (higher LPI was because the font was smaller, and I wanted to ensure readability).
It’s a subtle look, but clearly readable under good light. If I had it to do over again, I would up the power and/or lower the speed a bit. But I am happy with it.
To align the keybar, I first created a shape in Illustrator matching the Keybar almost exactly. Fortunately, it’s a very simple shape consisting of two circles and a rectangle, with one of the corners radius-ed. I was able to get this pretty accurate by just measuring the radius of the circular portions, the overall length, and the width of the rectangle portion. Next I placed the text inside the shape where I wanted it, and then exported the whole thing.
In the GFUI, I cut only the shape outline out of some 0.1 inch chipboard that I purchased from Blicks. I then inserted the panel of the KeyBar that I wanted engraved, disabled the cut, and enabled the engrave. I set the focus of the engrave to match the thickness of the keybar panel. The image displayed in the GFUI indicated that things would be misaligned. This was the case even if I changed the overall material thickness to match that of the KeyBar (0.116"). In the end, I just ignored the image and trusted that my technique of placing within the cutout of the chipboard would align things correctly. Fortunately, this worked perfectly.
The image below shows the results. I’ve blurred out my personal information, but hopefully there is enough there for you to see the results.