I’ve had my GlowForge for over a year, and love it.
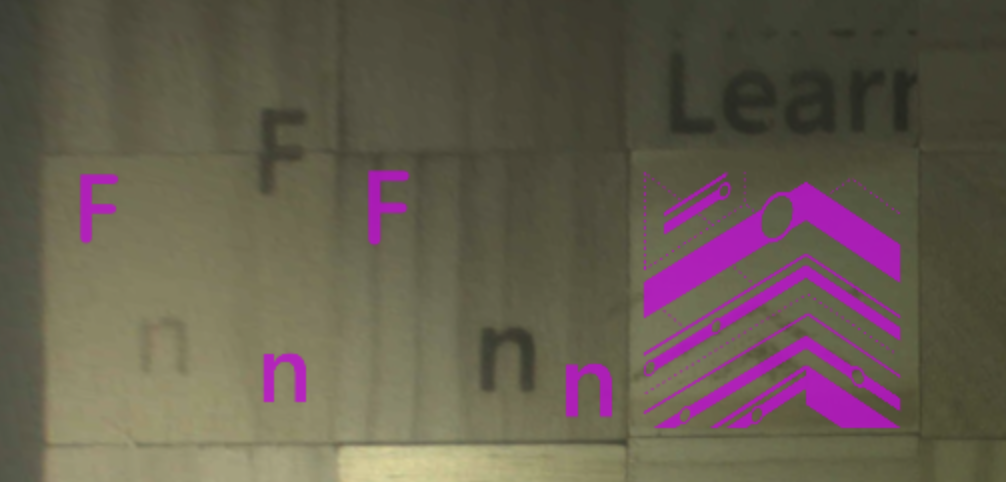
Today I tried something new - etching on 2 inch wooden cubes. I removed the tray, and packed it with the cubes. However the alignment is totally off (see the N and F letters in the added image) and seems to be inconsistent across the cubes.
I’ve tried setting focus manually with the tool, but after setting the red target I get an error message. So I’ve tired manually entering a distance in the etching parameters (0.59 inches approx.) This made zero difference.
Is there a trick to convince the GlowForge to align its laser with my cubes? Thanks!
-john
At exactly 2" there is no room for error. You might make sure of the actual size of each. The setting possibility is between 0.01 and 0.50 so anything else will go to zero. After checking that each is exactly the same height and be less than 2" exactly. Then you should use the Set Focus and make sure the cube is within range.
3 Likes
I did something similar a while back. I used a raised piece of cardboard and cut slots for the cubes: Classic Alphabet blocks
2 Likes
Oh no, I’m sorry you’ve hit a snag.
To ensure your Glowforge is operating as expected, I’d like to have you perform a test print for us.
At your earliest convenience, please perform the following:
- Turn off your Glowforge.
- Check for small pieces of debris or dust.
- Check the lower door to make sure it closes all the way. It may require some force to open, but open it, wipe any dust off the edges, and close it all the way.
- Remove the tray and clean any dust or debris from the surface underneath. Pay careful attention to remove all debris from the four dimples where the tray rests.
- Check the lid to make sure it closes all the way. Small particles of material, such as dust or debris, can prevent it from closing completely.
- Check the surface your Glowforge is on to make sure it’s flat. Ensure it is not twisted slightly and that there is no debris propping up one side of the machine.
- Turn your Glowforge back on.
- Place Proofgrade material in the part of the of the bed that you are having the most trouble and print the Gift of Good Measure using the default settings.
- When the print finishes, leave the lid closed and wait until the fans stop and the picture updates. Without moving your artwork or your material, take a screenshot of the Workspace to show us the difference between the artwork placement and the actual print placement. Make sure to include the rulers in your screenshot and show as much of the bed as possible.
- Mac: Press Shift-Command-4 and click and drag a box around your image. You’ll find the screenshot file saved on your desktop.
- Windows: Click on the Start Menu and type “snipping tool”. Open the Snipping Tool > New then click and drag a box around your image. Click the Save icon and name and save your file.
- Send us the screenshot along with the date and time of the print, and we’ll investigate.
Hi @johntkennedy. It’s been a while since Jeremy’s response and I haven’t seen any recent activity, so I’ll go ahead and close this thread. Feel free to create a new thread, or write us at support@glowforge.com, if you run into any other trouble. We’ll be happy to help. Thanks!