Since ordering my Glowforge I kept running into to many ideas of things I wanted to try making so I started using a laser at my office I was able to get access to. I figured I’d share what I got out of my Corian (http://www.dupont.com/products-and-services/construction-materials/surface-design-materials/brands/corian-solid-surfaces.html) tests with the group in case anyone was interested. For anyone unfamiliar with Corian, it’s a synthetic stone type material made out of acrylic and aluminum ore (as I understand it). You normally see it in countertops and bathrooms as the maintenance is really low on it. I had come by a ¼” thick piece from a friend who had a scrap lying around and wanted to make a cutting board for my brother for Christmas. Inspired by one I’d seen on thinkgeek (http://www.thinkgeek.com/product/ilrv/?srp=6) I set out to work with the piece I had available to me after checking the MSDS.
I first tried etching some small pieces and those worked out well, nice clean lines in them and good relief. I was using an Epilog Helix 60W, so I’m curious to know if the Glowforge 40W can handle the material as well, just at a slower speed (GF folks, Home Depot has sample squares ^_-). I tried various settings and finally got down to 100% power at 2% speed for 1/4" and 1% speed for 1/2" material.
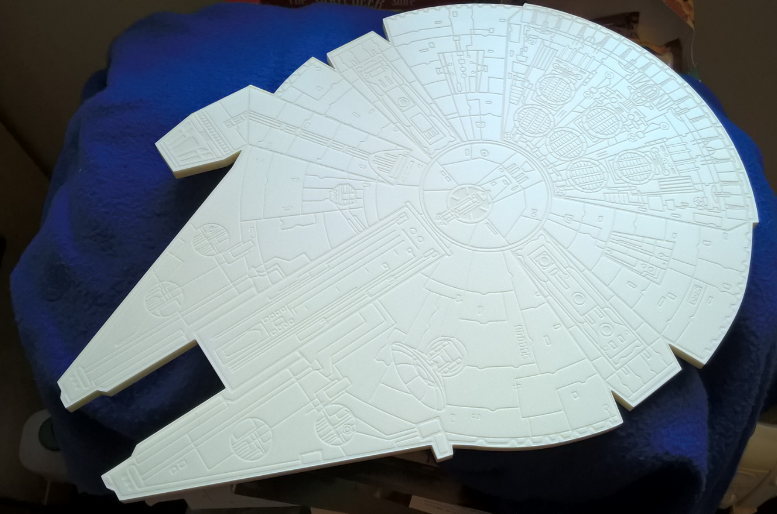
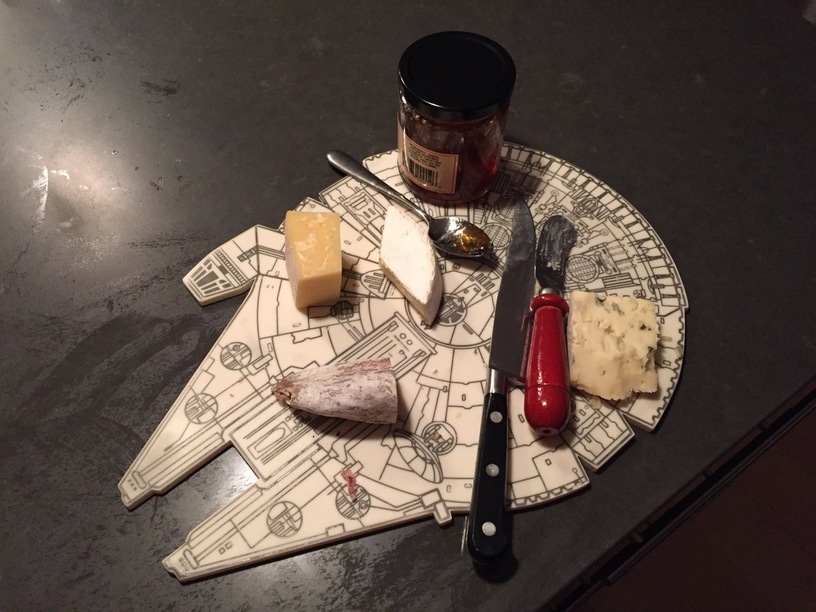
As usual, the bulk of the time was spent in the rastering phase to etch the lines in, but it turned out pretty clean as seen here:
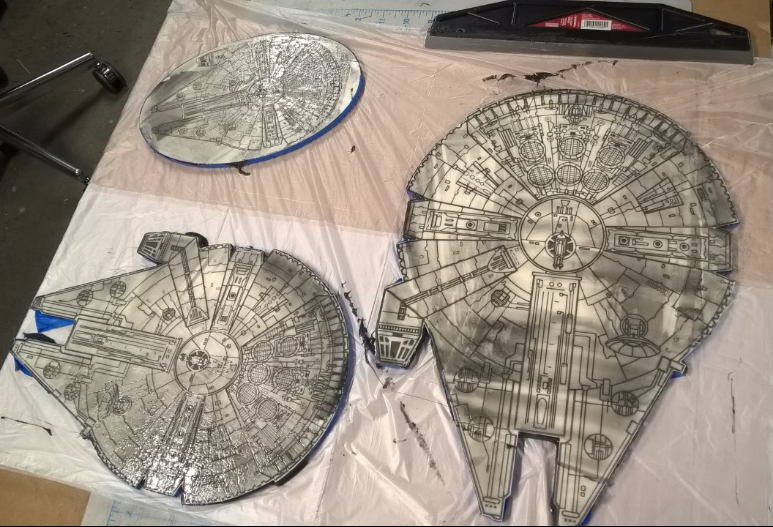
Knowing that I didn’t want food getting stuck in the etched areas I’d planned to try filling the space with the solid surface adhesive which is more like an epoxy in a funky 10:1 caulking gun. I was able to find the adhesive and borrow a gun from a local bathroom/kitchen contractor. I taped up the sides of the ones I’d cut (best to do more than one in case something goes wrong) and mixed up some of the adhesive (which I quickly found to be pretty smelly, best to do this outside with lots of air circulation) and spread/scraped it over the top of the surface with a metal paint scraper to fill in the etch lines. I had about 5-10 minutes or so time to really work with it before it started setting.
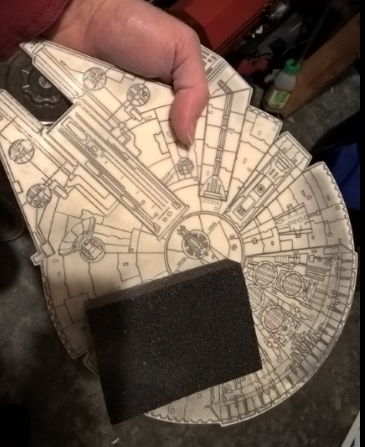
After an hour or so the smell had died down and I let it cure a bit more before sanding it down that evening with a sanding block (maybe 140 grit or so?).
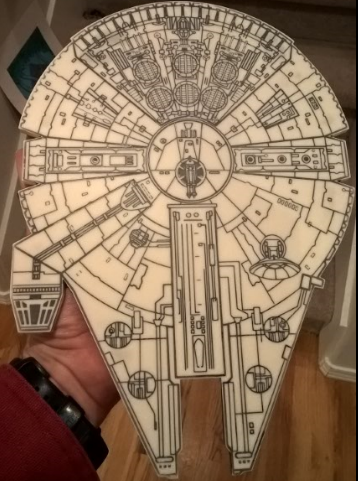
After that I was basically done and pretty happy with the result. It goes through the dishwasher and is pretty durable.
It made a great Christmas present for my brother who’s putting it to good use
That’s awesome!! You beat me to the punch- I’ve been dying to laser cut some 1/4" corian pieces I’ve had for almost a year now. Got my files all ready, the only thing missing is access to a laser cutter! (pretty important step )
Thanks so much for posting your results- I’m glad to finally see some process photos of laser cut corian! I’ll hopefully be able to cut my corian soon- I’ll be sure to add photos to this post when I do
That came out super clean. What was the bottom of the cut like? was it flat or did it have a bit of a rounded quality to it? Was it pretty uniform or were there raster lines in the grooves? All in all that looks great… Good Job
Cutting was done with the laser as well as the etching. Basically 2% speed and 100% power on the Epilog. It was only 1/4" material I was using for this one, but I also was able to cut 1/2" at1% speed.
Wow, I saw that in the post but it did not register that you were cutting with the laser too. That is great news! Even if we are limited to cutting 1/4", there are still plenty of applications.
Excellent work! I see this technique in my future!
A word on Corian for cutting boards however. While often seen in kitchens with Corian countertops (usually having been made from the leftovers from the counter install), Corian is very hard and not good for knives. There are reasons you don’t see Corian cutting boards in the store very often: your knives will dull more quickly and be prone to slipping as the knife can’t bite the board. If you have quality knives, use a wood or poly board.
It kills machines for the same reasons. In laser cutters it leaves a very fine abrasive dust in the cabinet that can really wear down mechanical parts. A lot of makerspaces/Fab Labs ban it for lasing.
Another great thing about corian is that it can be thermoformed! If you stick a piece in your oven and bake it at around 450 it’ll come out feeling a bit like a stiffer piece of rubber…then once you’ve formed it into the shape you want, douse it in cold water and it’ll harden! Word of caution though- you have to try and form the corian as soon as it comes out of the heat (it rapidly loses its malleability) and boy is it HOT. Definitely can’t touch it without oven mitts.
And if you don’t like the shape you made? Stick it back in the oven and it’ll flatten out again However, depending on the size and thickness, it’ll snap if you try to bend it too much, and if you leave it (or keep putting it back) in the oven too long it can turn slightly yellow and become brittle.
 )
)
 However, depending on the size and thickness, it’ll snap if you try to bend it too much, and if you leave it (or keep putting it back) in the oven too long it can turn slightly yellow and become brittle.