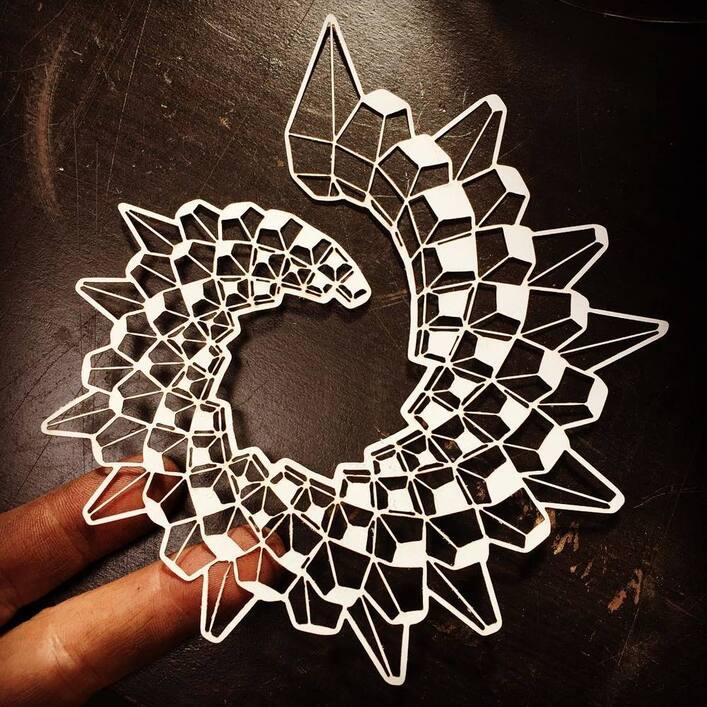
Been twiddling the knobs on this glowforge, trying to get the best cuts for making some paper models. Not too bad of results using cutting setting of 500/45. 500/50 works perfectly if the part has wider lines, but starts burning away very thin bits. Just thought I’d share since I hadn’t found as much on good settings for paper as I’d hoped. It would be great if there was a repository of settings for people’s experiments with non-proof-grade materials, at least to give people a starting point for experimenting.
54 Likes
I have thought the exact same thing before. I’d like to have a wiki that is a little easier to search and organize than a forum for this type of information.
5 Likes
Just do a search for the material and “Settings” in the Beyond the Manual category. All non-Proofgrade information is collected there.
5 Likes
There’s a spreadsheet with an attempt at starting a settings list here:
Other useful things as well.
8 Likes
I really would like a system that is ONLY for non-proofgrade settings. Some kind of database that has just the name of material as a searchable index, the settings, and a photo of the outcome. It should also have a community rating with comment system. So you know if it’s legit.
3 Likes
This idea has been tossed around recently. Google Sheet for settings?
One downside is that if GF decides to revamp their power/speed controls, as they have in the past, the whole thing becomes worthless, unless they provide conversions between the old and the new.
3 Likes
Good point. Though we can’t allow that to dissuade us from doing it. I wish GF allowed for us to create our own settings, name them what we want etc.
4 Likes
I’m pretty gobsmacked we can’t even save a project.
3 Likes
Note that if you cut paper via the bitmap engrave method, the lines per inch will greatly affect the outcome. If you keep the speed and power the same but up the resolution you will quickly burn up the paper. It is a balancing act between the 3 variables and can take some time to hit upon the best combo.
For my playing card boxes (just search for my thread about paper experiments) I did both vector cuts and engrave cuts and I think that for super fine details, the bitmap engrave method gives you more control.
3 Likes
I have been using a slower speed on paper because I saw more charing when the head slowed down for coners so when I turned the speed to something slower my cuts were more consistant
2 Likes
Amazing stuff and great info, thanks @joker
1 Like
I used similar settings on some White UCreate Poster Board from Walmart, you can search for it on their website for more info. It comes in a 22" x 28" sheet for 33¢. I cut it in half and then put a sheet into the GF. Played around and got a nice engrave/score.
Cut: (as stated above) 500 Zooms/45 Pews
Score: 500 Zooms/15 Pews
Engrave: 1000 Zooms/15Pews
I made sure to use my new digital calipers to check the thickness. Measured 0.01in Thickness. I used it to make a pair of pillow pack test boxes/folding dummies. Worked great!
7 Likes
Thanks. The more I play with the settings, the more I’ve found better results by slowing down the “zoom” and lowering the “pew”. Slower speeds, lower power gives cleaner results. It also means more time to finish, so one must find a happy medium of speed vs quality. The slower speeds particularly help with the extra burning in tight corners you often see.
3 Likes
I unintentionally underpowered a cardstock cut last night so ran a second pass to finish. The result was really clean. I might start leaning toward 2 light passes as a rule with cardstock.
I did 500/30/2x.
7 Likes
I do a screenshot to have a record of my settings
Not a bad solution. I run a google doc, myself.
I found out that the best setting for cutting out card stock with minimum burn edges is 180 speed / 10 power / 0.01 inch. 
2 Likes
On 110lb stock? No way my Pro will cut with those settings…