I’ve been meaning to post some of these for ages and I never seem to get the time to actually write a post. Fixing that!
Last year, I did something I almost never do: I took time off around Christmas. I figured I could take a forge home for a weekend, print a ton and then spend a week or so putting stuff together and testing ideas.
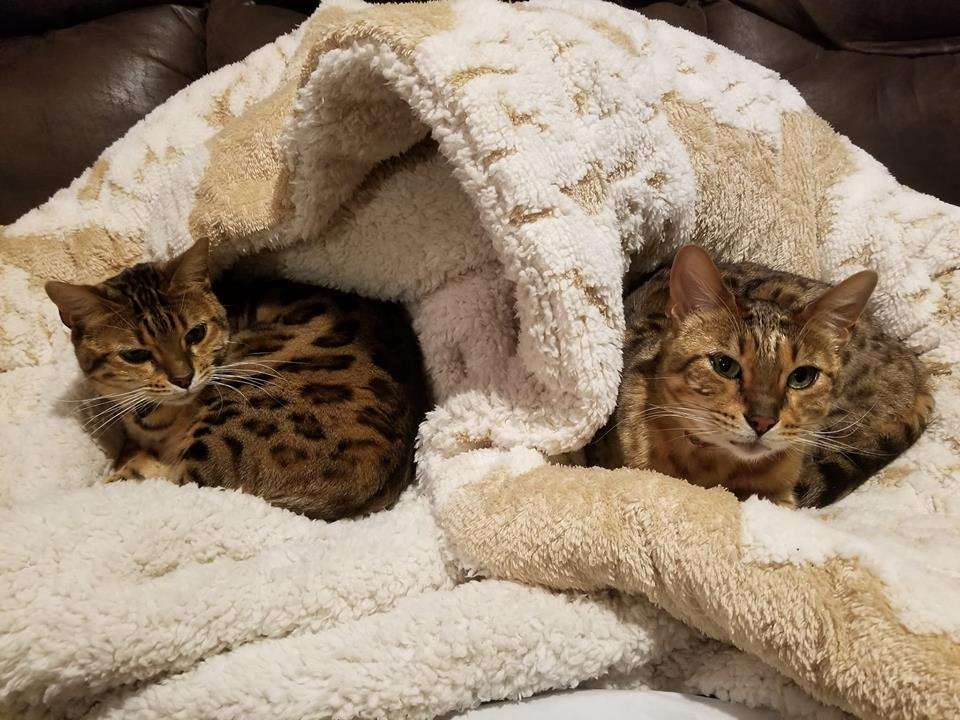
The cats, at least, approve of the idea!
Then I started running out of things… the order I’d placed for dye, rivets and other bits and bobs finally showed up January 3rd or so but in the mean time, I got creative about a few things.
Briefcase / Wet formed Handle test
I set out with three things I wanted to learn:
- How easy can I make this to assemble?
- How well will ‘fold in tabs’ work as side panels?
- Can I make a comfortable feeling handle with a little water and some stitching?
Lessons learned from last time
I was really unhappy with the side panels on The overnight bag of 1,000+ stitching holes. They puckered in the corners in a way I just felt was unsightly. The attachment of the top flap to the main body was also a bit disappointing. Plus the longer I used the bag, the more I found myself reaching for a handle on the top that just wasn’t there. And the stitching? I loved the effect of 5 panels alternating colors but OMG was it a ton of work!
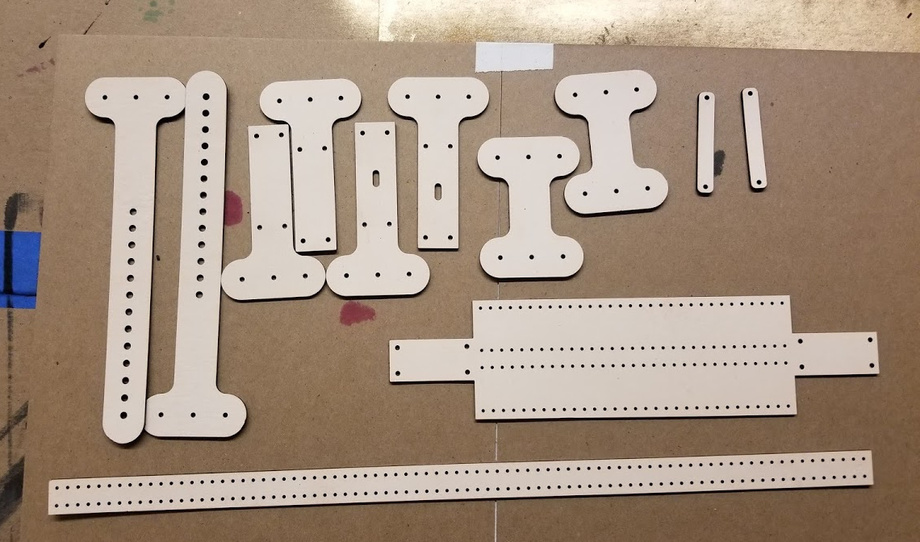
This time, I went for easier. Two panels for the body with a center piece for a little structural reinforcement cut the stitching down a lot. The top flap I did in a single piece. I eliminated a good amount of stitching by using rivets for all of the connectors.
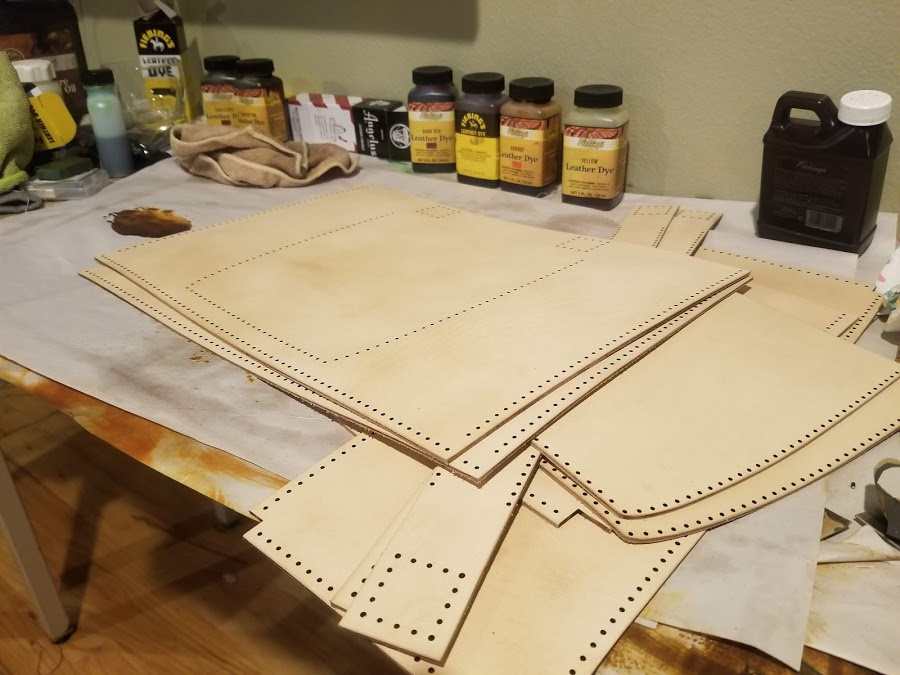
What I wound up with, as a pile of parts, looked about like this:

And this…
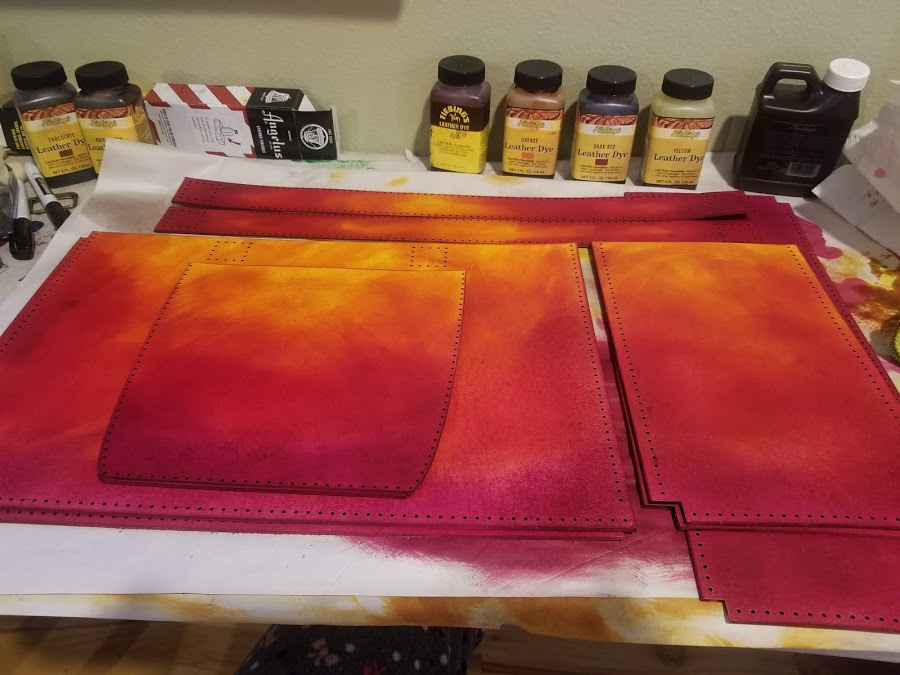
It took most of my remaining brown dye and in my efforts to make sure I had everything just covered, I didn’t get the most even application of dye but as a ‘proof of concept’ piece?
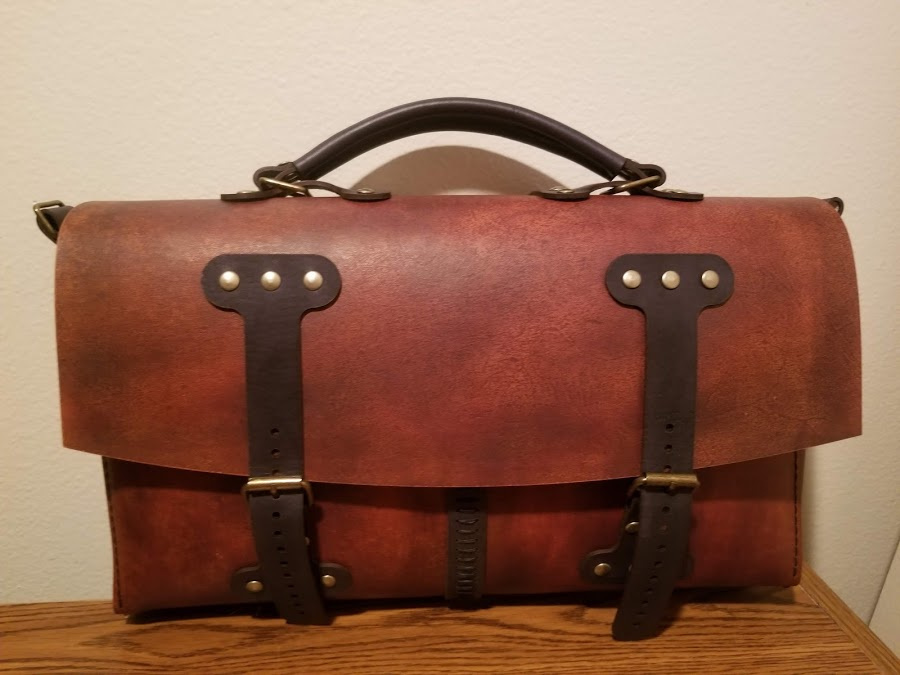
Not too bad.
The fold in sides did exactly what I wanted them to do:

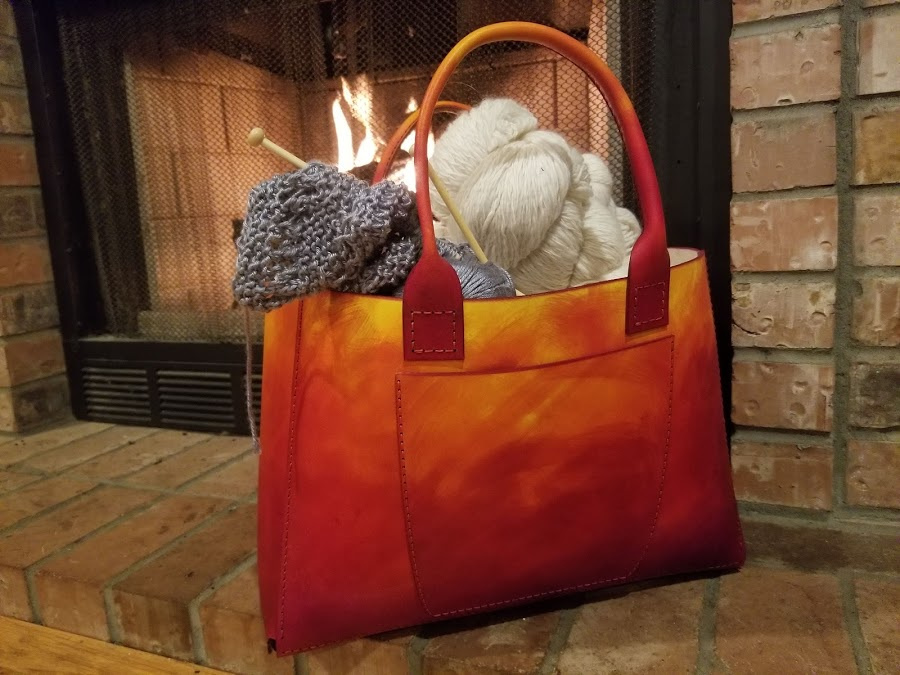
And that top handle?

Everything I wanted it to be!
Lessons learned from this one:
- Rivet over kill. I was worried about the weight that could wind up in this thing, especially if that weight included a laptop. The rivet count was really excessive (and was responsible for running me out of rivets.) I might do a version of this in the future that cuts down from 3 rivets per connection to 2 rivets per connection. It certainly needs some more stylish touches on those than the generic oblongs! Still, it holds up to what it was intended to handle.
- That center seam is insanity. It isn’t a saddle stitch. Running 19 inches of this stitch in one go with a single piece of thread would have been unwieldy as all get out. I had to do it in two sections and meet in the middle. Looks good though!

Knitting Tote - And more handle testing
What do you do when an idea works? Iterate! So, armed with the last round of success, I set out to build something for my mother-in-law that she’s needed for a while: A bag for knitting projects. The challenge? No rivets and not much dye to work with.
So, what do you do when your dye selection looks about like this?
Get creative ![]()
I left the interior undyed deliberately. The last thing I wanted to happen was for dye to leach into any yarn that might get stored in the tote. Bonus: Not dying the interior saved a lot of dye!
This time around, I did something a little different with the handles.

Super simple, single row of saddle stitching down the edges. Still needed to be worked wet but the end result gives you a seam that faces inward. When you pick it up with both handles, you barely notice the seam.
The corners need a little work, but overall…
I called this one a win.
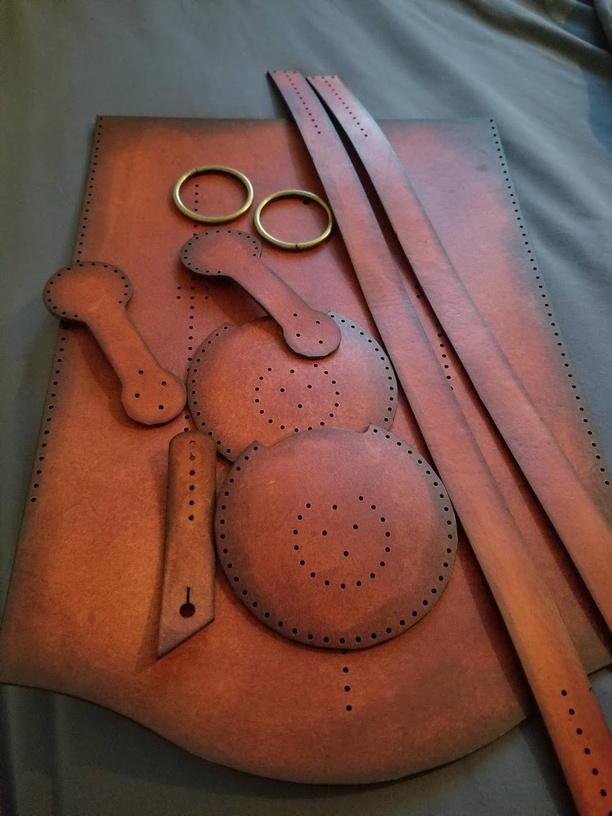
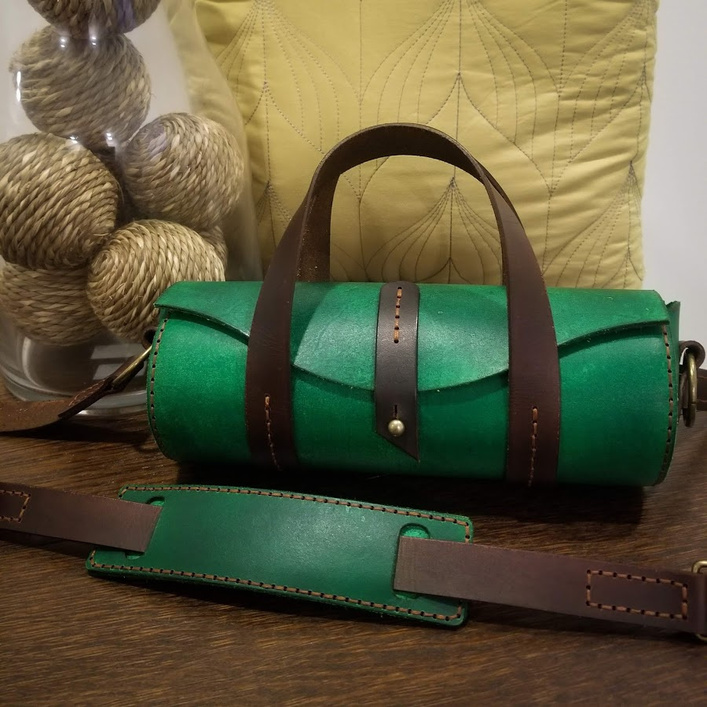
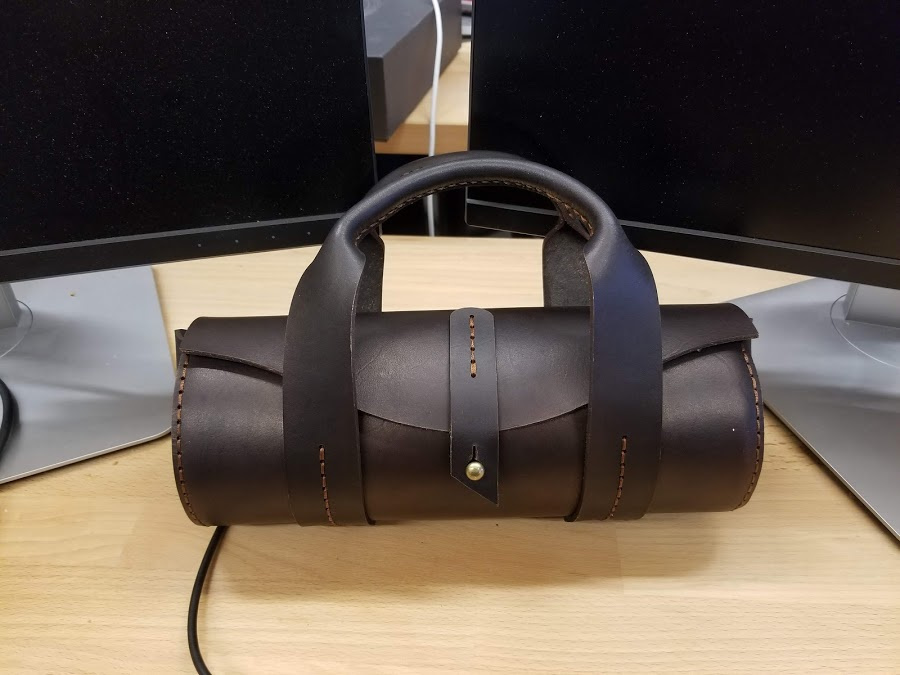
Let’s try round
I’ve mentioned elsewhere but I’m a big fan of Tony See’s patterns (http://dieselpunk.ro/) and around the holidays he gave away a simple round bag pattern that I thought would make a great quick gift for a few people. Also, I barely needed any hardware.
My first go used the last of my British Tan and a little bit of dark brown for edging…
And I learned that there is a right way and a wrong way to attach the handles. This is the right way

It looks so obvious when you look at it that way that I really have no idea what I was thinking when I did my first pass at it. As end results go, it didn’t turn out half bad:

But… remember that thing about iterating? I needed a strap. Building straps with 12" x 20" sheets of material isn’t really my favorite thing in the world and some day soon I’m going to break down and buy a pack of belt blanks just for the number of bag straps I find myself needing to make, but, in the mean time… I built another bag.
Just one problem. I was seriously running low on dye. I’d used the last of my British tan and I only had dregs of brown… the reds were pretty depleted… so, time to get creative! Green, oddly, I rarely use outside of doing rainbow pieces for Pride so I had plenty of that. But just green would have been a little boring. Solution? I poured my Brown, Dark Brown and Chocolate (yes, they really are all different!) into one bottle of Franken-Brown to use for all handles and straps…

And I whipped up a quick shoulder strap that I would rather have riveted but… a rectangle of stitches let me get by:

And in the end gave me a nice little bag:
But… I’m me and I can never leave well enough alone. So, when my dye finally showed up I did one more run at the pattern, riffing off the handles I did on my mother-in-law’s tote:
Now all I have to do is work a zipper into the design… and maybe a slightly larger version as a tool bag… and some steampunk gears for the ends… you know, just a few more iterations ![]()
Bonus Tips
Briefcase handle
If you’re designing a handle like the one I used on the briefcase, you wind up with something that looks like this:
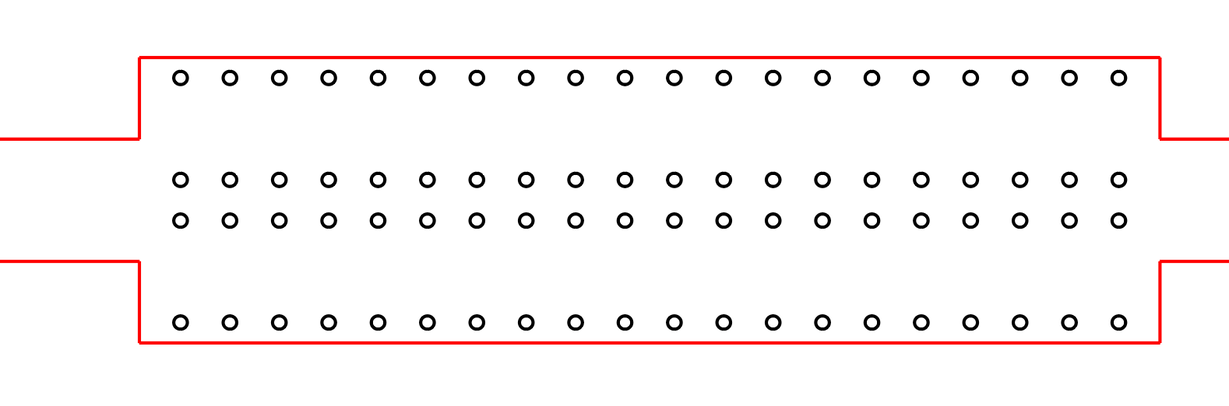
The spacing between the two inner rows of stitch holes should be twice the distance from the edge to the first row of stitching holes. In this sample, the stitching holes are 1/10th of an inch from the edge, so the inner row of holes is 2/10ths apart. I used a saddle stitch and kept the leather wet while forming the handle working one side at a time. You could, however, use an X shaped stitch and do the whole thing at once… just be prepared to be pulling hard on your thread.
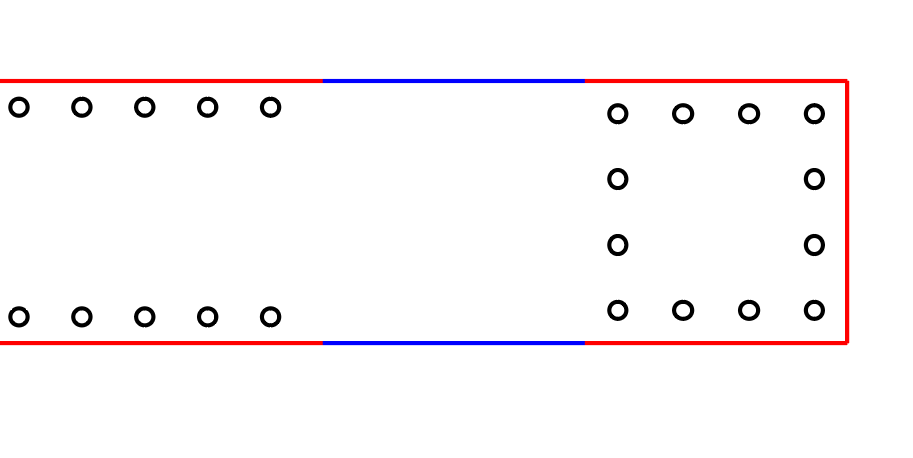
Fold-over handle
These things are wicked easy to set up. When you do, however you attach the handle to your piece, give yourself a little space between the connection and the first stitch of the handle seam (shown below in blue.) That space will give you room for a tapered transition from your handle to whatever you’re attaching it to.
Happy crafting everyone ![]()