Hi, I have been working to find a nice computer stand design for quite some time and found multiple designs. It is a need for me has a tall person for ergonomics.
Here are the version and iteration.
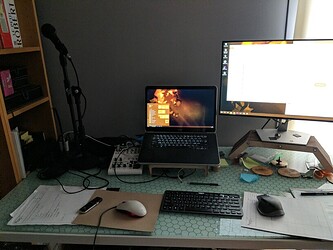
Laptop stand
Laptop Stand free design from me
See there for my design history
Strong arch design
I liked the layered design from the glowforge publicity, but I found they used a lot of material. Also, I needed a quite large stand width, which was wasteful in material. So I engineered a design where I used threaded rods to hold angles.
I used 3- 1/8" (I think) threaded rod cut to length and chicago screws to hold the two ends, tighten. I would change it by adding round spacers. But it was also quite wasteful (designed for 1/4" birch ply)
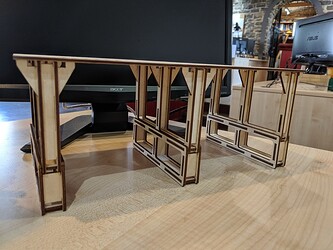
Scaffold design
Then I thought of a scaffold and building design. It was way more compact and modular to adjust the height.
The top part are in 3 height (40mm, 80mm and 100mm) and the add-on (40mm) under creates 2 more (120mm and 140mm). It was way more successful, being asked by my workplace to provide to everyone. around 2 sheets of 1/8" ply per assembly.
Interesting design. It isn’t perfectly tight at the joint between the panel and the trusses, (needs more lateral support, bracings) but it is resilient and except in a real intense earthquake, it will mostly get back to its stable state.
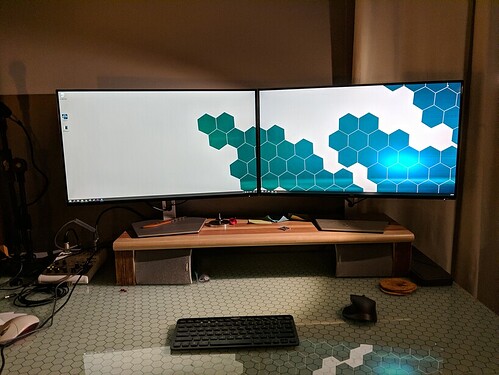
Plank design
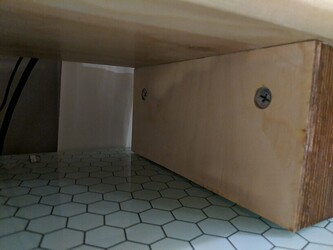
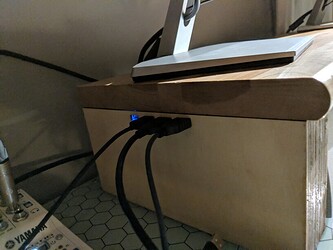
Now, at home, I wanted less clutter on my desk and I changed to a desktop with two monitors. I designed my monitor stand so my speakers would go flush under. I also integrated a USB hub in the left leg. Finally, I used free IKEA assembly components to hide the joint.
The top board is in fact a stair step (10"x30"x1"). The legs are layered 1/8" ply to build the inside mechanism. The hub is an Incipio USB-3.0 Hub that I disassembled to the board and cable.
The USB leg needed a bit of adjustment after assembly, the board cable isn’t well aligned. The general design is great, but the glued layers of the legs drifted at assembly which would need large sanding (which I don’t have) to even and level the legs, a holding/ tightening jig (which I didn’t do) to prevent the drift or holding pegs/screws through the design (which would show)).
So ya, my exploration in monitor stand.
Feel free to take the files
