Hi everyone! I wanted to share an exciting minimal leather wallet project that I’ve been working on since the beginning of April 2018. This is my first post in the Glowforge community and I’m hoping to get more involved with all of the creative people on here! So without further ado, here’s my first leather project on the Glowforge including some issues and solutions that everyone who has worked with leather on a laser cutter has probably encountered.
1. Choosing the leather for this project
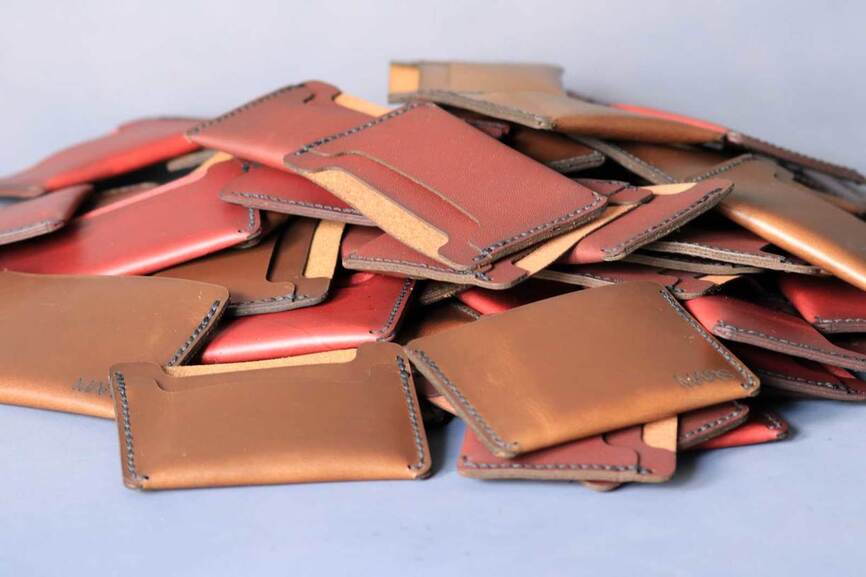
To make this project a fun learning experience for me, I decided to make 100 leather wallets with a minimal design starting on the 1st of April (no this is not an April Fools Joke!) and finished by the end of the month. Starting this project off, I chose to use 5 different types of leather, which you can see in the photograph below. The photographs show 6 different types of leather, but I decided not to use the midnight blue one at the very top of the pile. All of these leathers have been dry split to about 2.5 or 3.0 oz, which I would consider to be roughly the same thickness as the “medium” proof grade leather.

2. Laser Cutting a Prototype
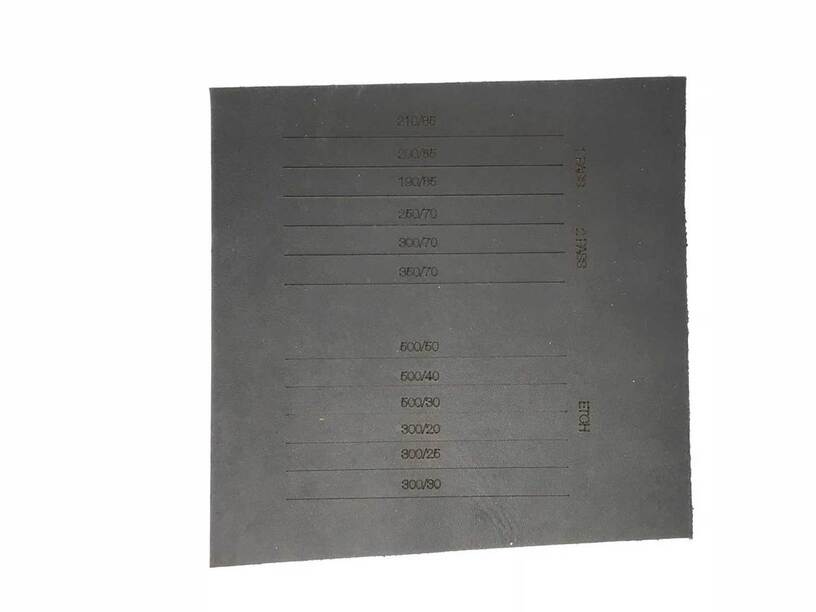
Since this was my first leather project on the Glowforge, I decided to laser cut a test piece and try different settings. This was a simple square piece of leather where I had approximately 12 lines; 6 to test single and double pass cuts and 6 to test engraving settings. This is probably the smartest thing that I did because it helped me set a standard range for all of my future cuts with this thickness of leather. I hope this helps some of you out there who are looking to work with leather on your Glowforge.
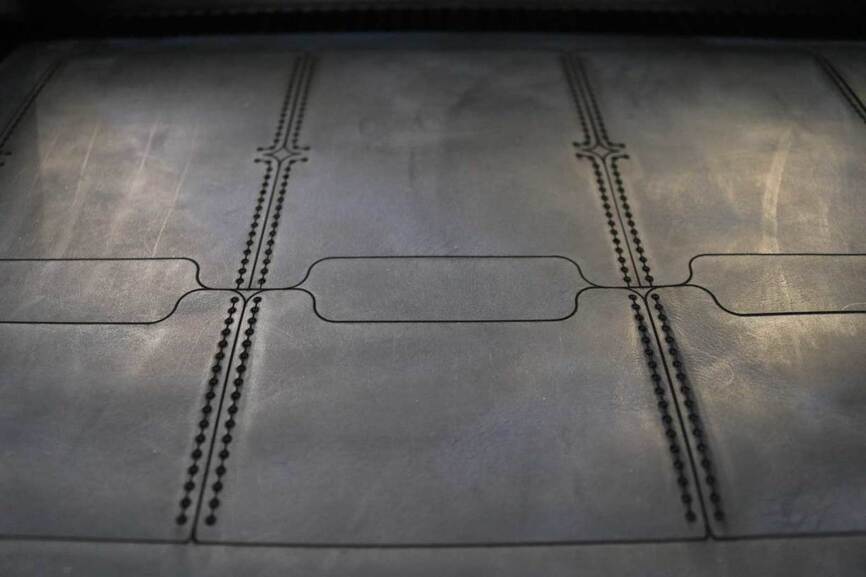
3. Test cutting a design made from CAD and Adobe Illustrator
As an architect, I’ve used many modeling and drafting software throughout my career so I was fortunate enough to be able to design the leather wallet using an architecture software called Revit to an exact scale and import the drawing into Adobe Illustrator where I assigned my cuts and etch layers to different colors. This allowed me to adjust the power and speed settings manually on the Glowforge. Again, this was my first time using the Glowforge, so I applied some of my previous knowledge of laser cutting in architecture school to test these settings. Ultimately, the test cut went well! Although I didn’t tape down the edges of the leather to the crumb tray, I made sure that I ran my hands across the surface of the leather to ensure that there weren’t any debris or residue beneath the leather. This way, the leather can lay flat on the cutting bed.
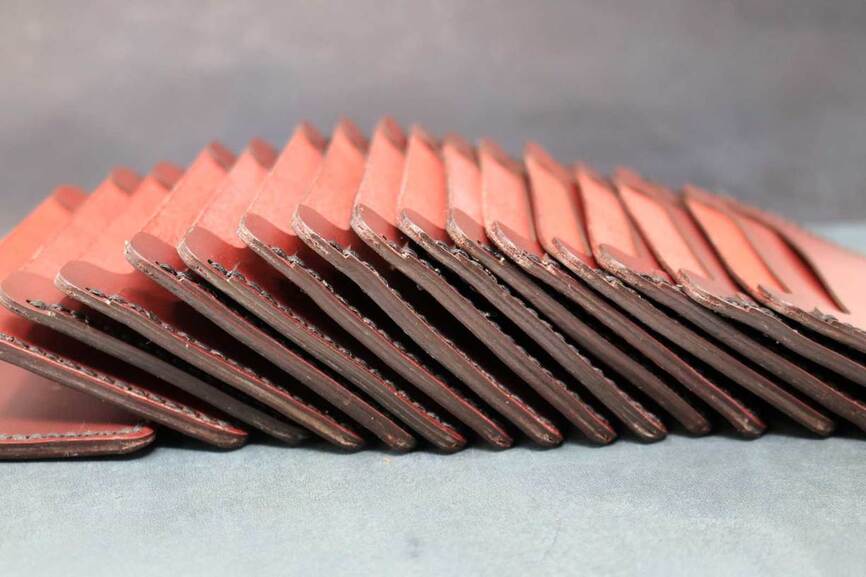
4. Cutting the selected leather for the 100 wallet goal
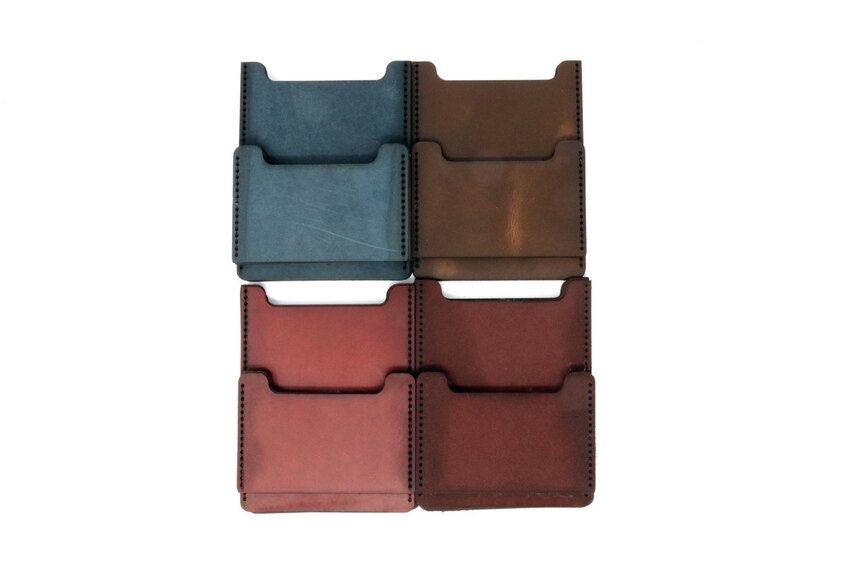
With the settings fine tuned, it was time to cut the leather that I selected for this project. Although the picture below only shows 4 colors, the last one was a black leather that was just as beautiful as these. I cut 20 of each color leather and stacked them together outside of the Glowforge. After they were all cut, I ran into the issue of soot on the edges and in the stitching hole cutouts. I haven’t figured out a good laser cutting setting to avoid the soot, but I’ve found two cleaning techniques to be very helpful. The first is to carefully clean the areas using a toothbrush and pumice soap. Gently brush the areas that need to be cleaned and wipe off with a lightly dampened cloth. The second method is to stack a bunch of the same cuts together and use a non-scented baby wipe on the edges. If etching a surface, let the baby wipes dry out a little bit before lightly pressing on the etched areas and simply dabbing until it’s clean.
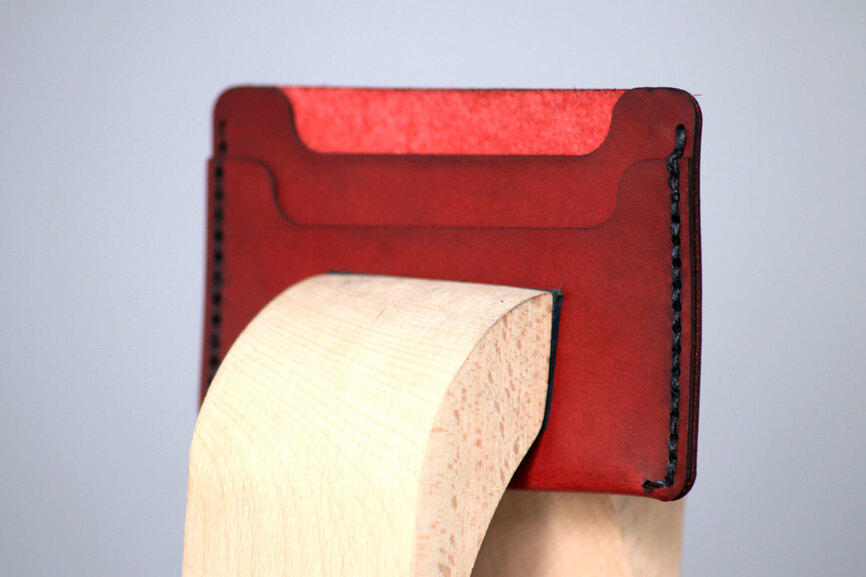
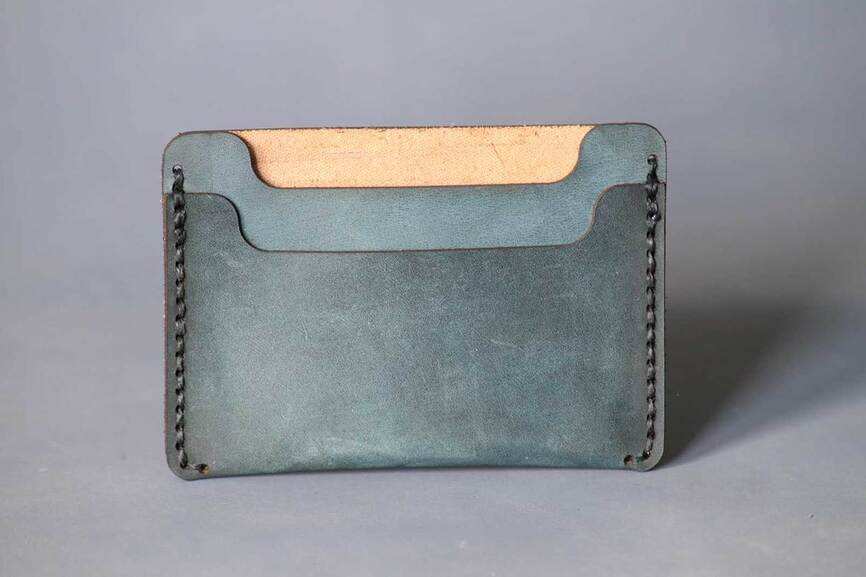
5. Stitching the leather wallets
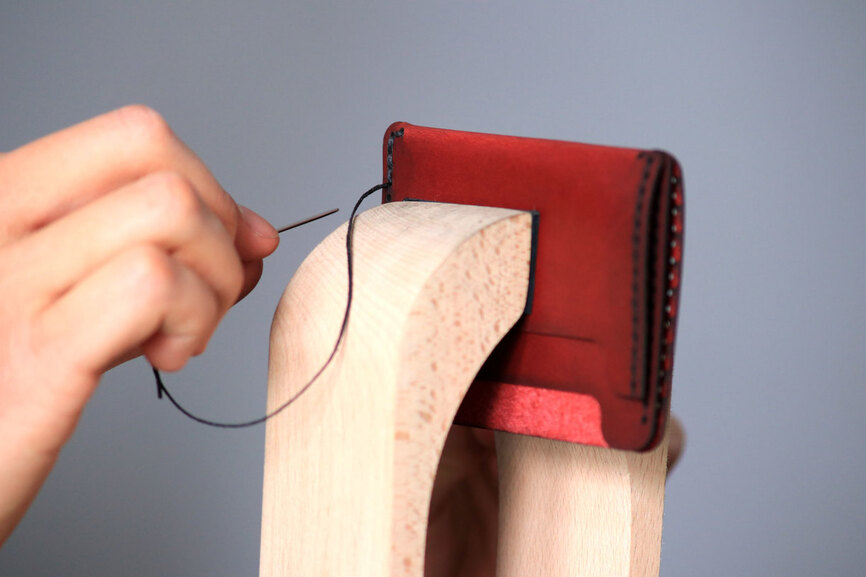
Then, it was time to hand stitch all of the wallets. One of the things that I’ve chosen to do is to stitch all of my wallets by hand without the use of glue. This probably goes against a lot of the standard practices of leather making, but it’s a choice that I’ve gravitated towards as a leather maker. Using a stitching pony, I used a black thread to stitch all of the holes together. If you’re planning to stitch a bunch of leather products in one sitting, make sure you have a comfortable chair and a good stitching pony set to a good height that works for you. Here are some photos of the stitching process and two of the finished products.
6. Burnishing the leather edges
Since this was a test project for me, I wanted to try burnishing the edge in a different way. Typically, you would use an edge beveling tool to trim off the edge at about a 45 degree angle, sand the edge down, and slick it using water, gum tragacanth, or another liquid of preference, and/or beeswax. For these 100 wallets, I wanted to forgo the step of beveling the edges and sanding them. Instead, I used beeswax to fill any small gaps and to give the edges a glossy and smooth finish. In the future, I’ll either use glue to hold the edges together or skip this step in its entirety because I actually like the natural raw edge. Again, I know this is not standard practice in the leather making industry, but it’s a personal preference.
I can definitely say that I’ve learned a lot about using the Glowforge for making leather goods and I’m excited to continue making leather products on this machine. There’s still a lot for me to learn and if you read all of this post until the end, I hope it made you a little more excited about the endless possibilities provided by the Glowforge. Please let me know what you think and feel free to DM me with any questions or comments. I’m excited to be a part of this creative community and I look forward to meeting you all!
Until next time, keep creating!
Tim Ung