Before cutting full sheets I created a simple template to see which settings where optimal for the foam-board with minimal foam melt.
I am using 3/16" thick 20x30" sheets of “Readi-Board” made by “R. L. Adams Plastics” and sold in many dollar stores for (surprise, surprise) $1 a sheet. This can be easily cut down to 20x12 sheets to fit the Glowforge giving two full sheets and a 20x6 scrap sheet that can be used for smaller parts and tests.
The problem with cutting foam-board is that the foam melts very easily in comparison to cutting the paper on either side. In an ideal world I would expect that a 3 pass cut would give the best results with:
- 1st paper cut at ~ Speed: 200, Power: 5, Pass: 1
- Foam cut at ~ Speed: 200, Power: 2, Pass: 1
- 2nd paper cut same as first.
Unfortunately the Glowforge app does not give this level of control.
So I tested what can be done easily and prints quickly.
Here are the results:
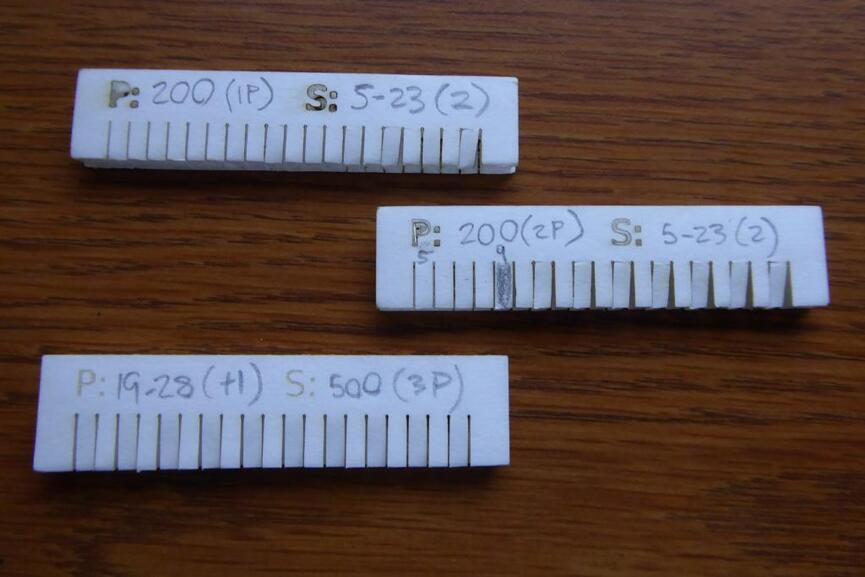
Had a dyslexic moment and wrote the settings wrong on the test pieces (above) switching Power and Speed in picture. Actual settings below (pieces aligned left/right by total depth of cut)
- Top: Power 5 to 23 using 2 step increments. Speed 200 using 1 Pass. “P: & S:” text using way to high engrave setting.
- Middle : Power 5 to 23 using 2 step increments. Speed 200 using 2 Pass. “P: & S:” still using too high engrave setting. This test was to determine whether the Glowforge would halve the power on 2nd pass, or use half power on each pass. As you can see by visible collapse it used the latter.
- Bottom: Power 19-28 using 1 step increments. Speed 500 using 3 passes. Engraved text using Speed 500, Power 5, 1 Pass which was spot on.
Here is the more informative pic that shows how the foam melted away when GF cut all the way through: (again aligned by total cut depth)
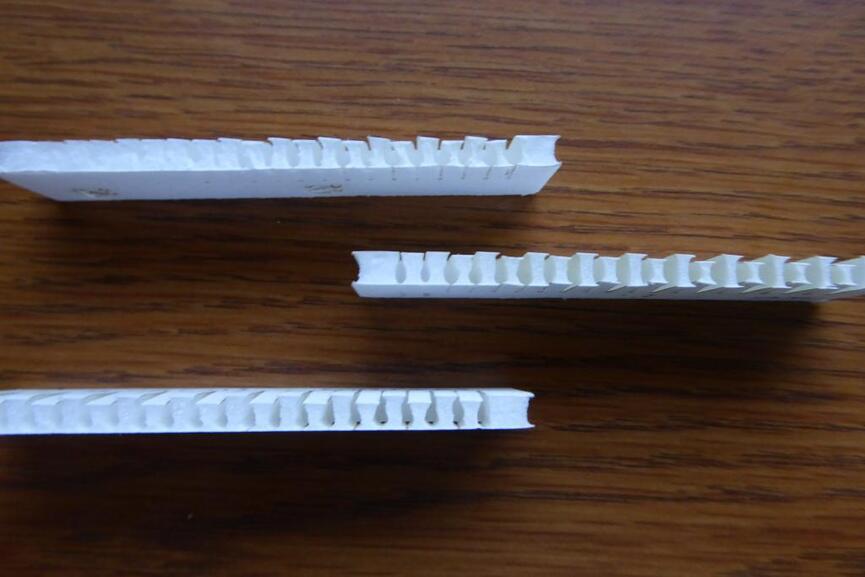
- Top: 1 pass - Speed 200, Power 23, made it through but really melted the foam.
- Middle: 2 pass - Speed 200, Power 9. Same depth but noticeably less foam melting.
- Bottom: 3 pass - Speed 500, Power 28. Did not make it through but was very close. Took longer to cut overall and appeared to be worse than 2 pass.
Best results (for my foam-board):
- Cut through top paper and not foam: Speed 200, Power 5, 1 Pass (for marking edge of bevel cuts)
- Cut through top paper and foam: Speed 200, Power 5, 2 Pass (for score cuts on A, B, C joints and other edge of Bevel cuts)
- Cut though everything: Speed 200, Power 10, 2 Pass (for normal cuts)
*** Engrave text: Speed 500, Power 5, 1 Pass (for marking pieces)**
Engrave:
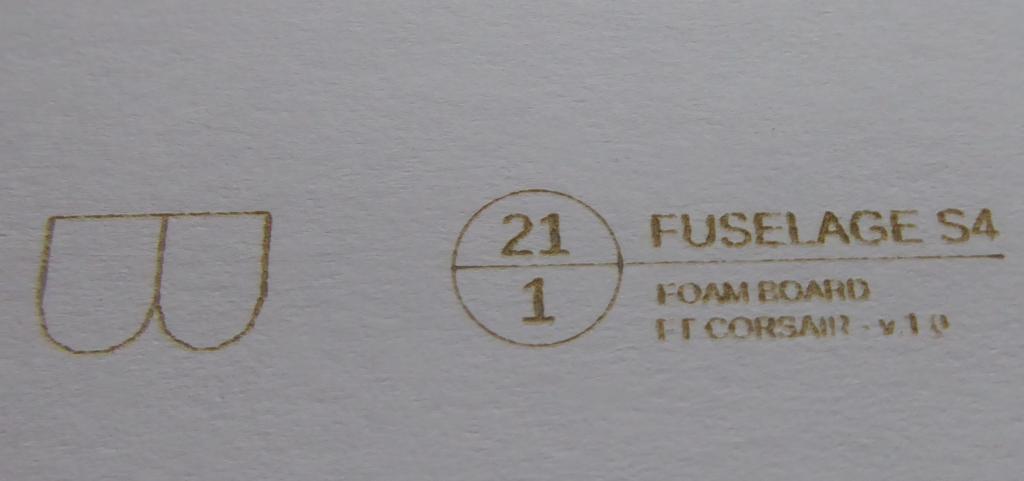
Engrave text, looking under magnifying glass, was optimal at last mentioned setting as it did not cut all the way through top paper, but provided good contrast to read.
- The big “A,B,C” fold type text is already an outline path (not font) and does not require conversion.
- The numbers in the circle are text, require conversion to paths, and are useful to identify pieces. This took minimal time to convert.
- The remaining text (right of circle) is not useful and takes a long time to engrave. This also requires highest engrave DPI and is not worth the time in printing as it takes so long.
Conclusion:
- Scaling total throughput does not equate same results. e.g. Power 5, Speed 200, 1 Pass is not equal to Power 5, Speed 100, 2 Pass. Second pass requires a slight bump in Power.
- Your foam-board may vary, but it may be a tiny Power amount that leads to different result (±1).
- Best to test using power increments of 1 once you are close to optimal settings.
- 2 & 3 Pass (double or triple power) - this results in reduced total power control as steps are 2 or 3 times output. You may be better off at 1 Pass to fine grain cutting control.