Alright I finally got around to pulling my first design together all the way through from Fusion to Inkscape and then back out as a SVG. First credit where credit is due:
-This design is based on dimensions created by Theo Jansen and not myself. If you’re interested in learning more about Strand Beests go to his website or YouTube. Seriously. They’re amazing
-Special thanks to @Jules@markevans36301@marmak3261@takitus and probably several more who I can’t think up right now who have been so helpful in throwing hints out on how the design flow works, it was actually a breeze to move all this through from F360 through Inkscape and then here but only because you guys have been so helpful.
There’s a few instructions/warnings that go with these so here they are:
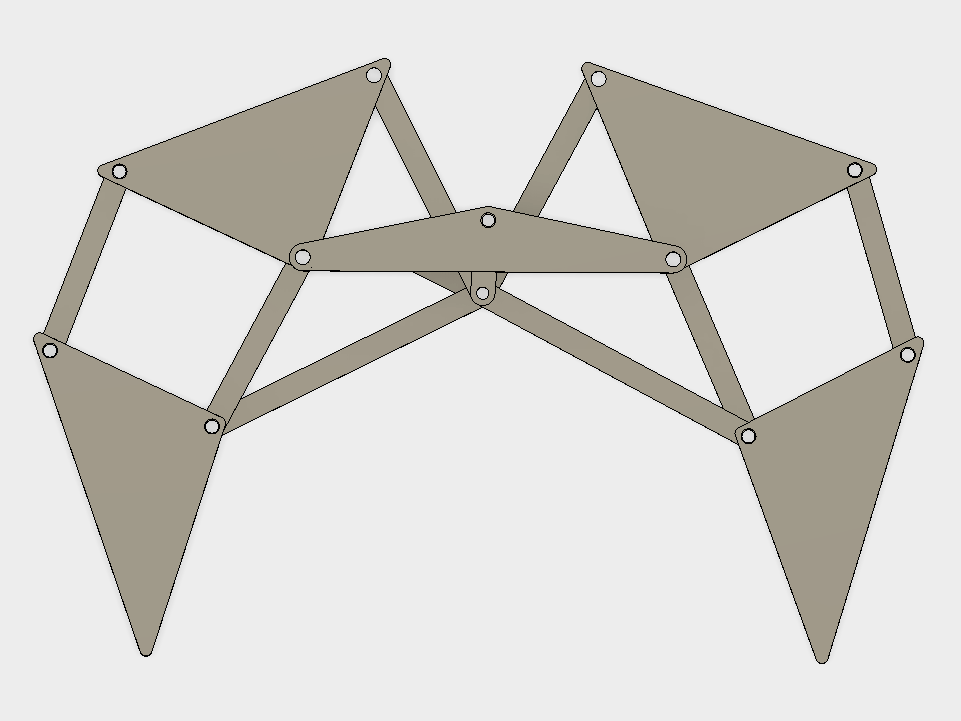
There’s supposed to be some magenta letters and words, these are there as an assembly guide and intended as a no-print layer (if they aren’t there let me know and I’ll try to reload). Lining up all the same letters on the same pin is half the battle. Knowing the layer order is the second half we’ll get to that
This file was designed assuming a .25" dowel for the pins. If you have a different size dowel you’ll have to change the hole sizes
The holes in the triangular leg pieces, the driver and the outer holes on the structure piece are press/interference fit. Super glue is your friend, just a tiny bit to make sure nothing slips
This file contains only what you’ll need for one leg. You’ll need at least 3 leg pairs to make a functional Beest. You need one more structure piece than leg pair so it’s on a different layer (blue) so you have the option to not print it every time you need a leg. (for example if you want 3 leg pairs you need 4 structure pieces and you’ll be printing 6 legs total so you’ll turn it off the last couple leg runs)
Layer orders for each pin are as follows (from the ground up assuming you lay the first piece down and stack the rest) and are the same for all the legs which is important for rotational symetry reasons just trust me:
A: Upper Leg-Spacer-Spacer-Upper Driver-Upper Leg
B: Structure-Spacer-Upper Leg-Spacer-Interior-Spacer-Upper leg-Structure
C: Upper Leg-Spacer-Exterior-Spacer-Upper Leg
D: Lower Leg-Lower Driver-Interior-Spacer-Lower Leg
E: Lower Leg-Spacer-Exterior-Spacer-Lower Leg
F: This one’s tricky, the Driver piece goes on the outsides, you have to mesh together two legs in 4 layers in between, will be Driver-Upper Driver- Lower Driver-Lower Driver-Upper Driver-Driver
G: Driver-Structure-Driver (On the outer most structure pieces you will either want a press fit spacer or shorten the pin)
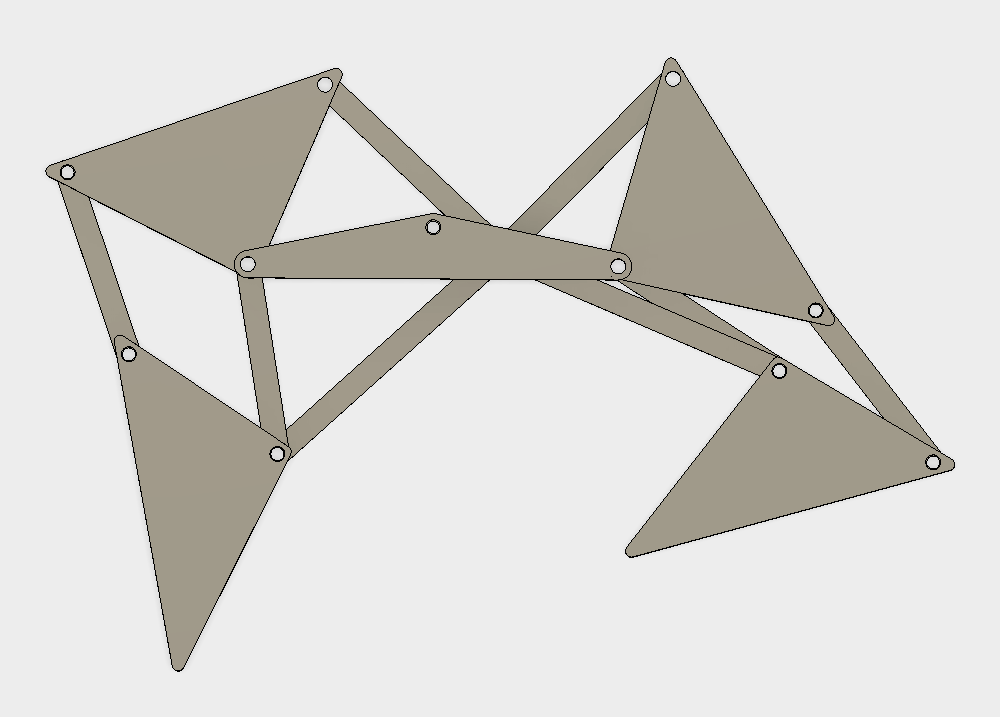
I encourage customization. The only things that you have to maintain is the distances between the holes. Carve it up, add art, go crazy. This also means that you can shrink or enlarge the design as long as you keep ratios the same.
You have saved me many hours of work. I’ve been working on a Strandbeest design and have been starting with it. I’ve got the basic concepts and a few good references bookmarked. There are a few public models in the OnShape library that I have been eyeing. I’ll give it a whirl.
Thank you so much! I’ve started one on a 3d printer but have never finished it. I’ll look forward to making this in that glorious time when my glowforge gets here!
Second, wow, I’m actually blushing to get a mention as helpful along with three of what I consider three of the most helpful folk I know! When did this happen?
Finally, a question. Did you model the whole beast in F360 or just a single set of legs? Anyway, great work. This will be a huge time saver for anyone wanting to build one.
You earned it, I pulled up my bookmarked stuff from you and jules and marion about work flow and didn’t hit a single snag along the way. It was great, assuming that someone tries to pull this in and it works which is still unknown. I made all the components and then made several different assemblies. I have one leg, a leg pair, and I put together 3 sets of leg pairs but fusions being fussy with the angles and sometimes the legs invert in a crazy unfixable way so I didn’t post that here. I’m happy to share the folder with anyone that’s interested
Out of likes, but I totally like this and it’s bookmarked. I am giddy with what I will learn making it. I don’t understand how they work; but I think they are fascinating. Doing is learning.
About lasering, assembly, mechanics, motion, and more.
Thank you
Wow, you did a great job! The Lynda.com tutorial for Fusion360 walks through making something similar and I had a lot of trouble following it (they left out some steps), so your even more complex model is quite an achievement!
I just glanced and the Lynda tut and I couldn’t see much without signing up but my first problem right off the bat is that the design they made isn’t something you could actually build which always seems silly to me. Why waste people’s time designing things they’ll never be able to make. Any idea what steps they skipped?
Can’t remember exactly, it was a while ago. It’s just that one of their lessons ended with the model in one state and the next picked up with it slightly different and I couldn’t figure out how they got there. It was one of those things where it was probably so obvious to the instructor that they thought it was trivial, but it wasn’t to me.