Our Glowforge no longer cuts through materials. We’ve gone through it and cleaned it thoroughly 2 times, following the guidance here (general wipe down, laser lens, lid camera lens, the 2 windows, I even vacuumed out the exhaust):
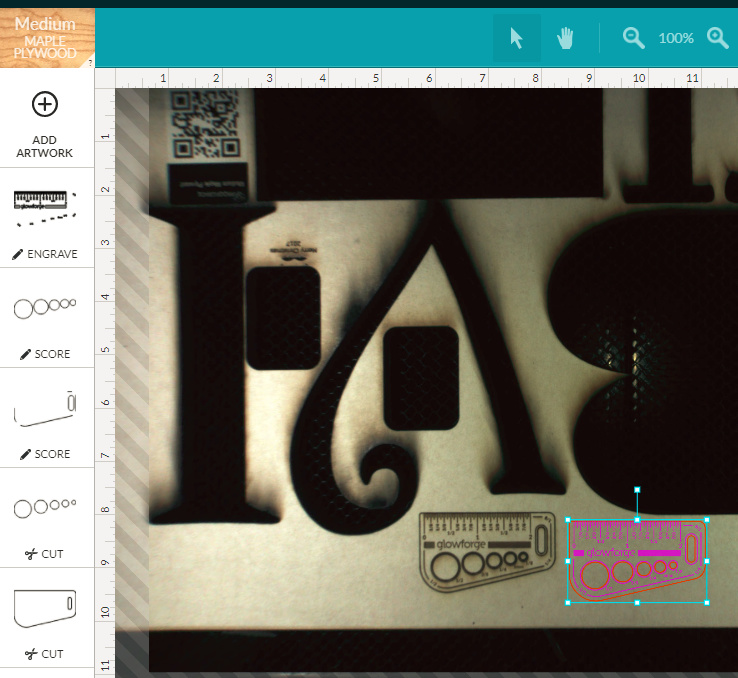
I’ve attempted to cut out the gift of good measure keychain after the first cleaning and then again after the second. Here is the laying out the print:
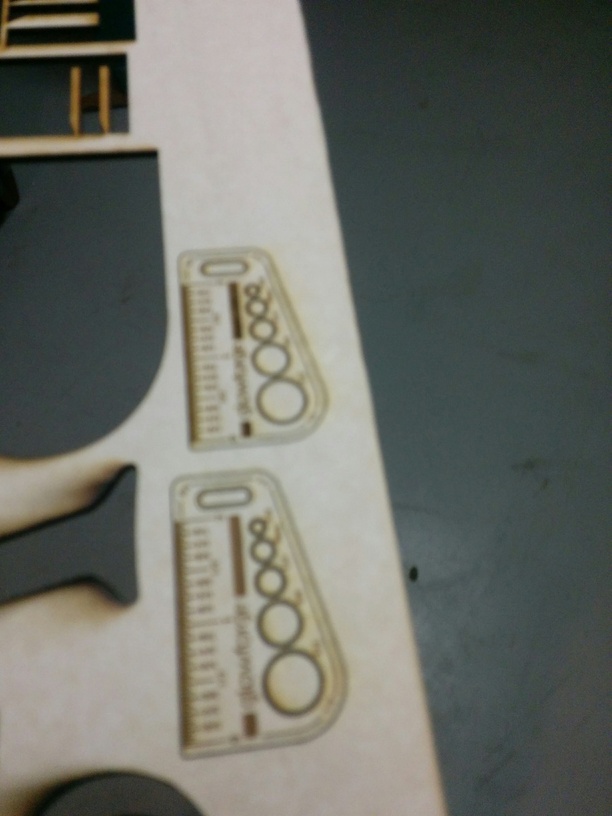
Any input? Prior to cutting out the the gift of good measure keychains I tried slowing the device down and cutting out one of the simple key chains, upping the number of passes to 2. It also didn’t cut through the material.
Any input on why this might be occurring or how to remedy the situation?
Thanks for letting us know. I’m sorry that your print didn’t come out beautifully!
To cut successfully, there are three important things to check. First, your material must lie flat. This requires a clean, properly installed crumb tray and flat materials. Second, there must be no obstructions, dirt, or damage preventing the laser light from reaching your material. Third, your design must be set up properly - for example, with lines that are fully on the material and that are set to cut.
Since you’ve already cleaned and checked your material for warp and are printing one of our designs, I suggest you check your machine for debris per the instructions in our troubleshooter.
Once you’ve finished inspecting, please try printing the Gift of Good Measure one more time. We included an extra piece of Proofgrade Draftboard with your materials shipment for troubleshooting. Please print another Gift of Good Measure on Proofgrade Draftboard and let us know the result. If it doesn’t print well, please let us know the date and time of your print and send photos of the front and back of that print.
Thanks for the response. We went through and cleaned it out again, making sure to empty the crumb tray thoroughly, ensure lenses are clear, and design set up properly (not outside of the cut-able range). Same result.
Two questions:
At the top of the print head there is an access panel held in place by magnets with a blue plastic piece passing down into the printer head. Is that a source of potential alignment issues?
The prints are fascinating in that it appears that the power being used for “cut” is the same that’s used for etch. After the job has finished the “cut” lines are the same depth and characteristics as the “etch” lines. Is there a way to factory reset the device or any internal device configuration? Similar to clearing the check engine light codes on a car.
That is a clever way to do it. I removed that when thoroughly cleaning after printing a Dymaxion Globe (Dymaxion Globe - Optimized for Glowforge!) and having the cuts not travel all the way through the board. All that etching also made quite a mess.
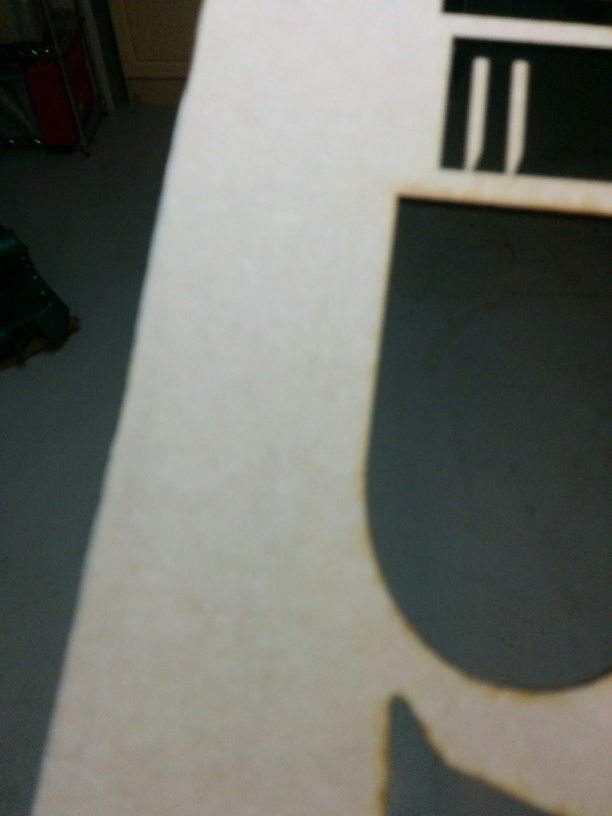
After replacing it the gift of good measure etches are coming out looking correct but it still won’t do a cut.
Progress. Is the lens in correctly? If you got it in upside down it won’t focus correctly and won’t cut (continual problem with the Chinese lasers). If you use the lens tool, it shouldn’t go in backwards, but figure it’s worth checking.
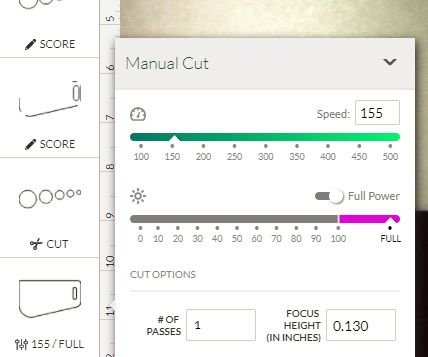
Would you open that file on the Proofgrade Medium Draftboard and select Cut, then go to the Manual Cut Settings and tell me what you see listed there for Power/Speed and Focal Point?
Sounds like there might be an incorrect setting that is overriding the defaults. (I had that happen once about 3 weeks ago…I think it was from switching from another material to PG, and a saved setting got loaded.)
Anyway, it might be a one time thing…after I reset it to the correct value, it never happened again.
Yep, sorry…had to get dinner. @jamesdhatch is correct, those numbers are close and should cut through, except for one thing - the focal point listed is a little bit high, which means that you are trying to cut through defocused.
If you want to run one other test to see if it changes things for you, try changing the Focal Point to about 0.12 inches. The actual measured thickness that I get on the Medium Draftboard is 0.123", but they seem to like to set the FP just slightly under the surface.
I’d be interested in seeing if that lets it get all the way through with the cut.
Yeah, my default is 0.125" as well for the Medium Draftboard. I wanted to see if setting it just below the surface doesn’t get it through. I generally measure a thickness on the Maple ply in the range of …
Holy Eureka! I just discovered something…
The recent batch of maple ply has significantly shifted from the early beta Maple ply thickness. That used to run in the 0.134- 0.136" range and was tough to get through. For that a FP of 0.130 was sitting just below the surface.
But I just shot a measurement on the recent batch of Maple ply that came with the machine (November) and it is only measuring at 0.121". So there might be a lot of unfocused cutting on that batch of Maple ply from a lot of machines. (There have been a lot of incomplete cuts on the Maple lately.)
I just did another pass confirming .125" on the medium draftboard and it made no discernible difference. For cuts prior to this issue beginning it seemed like the strength of the laser was increased for the cut, this may have simply been a misinterpretation.
I’m on the Basic model if it matters.
I removed a questioning whether to lower the focal point to 1.20. Please DON’T DO THIS. This thread tells the sad sad tale of poor @logan_liskovec whose laser tube shattered this evening.
Ugh, now I’m that guy… While it’s certainly better to be safe than sorry (as I am), could that have made really made a difference? Truly curious to understand if such a small focus height change could have caused this?
I’m really not sure but am curious as well. Jules just commented on your thread and indicated that it sounds like you received a bad bulb and that the GF support folk would take care of it for you.
I’d like to understand what the expected constraints are. Can I put a piece of cardstock in there and cut that? Certainly I wouldn’t expect the bulb to break.


 No, changing the Focal Point did not cause the tube to shatter. Sometimes there are bad bulbs. Truly sux that you got one.