I reached out to support last week and hearing a response back from the emails I sent last night with pics but thought I would try my luck to get some help here.
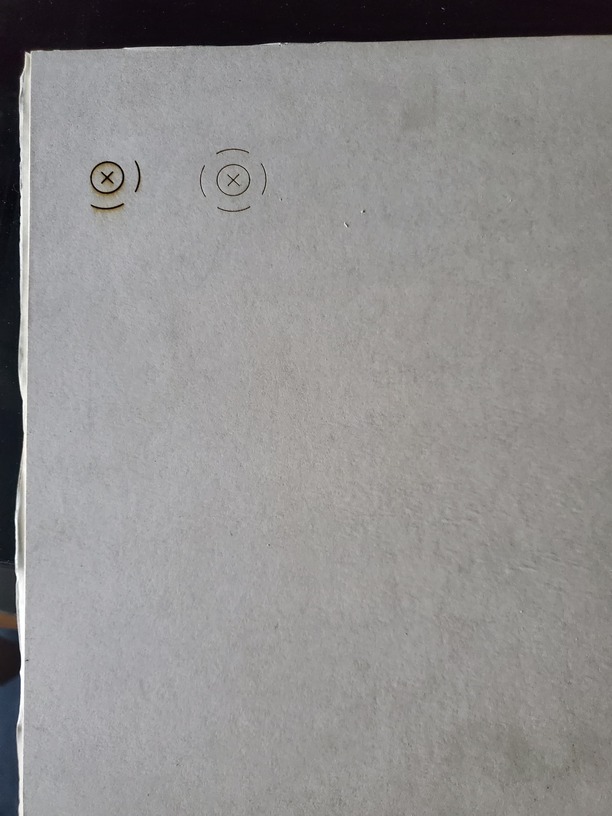
Just an FYI, I went through the entire process of cleaning and did a calibration test twice (based on the other thread in this forum) but it is still off. Check attached image named test-2.png
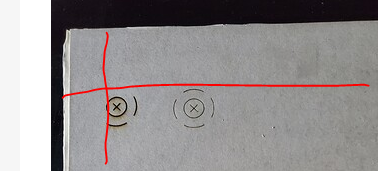
It is also important to note, that when I printed this calibration test, I placed the calibration image on top of the board almost touching to be exact and you can see from the second image attached named print.jpeg, when it prints, it prints much much lower then where I originally placed the image in the software.
Any help or recommendations is appreciated. Thanks.
Posting here opens a second support ticket and slows the response sometimes.
The camera shows the printable area, so a complete Proofgrade board of 12 x 20 never shows the top of the board. If you look at the printhead in the home position, you will see that there is material behind it. It cannot print behind the home position or any further left. The actual cutable area is about 10.9" x 11.5". You should always orient your design and material relative to the lower right corner. Also, the camera is most accurate with designs placed directly underneath it, and the Glowforge stated tolerance for camera alignment is within 1/4" I believe.
Thanks for the reply and that is good to know. Seems a little weird why the entire scale of the bed wouldn’t print but based on your response I guess that makes more sense of how its printing then. However, during the calibration and the picture, it does seem like it is off at least a good 1/4 of an inch. Based on what I see people posting and their calibration pictures, they seem more on point then mine. I will try again, but this time starting with the lower right corner to see what type of results I can get from that. However, when your printing things that need to be specific, a 1/4 of an inch makes a big difference on the end result.
I appreciate that. Lil hard to wrap my head around why it is done this way and why not just show the entire table without having to figure out the correct measurements to print. I can see why someone else mentioned to start from the lower right corner. I guess it would be more accurate to start from that point. Thanks!
The lid camera is a fisheye lens. Most users get fairly precise placement with the camera if the set focus tool is used properly. Using the placement tool also helps a great deal for placing artwork in the desired location, and for absolute precision jigs are the foolproof solution.
The reason for doing it that way is the head cannot physically get into that corner, but people wanted access to larger material - you can also push a good 3-4" into the back if needed - but you’re not cutting up there
The printable area is 10.9" x 19.5". You do not lose an inch off the side, but you do off of the top. Also, if you are engraving rather than just cutting, the print area is reduced. The printhead needs room to accelerate and decelerate and therefore if you are engraving your design you will not be able to use the entire area.
Thanks for the response. But I noticed, even if I am not using a full bed print material, something small, it still does not align up properly and it is still off like an inch down and to the right?
Hello! @tommyliquori I am sorry to hear about the alignment trouble you are having. I will do my best to get this issue resolved. It looks like you got some great advice from our forum members regarding the bed size print area.
Also, I have a few steps I can offer which will help us identify alignment trouble:
Turn off your Glowforge.
Check for small pieces of debris or dust.
Check the lower door to make sure it closes all the way. It may require some force to open, but open it, wipe any dust off the edges, and close it all the way.
Remove the tray and clean any dust or debris from the surface underneath. Pay careful attention to remove all debris from the four dimples where the tray rests.
Check the lid to make sure it closes all the way. Small particles of material, such as dust or debris, can prevent it from closing completely.
Check the surface your Glowforge is on to make sure it’s flat. Ensure it is not twisted slightly and that there is no debris propping up one side of the machine.
Turn your Glowforge back on.
Place Proofgrade material in the part of the of the bed that you are having the most trouble and print the Gift of Good Measure using the default settings.
When the print finishes, leave the lid closed and wait until the fans stop and the picture updates. Without moving your artwork or your material, take a screenshot of the Workspace to show us the difference between the artwork placement and the actual print placement. Make sure to include the rulers in your screenshot and show as much of the bed as possible.
Mac: Press Shift-Command-4 and click and drag a box around your image. You’ll find the screenshot file saved on your desktop.
Windows: Click on the Start Menu and type “snipping tool”. Open the Snipping Tool > New then click and drag a box around your image. Click the Save icon and name and save your file.
Send us the screenshot along with the date and time of the print, and we’ll investigate.
Once you reply back with that photo I will be more than happy to assist with next steps! Thank you for reaching out on the forum!
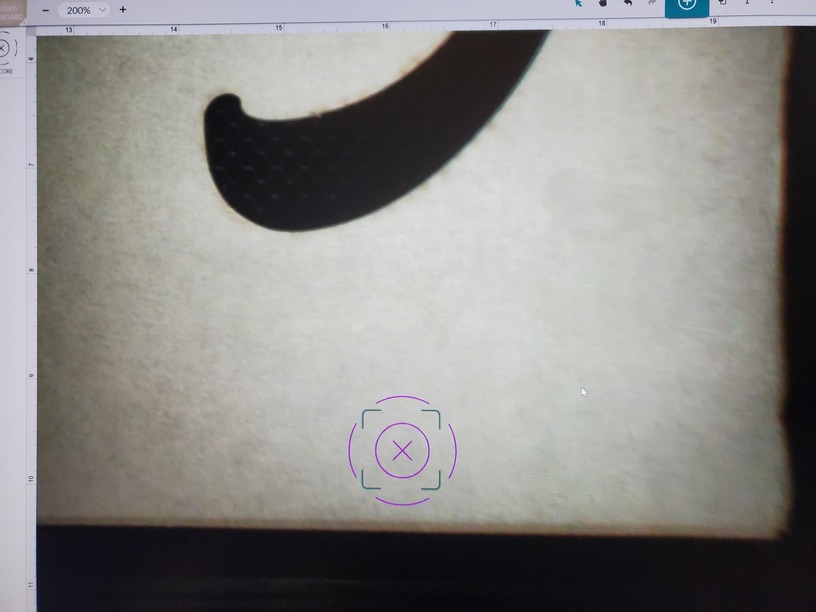
@Ray.V thanks for the response. Check attached pics. I put the image in the lower right corner this time with the hope it would print more accurately. Image named set-focus-before shows the before print, and image named after-print shows the after which is still off. These were just printed 5 minutes ago July 27th 2021 at 10PM.
Hello! @tommyliquori Thank you for submitting those photos. The best way for me to establish a baseline for the trouble we are seeing is by following the steps below. I would greatly appreciate if you could go through these steps to make sure I don’t miss anything for you.
Turn off your Glowforge.
Check for small pieces of debris or dust.
Check the lower door to make sure it closes all the way. It may require some force to open, but open it, wipe any dust off the edges, and close it all the way.
Remove the tray and clean any dust or debris from the surface underneath. Pay careful attention to remove all debris from the four dimples where the tray rests.
Check the lid to make sure it closes all the way. Small particles of material, such as dust or debris, can prevent it from closing completely.
Check the surface your Glowforge is on to make sure it’s flat. Ensure it is not twisted slightly and that there is no debris propping up one side of the machine.
Turn your Glowforge back on.
Place Proofgrade material in the part of the of the bed that you are having the most trouble and print the Gift of Good Measure using the default settings.
When the print finishes, leave the lid closed and wait until the fans stop and the picture updates. Without moving your artwork or your material, take a screenshot of the Workspace to show us the difference between the artwork placement and the actual print placement. Make sure to include the rulers in your screenshot and show as much of the bed as possible.
Mac: Press Shift-Command-4 and click and drag a box around your image. You’ll find the screenshot file saved on your desktop.
Windows: Click on the Start Menu and type “snipping tool”. Open the Snipping Tool > New then click and drag a box around your image. Click the Save icon and name and save your file.
Send us the screenshot along with the date and time of the print, and we’ll investigate.
Let me know how it goes and when you reply back with that photo I will be happy to assist with next steps!