If this is what I can do just messing around, I really look forward to seeing what the team has come up with. Just doing this little engraving will give me some great use cases for stamps and embossing.
12 Likes
Wow. If this is what it’s like when it doesn’t really work yet.
5 Likes
Nice! I like that a lot. Thanks for sharing. 
3 Likes
I’m imagining custom wall coverings now.
3 Likes
Any chance you could share a couple quick tips?
Mesh gradients are very powerful in that gradients are handled like bezier curve controls. Make sure you understand how bezier curves work, or you’ll drive yourself batty.
Here’s the end result of what I’m trying to do:
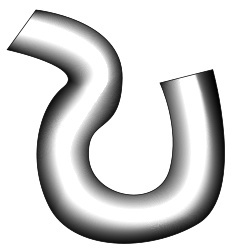
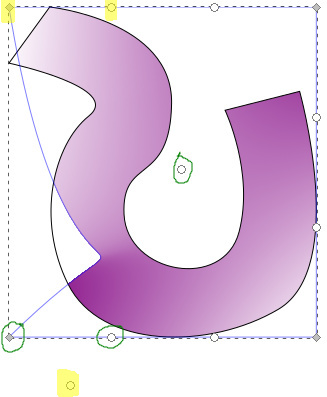
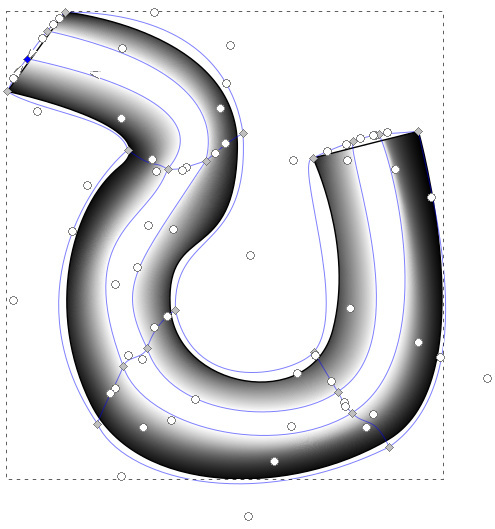
Okay, let’s say that you have an irregular shape which you want to have a high flat shape in the middle that does a slope engrave on the sides along it’s path. This is in a different direction from what @marmak3261 was doing, which was to curve the ends of a path. I’ll start with an irregular shape, which I drew with beziers:
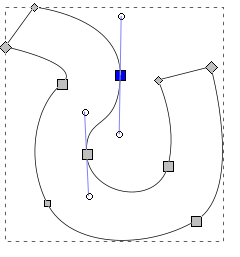
With the shape selected, choose the mesh gradient tool (![]() ), then click + drag it across the shape. You’ll see it change to something like mine, below:
), then click + drag it across the shape. You’ll see it change to something like mine, below:
If you look closely at the new image, you’ll see a number of handles along the corners and sides: grey diamonds in the corners (these are the gradient rest stops), and white circles (these are the gradient slopes that control the travel towards the rest stops).
In this example there are four gradients shown above by default, which you can see by clicking on the diamonds with the mesh tool and looking at the fill color:
- TL (top left) is white
- TR is purple
- BL is purple
- BR is white
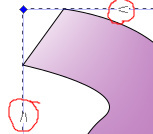
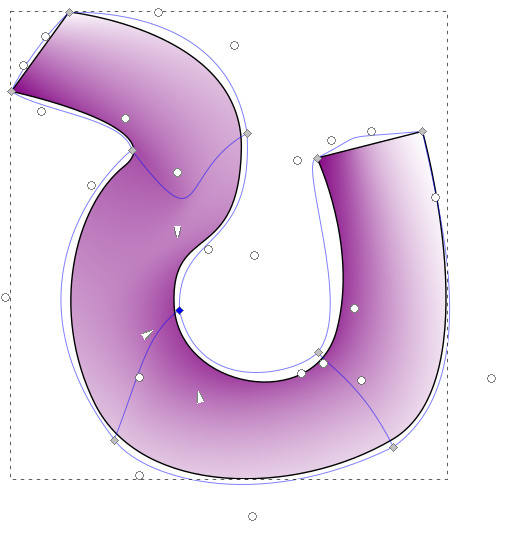
So each diamond / rest stop controls end-color of the gradient. But how do you control the amount of gradient? Well, by clicking on a diamond, you’ll see that a set of the white dots changes to arrows pointing towards the rest stop (circled in red):
This indicates the curve and strength of the gradient towards the gradient stop from the neighbouring connected gradient rest stop in one direction. In my example, there is no curve (yet!)… it’s just from one gradient rest stop to the next.
This is somewhat key: the midpoint of a gradient transition from one rest stop to another is determined by the strength and curve of these arrows between adjacent gradient stops. That is, if you put the arrows close to the rest stop, the shorter the gradient transition.
So if you have two rest stops, you’ll have one arrow for each rest stop: One arrow indicates how fast the first rest stop transitions from it’s color to the “mid” color, and the second arrow on the other end stop indicates how fast and what angle to transition from “mid” color to it’s own color.
Here I’ve tugged at the gradient slopes for the two points on the left side to show how the gradient changes. Yellow highlights are the new adjusted points for the TL, and green circled are for the BL:
Now you can see how the midpoint of the gradient has changed to the crooked bend, and how the angle of the gradient has changed because of the sharp curve I’ve put in place. Also, that the fill only applies over the part that overlaps the object shape, not if the gradient curve fails to overlap it.
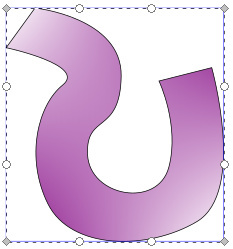
Through tweaking and fussing with control points, you can move the gradient end stops and curves so you get something like this:
What I haven’t said about the above: I added extra gradient rest stops. You do this by double-clicking on the gradient curve. When you do, the fill color of the rest stop will be the same as the transition color where it was before it was created. I’m not worried about the actual fill colors at this point. But you see how the mesh is now a 2 x 5 mesh (look for the grey diamonds), starting from the top-left of the irregular shape, leading to the tail. The blue lines that cross the shape also give ‘shape’ to the gradient.
If I want to have a “high” spot in the middle, I can’t just go from “dark” (deep engrave) to “white” (no engrave)… I need to have a 3 x 5 mesh… that goes from dark -> white -> dark. So since I have the rough shape of the gradient, I can just double-click on the blue gradient line at either end of the irregular shape to add another gradient end-stop down the middle:
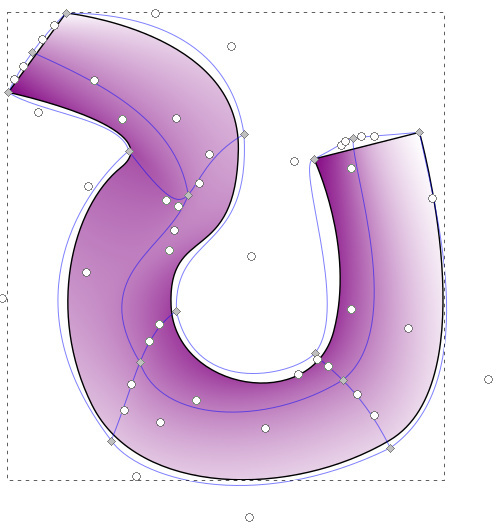
As you can see, the gradient control points / slopes are getting complicated! That’s why you need to pay attention to look for arrowheads when you click on the diamonds / gradient stops. If things get too overwhelming, you can toggle Show Handles (![]() ) in the toolbar to focus on gradient stops.
) in the toolbar to focus on gradient stops.
After some repositioning and adjustments, I click on all the outside gradient rest stops to set them to “black” fill, while those down the middle I set to white, and I get this:
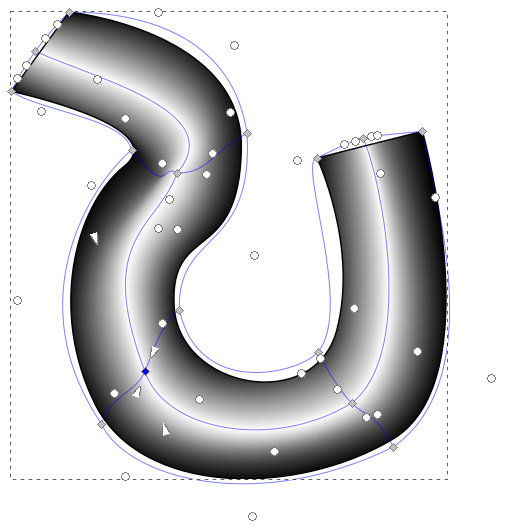
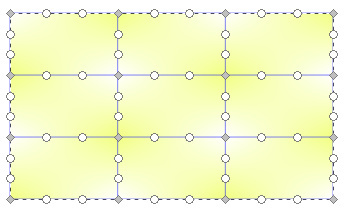
If I want a flatter top, I could add another matrix to the grid, making a 4 x 5 grid… so that it goes black -> white -> white -> black:
It’s an ugly example, but hopefully you get the gist of it.
EDIT: Something I forgot to mention… after you have the matrix set up, try changing the smoothing algorithm to Bicubic. I find that it offers a smoother gradient that would probably be best for engraving on the Glowforge. Experiment to find what works for your instance.
40 Likes
My head explodes with knowledge. thank you.
4 Likes
Far from a “quick tip.” That would have taken me WAY longer than half-an-hour to figure out. Thanks so much!
2 Likes
I prefer to think that my mind just works differently most of the time… lol 
2 Likes
Thanks you so much. This is a great help to me. Finally got the latest Inkscape on my good computer that can process these well. I was stumbling with the arrows and couldn’t get the center to become white. Will give it another go in a bit.
3 Likes
Hey @Jules, looks like we have another tutorial just about ready to go.
6 Likes
Hey man, what an outstanding share!
Thank you for all of yourself that you poured into that for the communities benefit. 
thank you!
4 Likes
Already snagged it! It’s on the spreadsheet! 
8 Likes
Wow. We really need a FAQ section and things like this should go there.
2 Likes
@dan_berry, you are my hero!
13 Likes
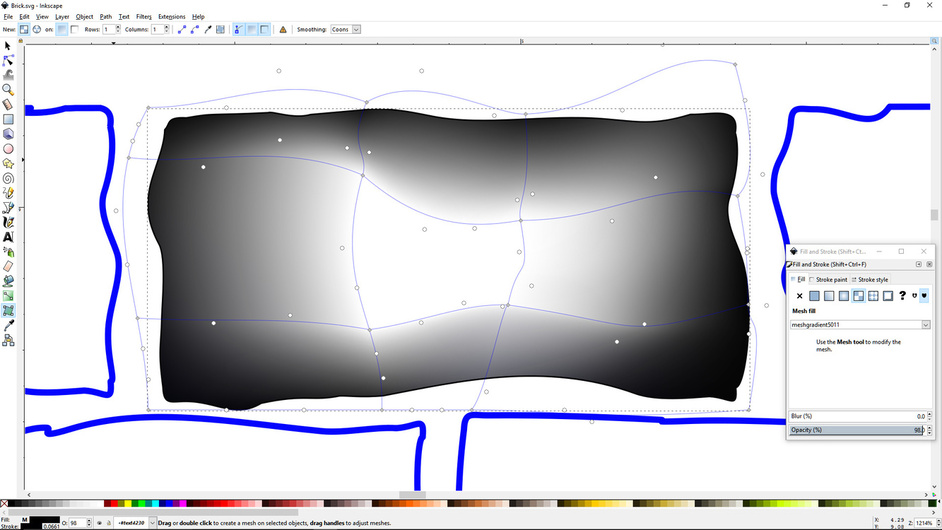
Ha! If that’s all you were attempting to do, then it’s even easier… 
After you’ve got your brick drawn out, choose the Mesh Gradient and change to ![]() in the button bar, and then click on the brick to get:
in the button bar, and then click on the brick to get:
I’ve noticed that once you have gradient points laid out, there doesn’t seem to be a way to REMOVE a row/column. You have to start the whole mesh over again from scratch. 
13 Likes
Mesh gradients make my brain hurt. Experimented with them a bit for that 3D engrave penny I was doing… but boy, what a challenge!
11 Likes
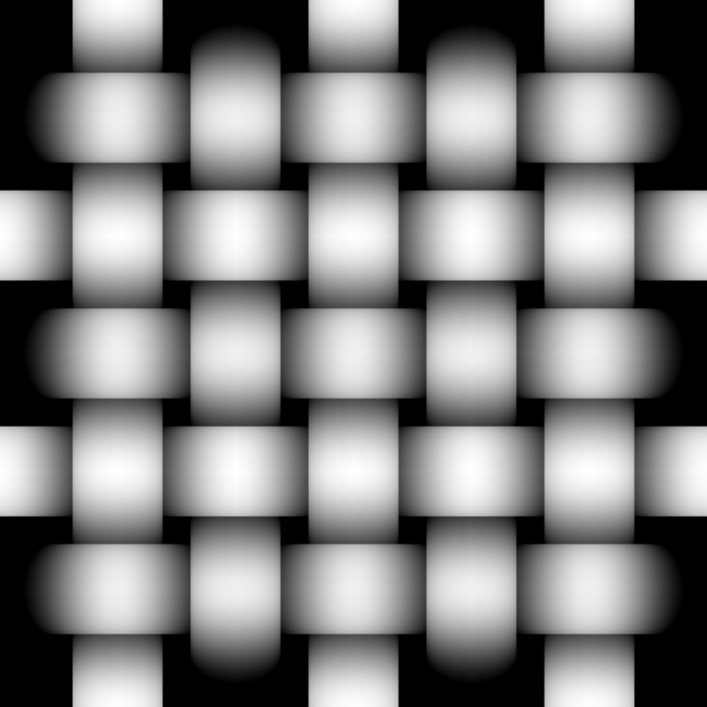
It looks like you end up using a raster image for your engrave. Is there any reason you are trying to use vector gradients to create your engrave pattern? It just seems like a roundabout way to try and create a representation of 3D space.
Since you are trying to create a representation of 3D information in your pattern, why not just make the pattern in 3D and pull the information you need from it?
Here I have modeled a simple 3D basket weave, and then taken the depth information from a top-down render:
3D Perspective
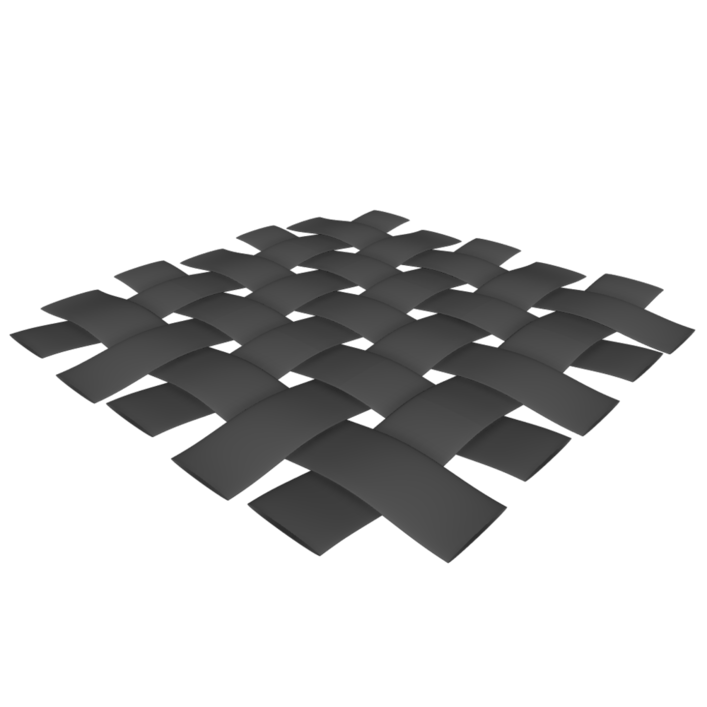
Depth Buffer
37 Likes
Oooooo, neat!
1 Like
Sounds good. Can you provide more detail on how you did this?
3 Likes