My older daughter came home Tuesday saying she had an extra credit project she wanted to do for school. She wanted to make a Japanese castle model for what I assume must be history class. The trick is it was supposed to be due Friday. Well, challenge accepted! We surfed around the web for some pictures and looked through some books to come up with ideas and eventually settled on Mastumoto castle as the inspiration source since it looked a bit simpler than many of the others we’d seen and there were lots of pictures of it to refer to.
She got to work in Illustrator working on designs for the walls of each floor and decided to aim for a 3 story model. She found some nice patterns for the roof area and drew some basic patterns for the walls like she saw in the picture. We decided to save time and just do some vertical lines for the roof sections and did our best guess for how to build the roof in pieces so it could slot together. Eventually we had the pieces we needed to print out and try assembling them on Thursday night.
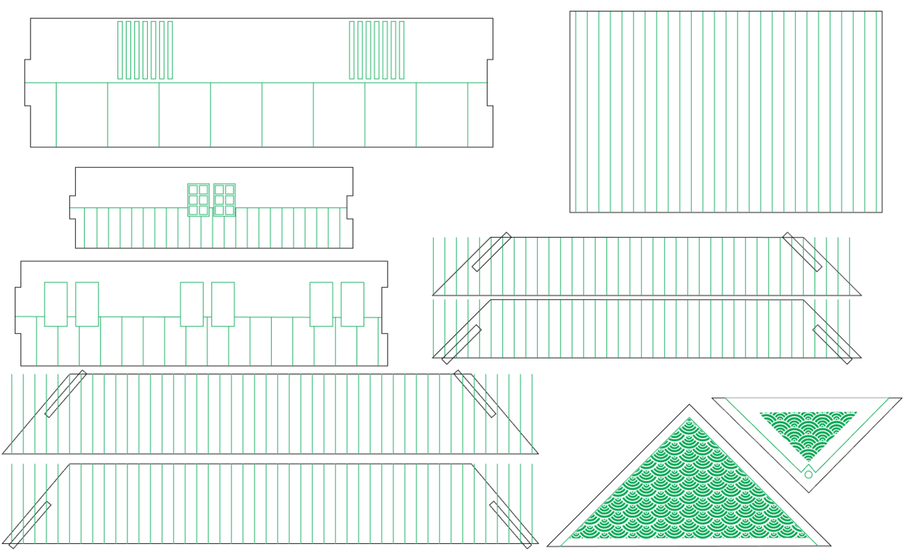
While she was working on the castle, I’d done a quick design for a trapezoidal base for it with a rock pattern on it so we’d have a hopefully stable platform to start building on.
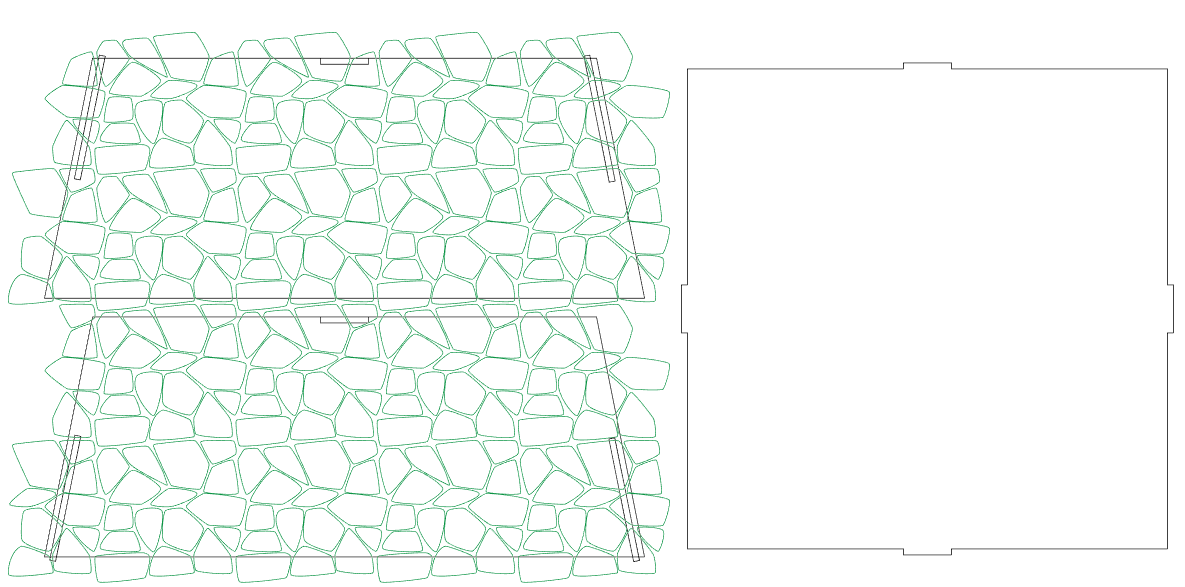
I made the base as large as I could with single pieces (could go bigger if I made it into more pieces, but wanted simple). Luckily I had a few sheets of 1/8" plywood around to print all the pieces. It was a bit of a mix though with unfinished birch ply and finished maple ply. I can tell you that removing all the little bits of protective paper from the finished ply is much nicer than it is from the unfinished ply and it looks quite a bit nicer.
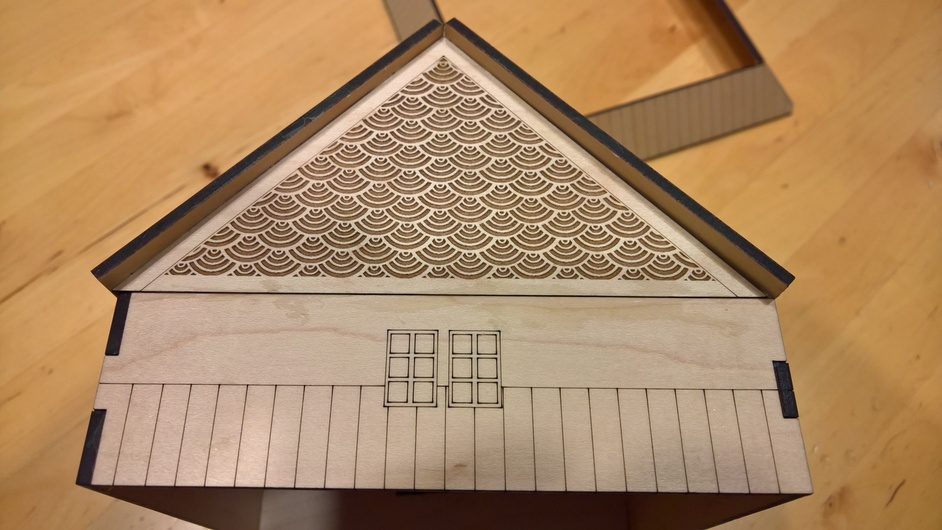
We found that our planning for the roof sections was off and I ended up having to re-cut some of them at different angles to try and compensate. Eventually we got it all taped up to hold the parts together while the glue dried overnight. The next morning we found the one drawback to finished plywood; while it looks and cuts beautifully, it doesn’t glue well (maybe if you sanded the areas you’re trying to glue first). I should have figured as much, but it was late and I wasn’t thinking about it. We had to be careful with some of the glued joints and a few I used some superglue on to fix. We also found that we’d incorrectly planned one of the roof sections and it was too small so we had to improvise on it a bit with crossbeams. Eventually we were able to get it to school and show it to her teacher.
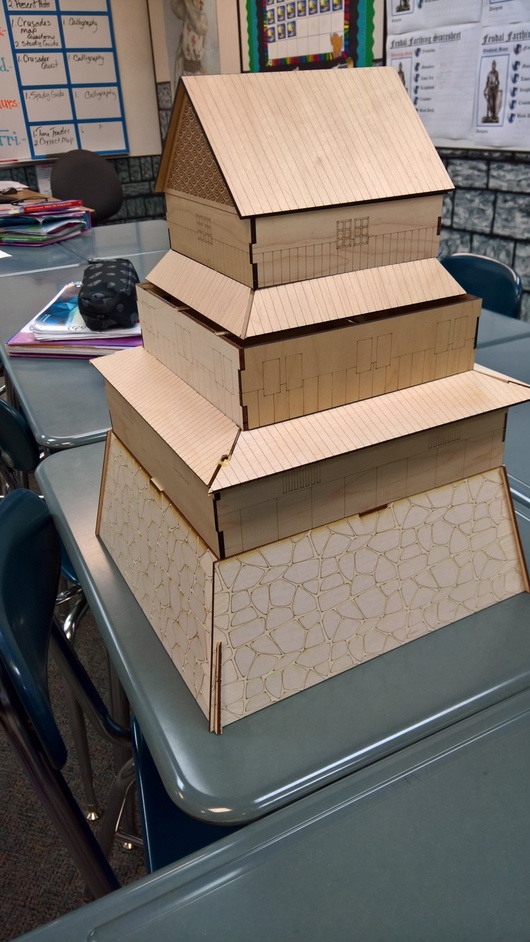
Her teacher was pretty impressed with what we’d done in just a couple of days and seemed a bit surprised. The surprise was twofold. One part because it looked pretty good and the other because the project wasn’t due until March… Eyebrows went up. “Oh, really?” I asked while turning to look at my daughter. It seems there is some value to reading the actual assignment and not just guessing at when it’s due
So, now we have quite a bit more time to address many of the issues we found in this beta castle. We need to improve the roof segments so they align better and actually cover the parts we need them to. We wanted to add more details to the walls and top roof. We also want to add some of the extra sections that come out of the walls with roof lines of their own. I’m planning to use it as an exercise to review with my daughter how to calculate lengths of the roof shapes in 2D from the relationships in 3D using right angle triangles and Pythagorean magic.
Some things we found that really don’t work well for the model are the slot fits like I used on the base vs. the ones we used for the walls. The walls went together better. We tried the slots on the roof segments, but they always came out triangular instead of square which is why we had to try re-cutting them at different angles. We need different glue if we use the finished plywood as well.
One thing that worked well and we hadn’t planned for was that all the pieces fit into the base like a box when we turned it upside down. I’ll probably keep that part in the next version ![]() Expect another post at some point with a better castle!
Expect another post at some point with a better castle!


 Aren’t school projects fun! I’m sure my kids picked projects they knew I would be interested in to get some extra help. I finally caught on, and let them discover their own talents. They have produced some pretty fun things - from film to models. I can only imagine what they would have come up with had we had the Glowforge then.