Here’s a rough step by step process of how I did the lithophane of a night-blooming cereus. (I used the process described in this Instructable to get the .stl file.)
-
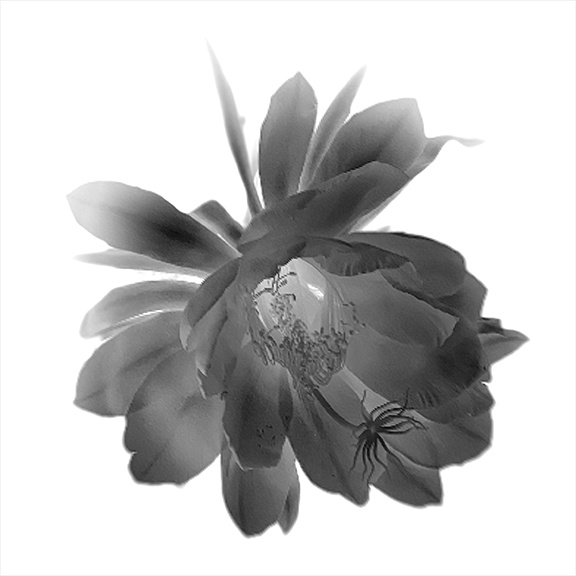
Start with a photo with good contrast. I used this one:
-
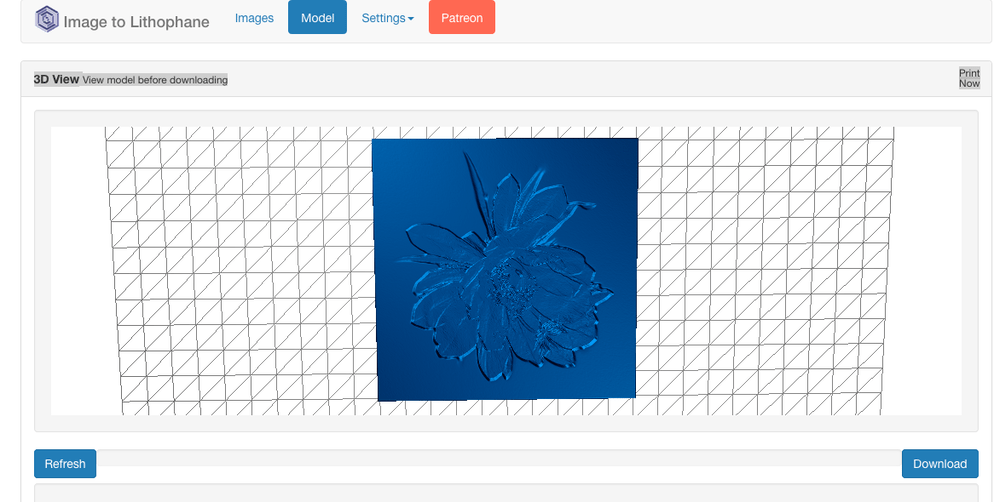
Go to this website: http://3dp.rocks/lithophane/. Settings as follows: Image settings–Positive Image; Model Settings–I went with the defaults. Upload your image. It will look like this:
Download the .stl file. -
Open MeshLab. Set the background to white by going to Preferences and set MeshLab::Appearance::backgroundBotColor to white. Same for backgroundTopColor.
-
Open your .stl file with Open Mesh. If you get a window called Post-Open Processing with Unify Duplicated Vertices, click OK.
-
Create a depth map by going to Render → Shaders → depthmap.gdp. Your image will probably go completely gray and you will get a popup window with several tabs. Click on the Uniform Variables tab. Play with zmax and zmin until you get a result to your liking. Note that they will probably be very close together, and zmax may actually be to the left of zmin. You just have to play around a lot. If a crosshairs shows up superimposed over your image, you can make it go away by clicking the Manipulator Tool (looks like a vertex of a cube).
Here’s what I ended up with:
-
To save it for further work in Photoshop (or GIMP), go to File → Save Snapshot. Choose a save directory, and set Screen Multiplier to at least 3 or your image will be of low resolution. Click Save.
-
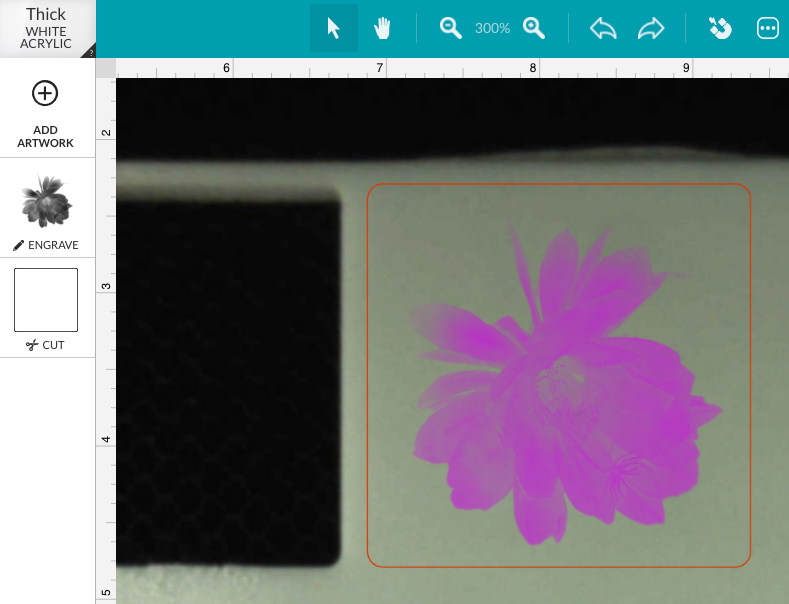
Bring the resulting PNG into your photo editing software. It will be a white image on a white background, so you won’t see anything. Copy to a new layer and fill the background layer with black to show your image. Play around with contrast, crop, etc, and save as PNG to bring into Glowforge (or paste the image in vector program and create a border first).
Here’s how it looks in GFUI:
-
I used the Proofgrade settings for 3D Engrave (one pass) then decided to take another pass. So you could use Deep 3D engrave instead.

I have many past forum members to thank for my workflow (especially @takitus) as well as some internet searching. One other thing–I used a Mac, so your Meshlab software may work slightly differently if you are using PC versions.