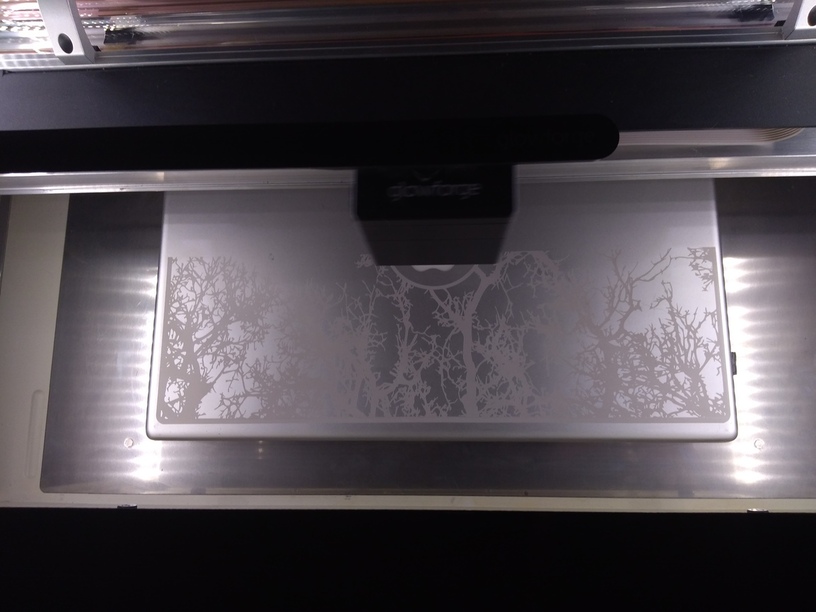
meant to say that it is not focus depth, the MacBook is an inch thick and I put 3/4" of material under it and set focus to 1/4".
I think you’ve got the wrong focus height in there, which will impact the alignment.
1" Macbook + 0.75" prop = 1.75"
1.75" - 1.4" (average tray top height - actual number might be different) = 0.35 inch, not 0.25 inch.
nope, it focuses starting at the height of the crumb tray, max of 1/2" on crumb tray so I removed it. the height of the crumb tray printing surface is 1 1/2" so raising the MacBook up to 1.75 makes it 1/4" off “the crumb tray”
I measured the heights and didn’t just go from specs so it does check out, also if it were the focus height, I would see some lines through the engrave (I have had the wrong height before and this is not it.
The crumb tray sits in divits on the unit floor. Height is typically 1.4" above the floor.
and the actual height of the mac book is a bit over the 1", as I said I measured (including from floor to top of mac book.
We’re measuring from the top of the grid, not the top of the tray…it has a raised lip at the edges.
(Mine is actually 1.378 inches off the floor of the machine, not 1.4").
You should probably actually measure it if you want to go trayless. There’s a how-to here:
Several others linked in the Matrix as well, including a calculator, but this one explains why you have to measure it the way we’re doing.
If you’re not measuring correctly (close enough doesn’t really work too well with this) then it will introduce additional variance into your object placement. So be sure that the thickness of the Macbook is correctly entered into your calculations, and that you have correctly accounted for the height of the grid surface of the tray.
right, the edges do, what I did was stand a ruler up against the FRONT of the crumb tray and lay one down on it and use the number that the laying one touched on the standing one. as well as I turned the crumb tray backwards so I can have a flat edge to measure from. I should also mention that I have a pro so the front to back is the same height as center so you can slide material.
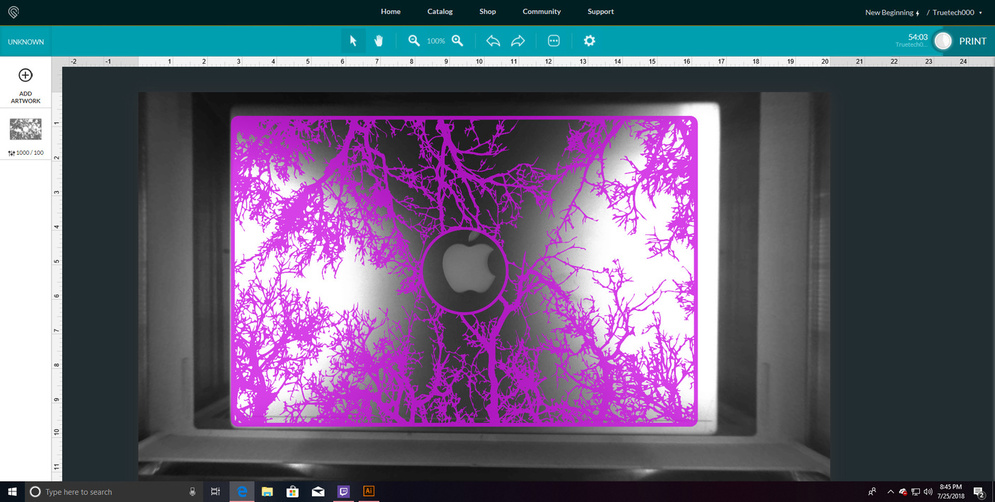
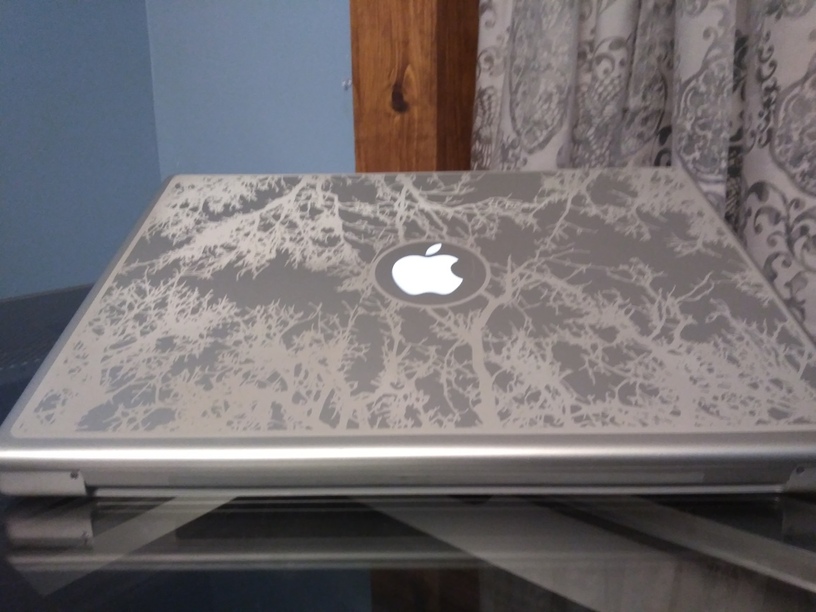
also, the image being engraved is PERFECT, it is just side to side that is mis aligned.
and front to back
The algorithm in the software that corrects for the fisheye effect in the lid camera relies on the measurement of the thickness of the material above the grid surface of the crumb tray being as accurate as possible.
If you have the wrong height in there, (for any non-Proofgrade material), your object placement is going to be further off. It’s very important to measure it accurately, with calipers, not a ruler, and enter than thickness correctly in the Unknown Materials slot in order to get decent object placement.
Working without a tray requires a few calculations, but once you determine the actual height of the grid, and account for it, your placement accuracy will improve dramatically.
Try it and see.
ok, then why do I see the same thing with medium maple plywood in there? not trying to be a dick but this is not my first rodeo. I know how to measure and I have made sure that I am spot on. if you assume that I do know what I am talking about, is this worse than average, is there a possibility that focus is wrong with firmware or something.
Currently the acceptable variance is up to 1/4". If you are seeing more of a variance than that on Proofgrade, print the Gift of Good Measure on the sheet of draftboard that Glowforge sends along to use for troubleshooting, take a picture of the results with the rulers in the picture and post the results here for Support to look at. (Along with the date and time of the print so they can check the metrics for your machine.)
They will let you know if your machine has a problem or not. But you will need to run that test using Proofgrade materials for control purposes.
Material height is not used for focus unless the laser height scan step fails. Material height is normally only used for adjusting the camera distortion correction. Just a little error makes a huge difference in placement accuracy. Even perfect height entry might see up to a 1/4" error.
again, then why do I see this with proofgrade?
I was trying to explain that the material height entry and focus have nothing to do with each other.Also that a couple tenths error in material height will cause a huge error in placement.
If you see the exact same error with Proofgrade then you will need to perform the test and post it for support. The pictures shown in the original post are consistent with material height errors. So Support will ask for test results from a known baseline.
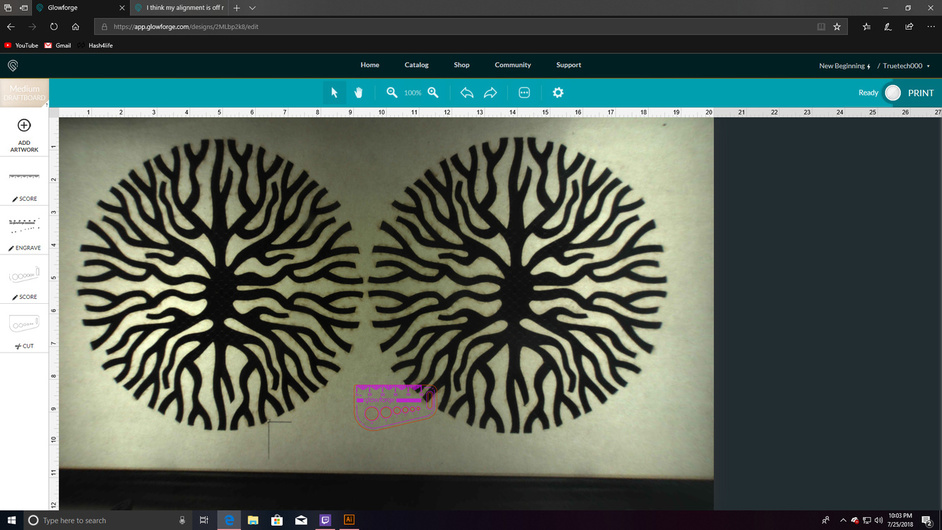
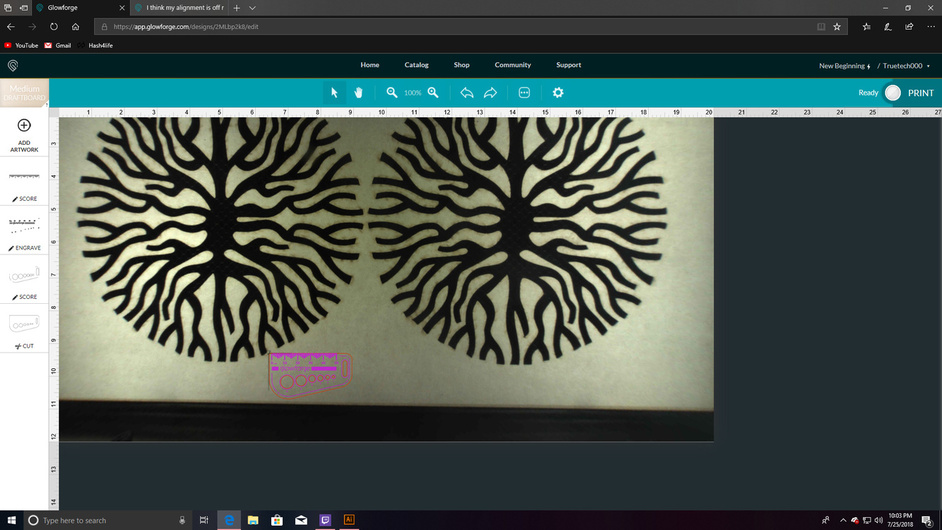
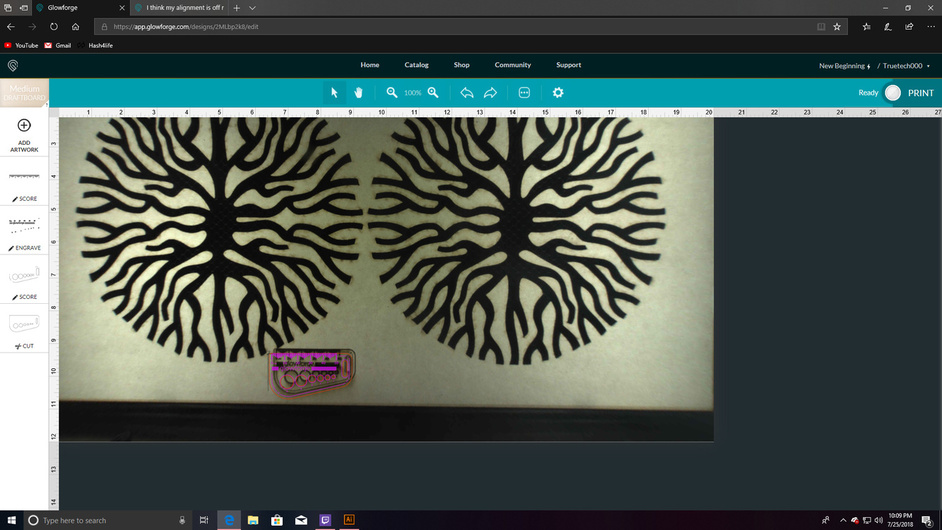
the first is just showing that I drew lines to corner it