I based this one off of this thread
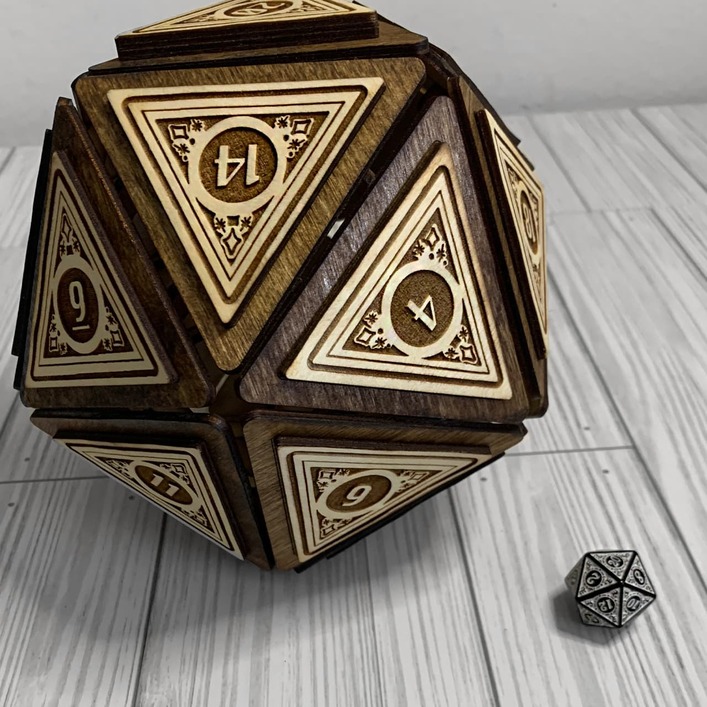
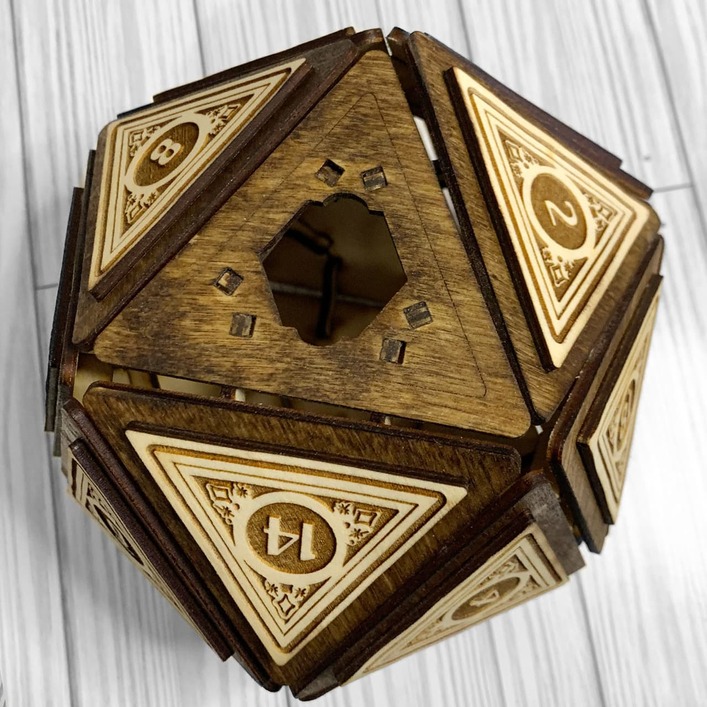
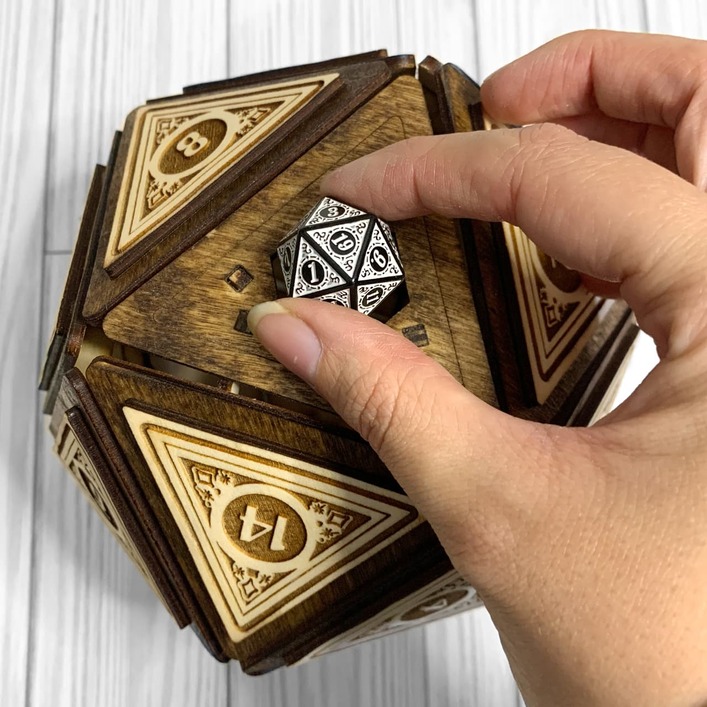
I adjusted the square parts because when I did the design as is, my wood had too much space, idk my 3mm wood is more like 2.8mm and it needed to be adjusted, anyways I figured I’d share my file since the inital file was shared too. This is a really complex thing to make. Also, I made my version have a opening at the top, so you can fill it with dice! The top twists off
honestly making it 100% arcylic would be really hard, when it’s assembled the little peices need to be sanded down to be smooth. I’ve seen some large d20’s like this be made with interior 3d printed pieces, which would be better for arcylic
I tried making the original one with acrylic also, but had problems because none of the acrylics were the same thickness so I made it all with PG. I’m looking forward to making this one. Love the people who share.
I wanted to make a design for the catalog with acrylic and ran in to the same issue. I assumed that if anything the acrylic would always be a consistent thickness.
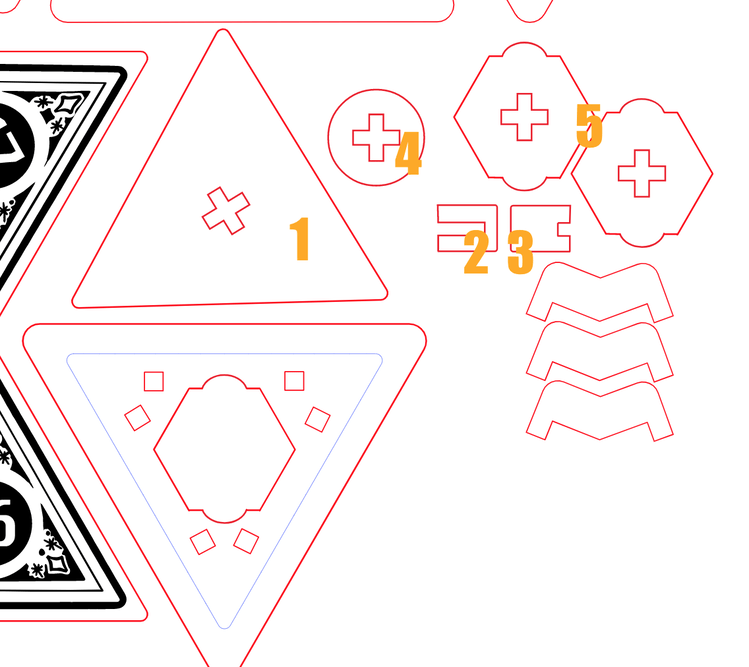
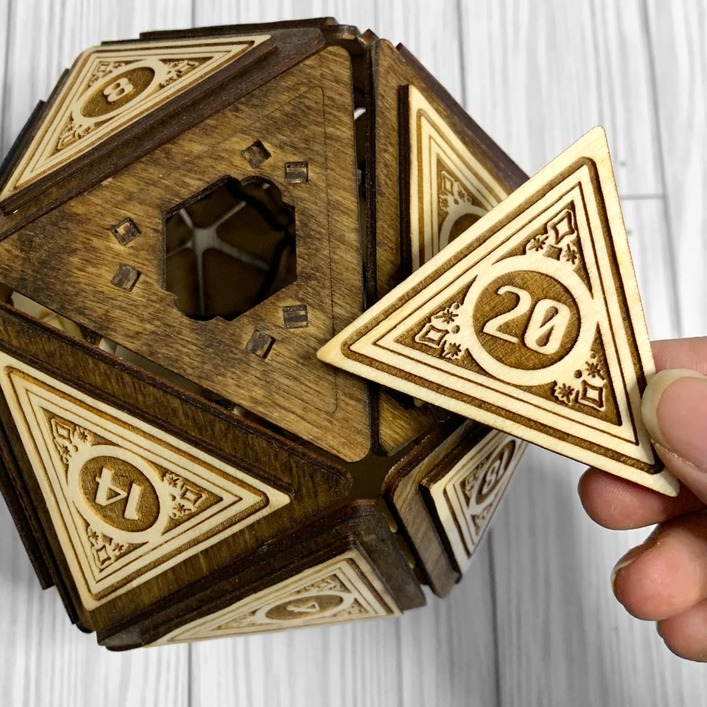
Can someone explain how the locking piece is assembled? I know it’s all the different looking pieces (on the bottom left of the svg file above). But I can’t seem to figure out how they go together to “lock” the “#20 triangle” into place.
In other words… what does the back side of the “#20” piece look like?
It appears to me that you would glue 1 onto the bottom of the ‘20’ panel (or any other, it would seem), then assemble the cross piece by slotting 2&3 together, inserting into the slot in 1, then dropping on 4 and both 5’s. Obviously all need to be glued.
Well… if 1 was glued to the bottom of 20, then 20 would protrude out farther than all the other numbers, since it would now be 1/4" thick, vs 1/8" for all the other numbers.
After looking at it the way you numbered the pieces, I THINK 1 is just a template to get the + sign (forms a PLUS when pushed together) exactly in the right spot.


 So punny!