Yesterday my Glowforge suddenly wasn’t able to cut through Proofgrade Draftboard. I cleaned out the crumb tray, took apart the printer head, and wiped all lenses. I couldn’t find my lens tool unfortunately, so I just alcohol swabbed + used microfiber cloth gently on the part of the big lens that was visible (it had a spot of fog on the lens when I inspected it). This slightly improved the Draftboard cut, but I also think it was partly a result of cutting at a lower location on the GF bed.
Today there is the same issue with varying results depending on the location of cut, but in addition to that, it is cutting 1/8" Proofgrade Acrylic with a LOT of charring and a long flame (scary!). By contrast, it can’t cut anything 1/16" with my usual settings, regardless of where I’m cutting on the bed. I’ve had issues like this before, and usually cleaning has solved the issue. Am I missing anything?
I’ve had this machine for 1.5 years now. Any and all help would be really appreciated!
I’m so sorry to hear that you’re running into trouble.
I’d like to take a look at a specific print, so that we can create a baseline for your Glowforge, and ensure everything is performing correctly. When you have a moment, could you please do the following?
Turn off your Glowforge, then turn it back on
We included an extra piece of Proofgrade Draftboard with your materials shipment for troubleshooting. Place Proofgrade Draftboard in the bed and load the Gift of Good Measure design.
Set the score and engrave steps to ‘ignore.’ Print the Gift of Good measure using the default settings. Allow the print to finish.
When the print finishes, leave the lid closed and wait until the fans stop and the picture of the bed updates.
Check the completed print:
If the Gift of Good Measure fails to cut, please let us know the date and time of the print
If the Gift of Good Measure cuts successfully, please try another print of the design you saw the issue with, and let us know the results.
If the issue still occurs, please let us know the date and time of the finished print.
Also, now that you’ve cleaned your optical components, I would like to check over just a few more things. Could you do the following for me?
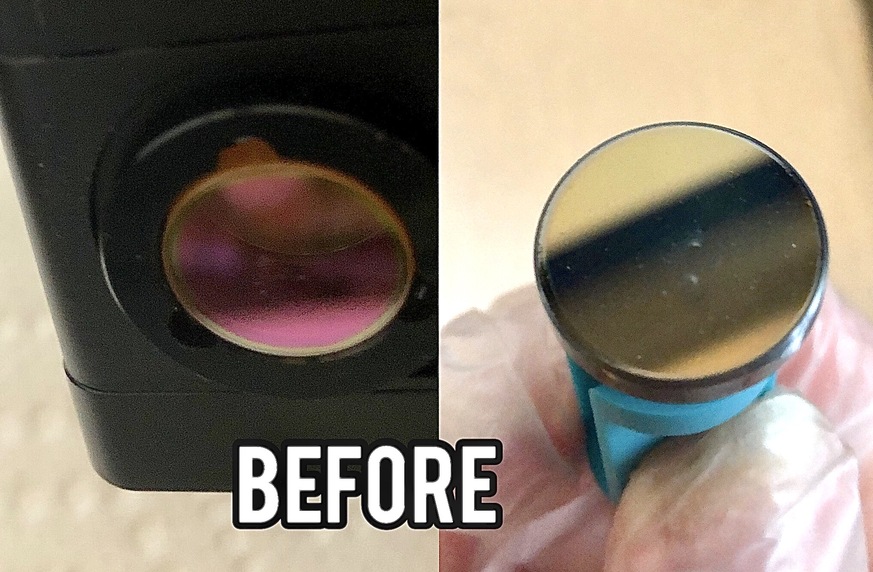
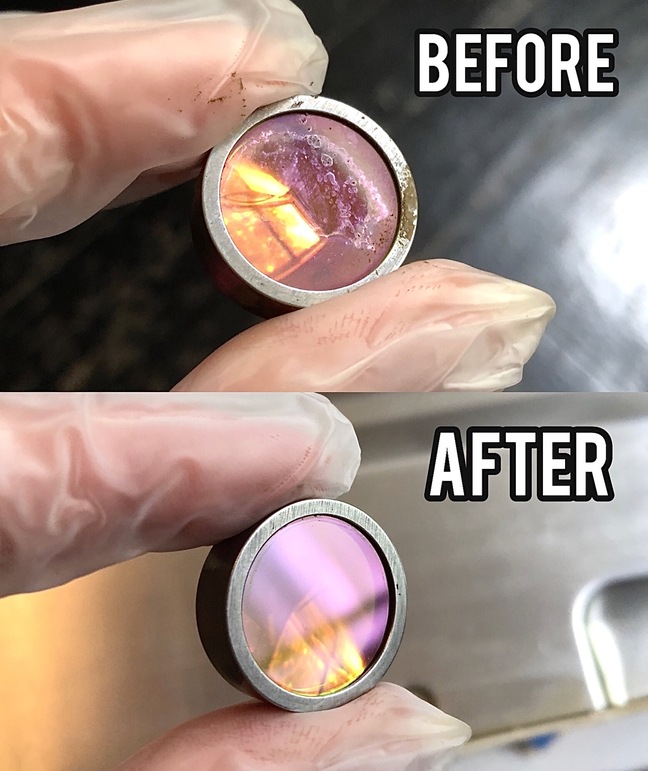
Please send photos of all your cleaned optical components, with special attention to any damage you might find:
Both windows
The printer head window, on the left hand side of the printer head
The laser window on the inside left of the Glowforge
I’ve ordered some contact cleaner, lens wipes, and pipe cleaners (for the exhaust fan) to better clean my machine this weekend. The only component I haven’t been able to wipe/clean yet is the printer head lens and mirror (I’ve never done this and I’ve had my machine for 1.5 years). This is because I can’t find my lens tool, and the shop currently doesn’t have any in stock. Please let me know if there’s any way I can get one sooner, or if there’s another way to remove the lens (i.e. magnets?), because I won’t be able to cut any more inventory for my business until they’re back in stock.
This is not a sanctioned method. But if you put a folded up towel on the bed under the head and take the top plate off and then remove the angle mirror you can look down the head and see the lens. A q-tip inserted from the top gently pushing down will result in the lens falling onto the towel (or just cup your hand under the head when you do this).
As I noted it’s is not an officially approved method but it will work and with almost no chance of damage.
After you’ve cleaned the lens, if you remove the head from the carriage and lay it on its side, you can hold the lens by the outer ring and slid it into the head. Tilt it upside down and it should catch on the internal magnet. Make sure you insert it the right way (it should look like a cup going in).
Thank you for the update. Did the advice our other community members shared help you remove your lens for cleaning? If so, how did the rest of the cleaning process go?
If there is still residue built up on any of your optical components after cleaning, it may impact your print results. We’ll be happy to take a look and advise if any of the parts need to be replaced. Please let us know, and we can reach out to you via email to sort out the details for any replacement parts and also look into sourcing a replacement lens tool for you.
Thank you so much for following up. Fortunately, I found my lens tool attached to the underside of my 2-layer ironwood low table where I keep my Glowforge (forgot it was a magnetized tool) The ZEISS wipes I ordered from Amazon are out for delivery, so I will do a proper cleaning with them and take pictures in the daytime tomorrow. A little scared of the process to be quite honest, but I feel safe having made this support thread
I also did some test prints and here are the results:
1/16" Acrylic: Cutting through normally (previously it wasn’t) 1/8" Acrylic: Cutting through with less flame, but still a bit of charring. Proofgrade Medium Draftboard: Cutting through normally (previously it wasn’t)
The charring on the 1/8" acrylic isn’t super bad, but I am getting some slight flame every time the lasercutter is doing a counterclockwise movement. This is probably “good enough” but for the first year of having my lasercutter, I didn’t experience any slight fire flashes. I wonder what could be the issue to minimize it?
I’m going to test 1/8" mirror acrylic tomorrow and run a longer print & come back with the results.
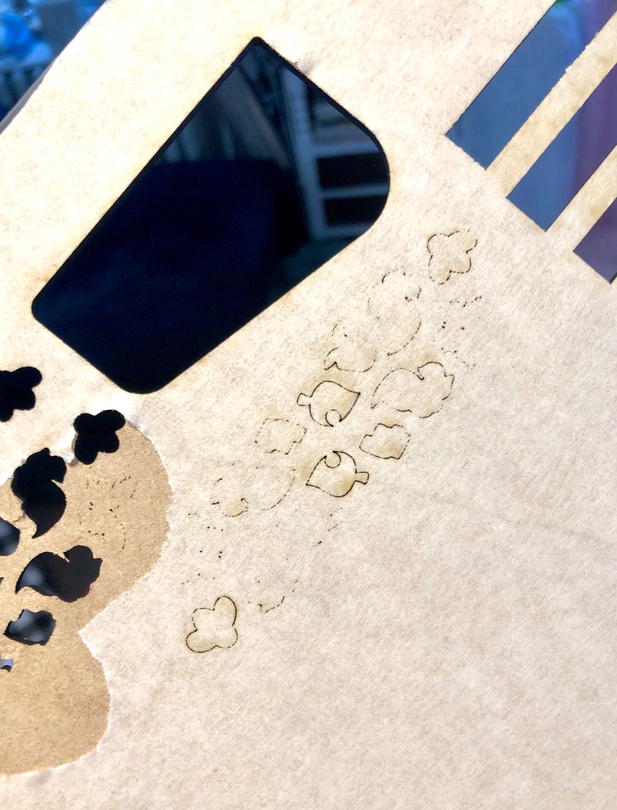
Okay so… there is still an issue with the Draftboard.
This is how the back of the material looks like after cutting, it is really hard to try to push through and salvage the pieces (I basically only cut small items on my GF). Not really sure why this is an issue on Proofgrade when I did such a thorough cleaning of everything yesterday
Prior to having these issues, I didn’t use my GF for about 2 weeks.
Also it still seems to get ever so slightly better depending on where it’s cutting on the location of the bed (I noticed this over the past year or so anyway, that the lower half generally cuts better) but now it doesn’t mean much as it’s not cutting through enough for the pieces to even be usable.
Thank you for providing such great details! When performing the prints you mentioned on 1/8" acrylic and Proofgrade Draftboard, were you using default settings or manual settings?
Is the same error occurring when using Default Settings on other Proofgrade materials?
Thanks! I’m using default settings on both the Proofgrade Draftboard, and the 1/8" acrylic (the latter which is 150 Speed + Full Power, I believe). For the 1/16" acrylic I use 200 Speed + Full Power. Haven’t had any issues with these settings before.
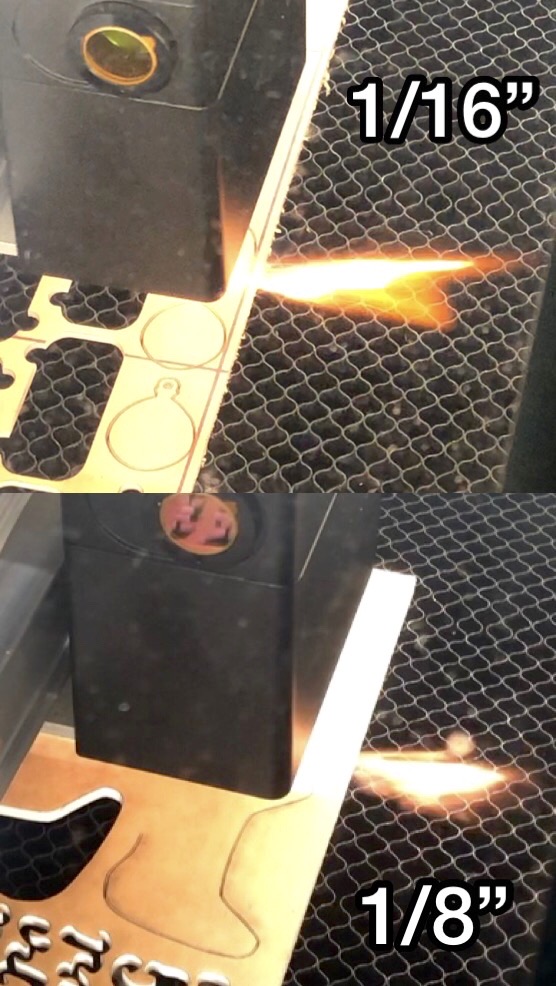
For the 1/8" and 1/16" acrylics, I’m getting a nice cut, but still experiencing flame flashes especially when the laser does a counter-clockwise vector movement. Took some pictures of it below.
Also – I just tried Proofgrade Medium Walnut and that worked well! Cut right through.
Also, I want to add that on all materials so far except for the Draftboard, the laser is cutting (and even etching) stronger than before. My default SD etch looks deeper and cleaner than it has been prior.
Also I have my Draftboard laying completely flat. The default Proofgrade cut is set to 168/FULL (I never touch this).
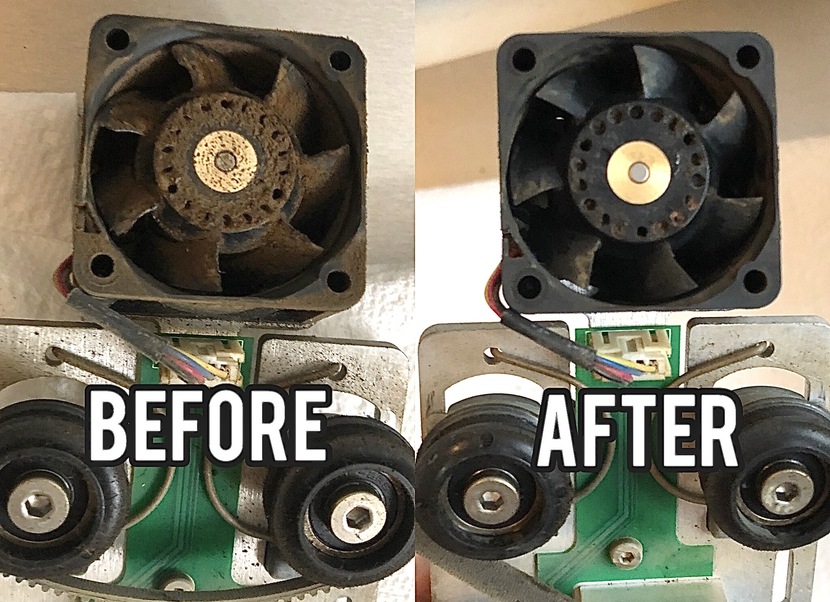
I’m so sorry about the delay in our response on this. Thanks for taking the time to complete the additional troubleshooting. The behavior you’re seeing is still likely to be originating with the Air Assist fan. Since this is persistent even after cleaning that fan, I’d like to send you a replacement carriage plate assembly that includes a new air assist fan and is very easy to install.
I’ll be closing this thread, and reaching out via email to work out the details for that replacement. Thank you again for working with us on this.


 The ZEISS wipes I ordered from Amazon are out for delivery, so I will do a proper cleaning with them and take pictures in the daytime tomorrow. A little scared of the process to be quite honest, but I feel safe having made this support thread
 I’m using default settings on both the Proofgrade Draftboard, and the 1/8" acrylic (the latter which is 150 Speed + Full Power, I believe). For the 1/16" acrylic I use 200 Speed + Full Power. Haven’t had any issues with these settings before.