It has occurred to me more than once that a precision laser cutter/engraver would be perfect for cutting and engraving all sorts of scales, rulers, protractors, and cursors. I already have several in mind but for them to work well I’ll need to ink or paint the engraved parts and wipe away all the excess.
Does anyone have experience with this? Model paint that has been thinned a bit?
I’ve got to always remember laserbits as a resource! This stuff looks great for lettering and shapes but I am thinking precision, a single laser kerf wide cut so whatever it is will need to be thin, not thick.
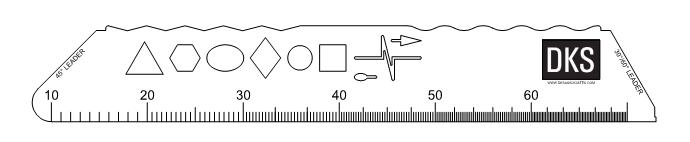
Making a markup template ruler for work was one of my first ideas as well. Here’s what I came up with:
Compact with just the major symbols that we use when marking up plans, and 1" sections each at a different engineering scale.
I bought one that has like eight or more sizes of each shape, but it was the only thing that I could find. It works well, but I am excited to try out mine.
Of course, I’ve also been trying to get the company to switch to digital markups with BlueBeam, so this might go unused much of the time.
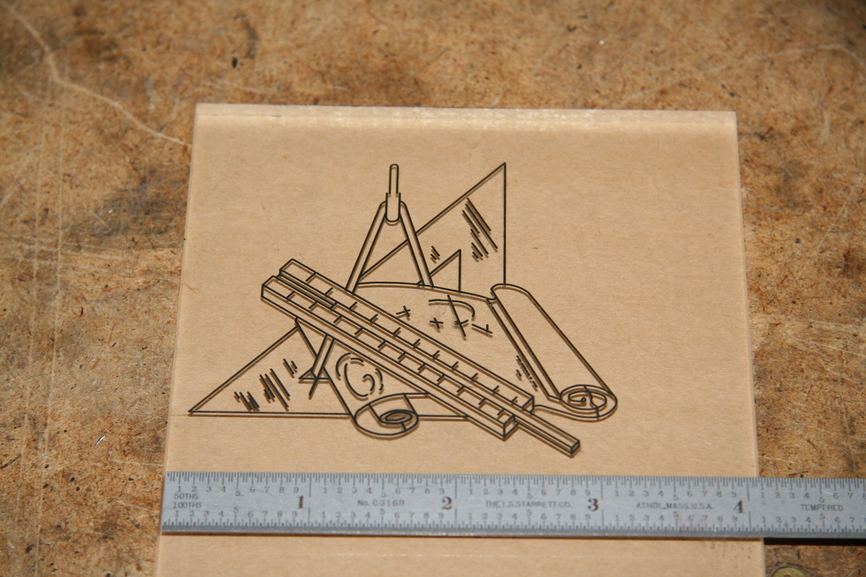
The spray paint idea sounds perfect, but engraving wax can also be used if you don’t have or have already removed the protective paper. This is a logo that I CNC-engraved for a neighbor and filled in with wax from Gravograph. The wax comes in the form of a crayon that you rub over the surface and then wipe off the excess with a clean cloth.
in the old hand drafting days, I used to take my triangles and scratch marks into them with an exacto knife, then I would use finger nail polish and fill the groves. It worked well.
Can’t wait for the Glowforge to make special templates and fixtures.
This is why I love this community!
Just had another idea spawn from this conversation. I’ll draw it up for one of my final stretch challenge items and post it there.
I once engraved topography lines onto a clear sheet of acrylic, painted over the sheet (after removing the protective paper) with black acrylic paint, then squeegeed the excess off with some chipboard scraps- worked pretty well!!
There is also two-tone acrylic. Engrave to the right depth and your color is there waiting for you.
You do risk having scratches on the acrylic go deep enough to make new colored lines… but with the painting approach you risk scratches to the paint removing the color. So that risk is a wash IMO.
I’ll be following this topic with interest, as I have similar plans. I sell vintage/antique beads, and I’ve been thinking that it’d be nice to include little rulers with my orders. Mine would have standard inches/cm + standard cabochon sizes, and of course, my logo + website info. There are a few other units of measure that might be interesting for jewelry designers, so I’ll probably do a variety.
FWIW, my thought was just to use acrylic paint … but maybe you guys will have better ideas.
That would certainly be an option for some projects but for a cursor I’d want it in clear with the line on the side that will be the bottom to minimize parallax.
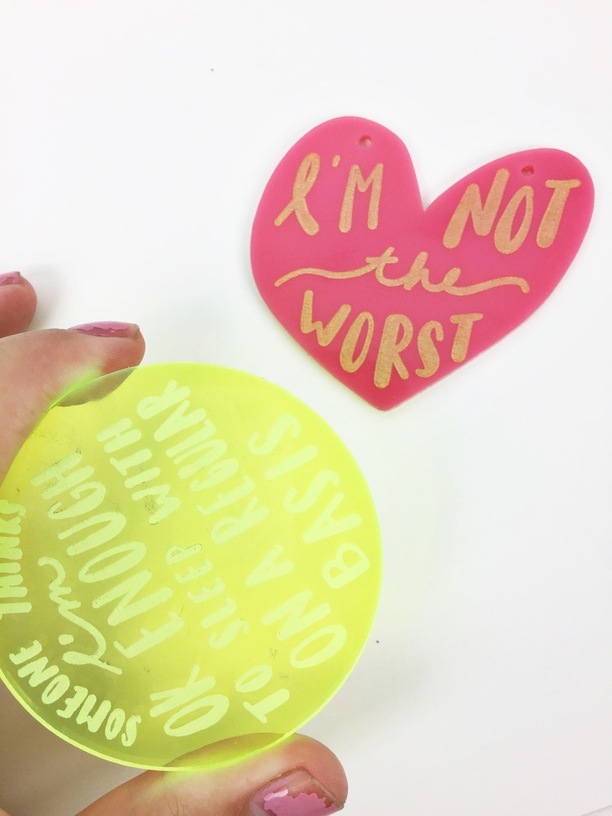
I’ve had great success with using a gold shimmer acrylic paint to fill in etched lines so I’m guessing any acrylic paint would work. Once you apply the acrylic paint into the etched part just wipe off the whole area with a damp cloth and the acrylic paint on the etched parts will stay put. You might have to do a few coats to get it super dark though.
Another option is to use a translucent neon acrylic because you’d still be able to see the ruler etchings without filling anything in and also because a neon ruler would be wayyyyy harder to lose than a regular one.
Here’s a photo of the gold paint (just one coat) on a pink opaque acrylic and neon acrylic with etching (which is really hard to see in the photo but much easier IRL.)