I’ve been studying Japanese language as a hobby for the last five years or so. My five-year-old daughter’s been with me the whole way — early on, it was something to read myself while bouncing the baby to sleep, but later she wanted to follow along with what I was doing on my phone in idle moments. Now she’s picking up characters and words herself.
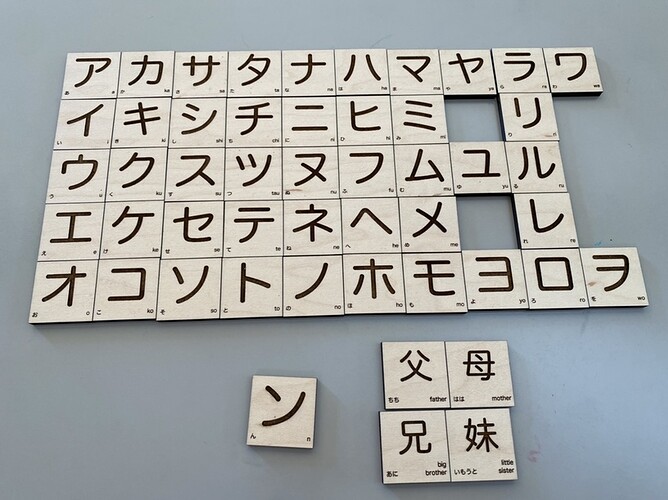
Last Xmas she got a set of Japanese “alphabet blocks”, which she loves to read and play with. But that set covers only the hiragana — one of the two phonetic character sets used in Japanese. So, together we set out to make our own set featuring the katakana characters.
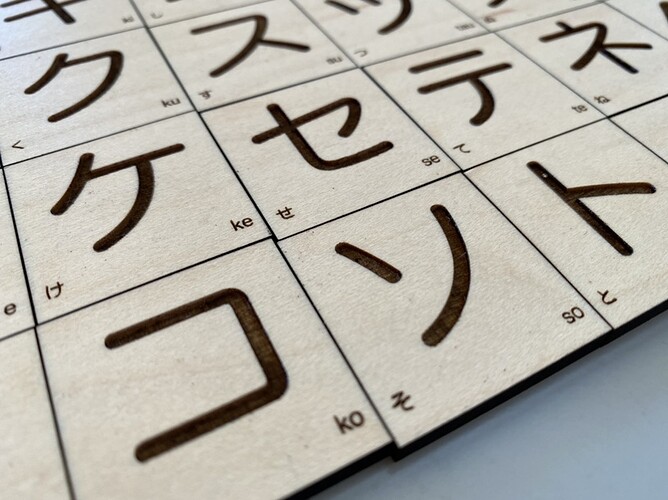
Each tile has the katakana front and center, with both the corresponding hiragana and the conventional Western-lettering equivalent (romaji) below.
There are 46 kana, so making a nice 5x10 grid means coming up with four extra things to make tiles of. Her other kana blocks have four color-name words, but I’m not printing these in color. Since this is a personal project, the extra four get to be the four members of our family (with the Kanji, or Chinese-style characters, for each word).
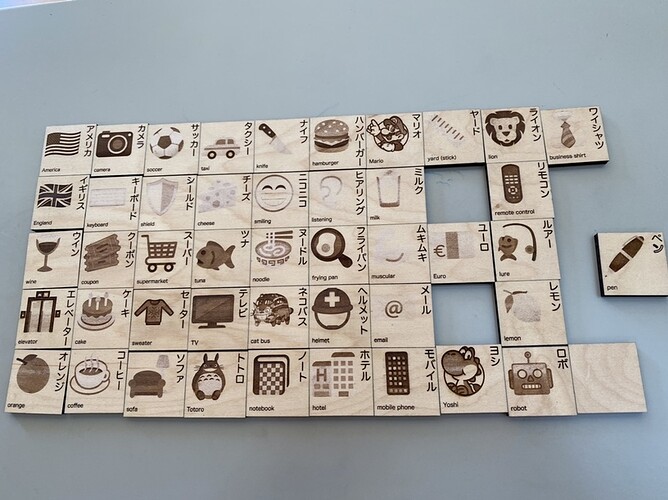
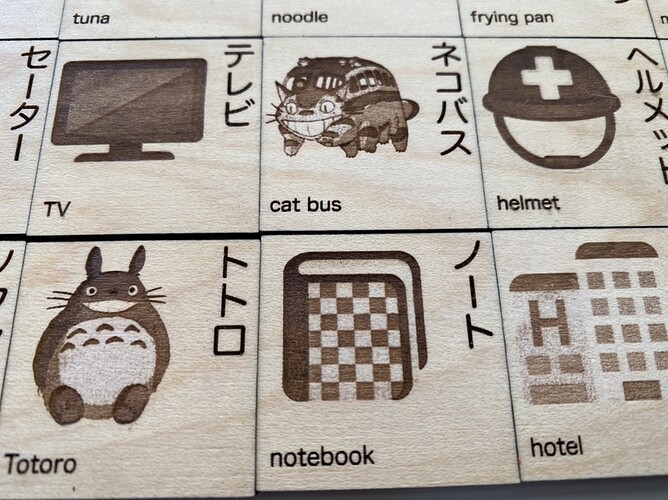
The flip side has a representative word for each. Katakana is used primarily for import words, names, neologisms, and sound effects, so we chose examples accordingly, including a few of her favorite things.
Interestingly, the “HD Graphic” setting on ![]() thick maple plywood created an effect where some of the lighter colors in the art came out lighter (or at least whiter or grayer) than the surrounding wood. (Even after an alcohol wipe to remove residue.) It’s not very consistent, and didn’t work out so well for some of the designs, but it’s close enough for a personal project.
thick maple plywood created an effect where some of the lighter colors in the art came out lighter (or at least whiter or grayer) than the surrounding wood. (Even after an alcohol wipe to remove residue.) It’s not very consistent, and didn’t work out so well for some of the designs, but it’s close enough for a personal project.
This was my first exercise in double-sided printing. I first cut a rectangle a bit bigger than the design, so that I could use @eljefe4 ‘s hold-down pins to make sure everything stayed in place after flipping the tiles. Then it’s just a matter of taking my artwork (which has both sides’ designs superimposed) and switching layers between cut/engrave/ignore in the GF UI.
Next up: the box to put them all in when they’re not being played with. (But that’s a less interesting project.)


 )
)