Up in the top post I listed the colors used in the art (which makes the UI separate them into different steps) and what settings needed to be applied to each. The blue lines need to be set to “score.” 
What material was yours cut from?
Up in the top post I listed the colors used in the art (which makes the UI separate them into different steps) and what settings needed to be applied to each. The blue lines need to be set to “score.”
What material was yours cut from?
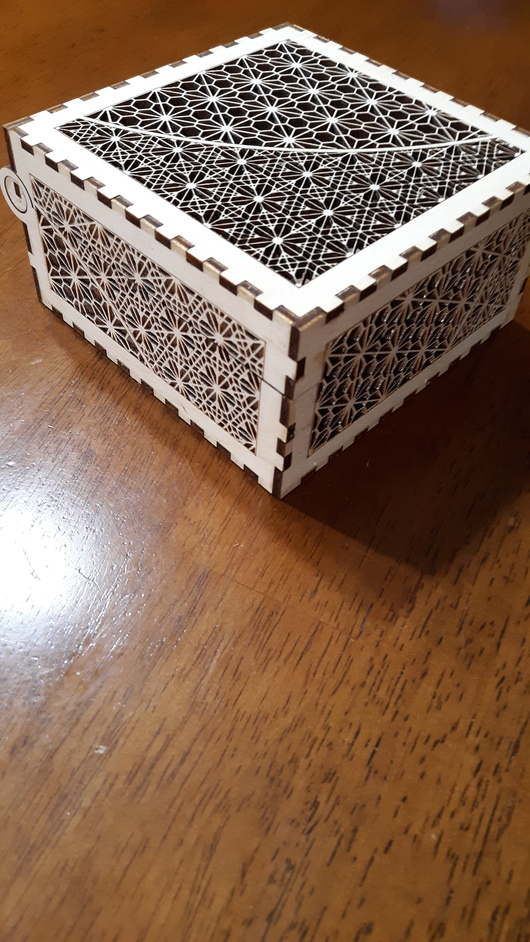
I did it! I made mine out of draftboard…kerfs are tight, but to be expected if not using glue… wasn’t sure how draftboard would fare, but nothing broke, so…tada!! Didn’t add any extra flair, but still looks great! Thanks for the nice pattern.
That came out great, thanks for sharing!
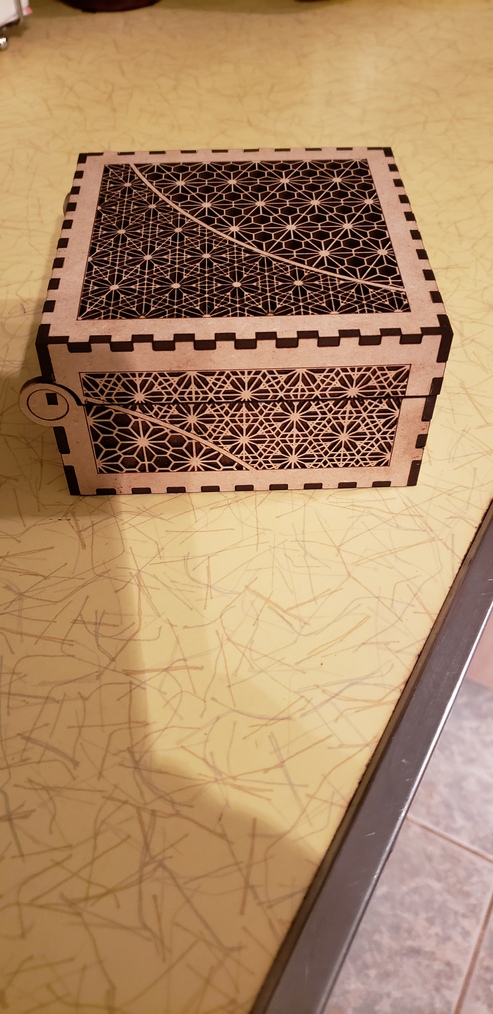
I cut this out Saturday out of baltic birch. I think it’s the most beautiful piece to come out of our Glowforge. Thank you again, so very much!
It is just stunning! Still need to rub it down with Feed-N-Wax, and insert something pretty.
STUNNING!!! Thank you for sharing this inspiration!
Every ones boxes are amazing . I tried it twice and I had a heck of a time with the hinge. Is it because I used plywood instead of hardwood?
Mine was made from Baltic birch plywood. What was it about the hinge that gave you trouble?
It doesn’t fit
The circle in the middle, you have to decide which direction to fit it, one side of the cut is wider than the other side because of how the laser cuts it. So the first time I made it, I actually broke the circle trying to fit it in, then the circle was a bit off trying to put it in the hinge part. So I think I flipped the circle and it went into the tab much easier. Also, it didn’t open and close smoothly as is, so I found that putting butcher block oil/wax on before putting it together acted as a lubricant for my plywood, making the the lid much easier to move.
It’s beautiful! Thank you!
Thanks for sharing @geek2nurse! Our 38th anniversary was July 17th and when I realized she’d waited three days to tell me I’d forgotten it, I knew I was in trouble. I tried to say I was waiting on her and figured she’d forgotten it too, she said this was true but that I shouldn’t change the subject.
That night I turned and finished the best bowl I’ve ever made and gave it to her the next day. This helped somewhat. She has a birthday coming up and I wanted (needed)) to give her something special to help get out of the doghouse so I started with your box and made a few modifications.
First up was to fill in all of the engraved parts with CA glue. This worked but not as good as I’d hoped and I didn’t come up with a good way to fill in the recesses at the cut edges between the lid and body. On the other hand, those panels are hard as a rock. (If I had it to do over I’d use a flood coat of resin.)
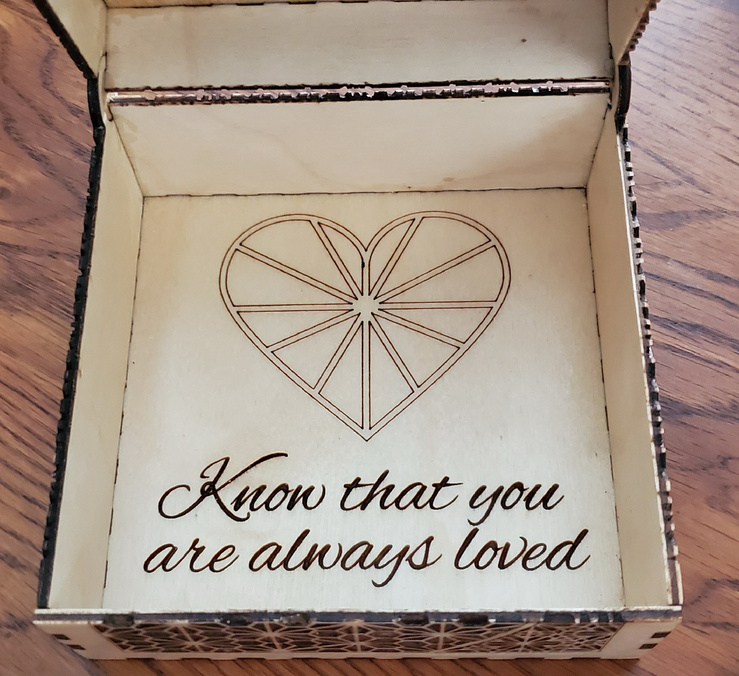
My other modification was to engrave the bottom of the box. I found this heart in the Glowforge Premium Beta art collection and when I removed the fill and left the outlines it seemed to go well with the kumiko theme. The font was also from the Glowforge Premium beta collection.
The sentiment of the engraving was inspired by my lapse of memory regarding the anniversary.
Earlier I said “If I had it to do over…” it would be better. Problem is, she walked in on me while I was finishing it, confiscated it immediately, took photos, and texted them to the family. It was all I could do to get it back for final finish and wax! I objected that it wasn’t up to snuff and I wanted to do it over and she said I was absolutely forbidden to make it no longer unique in the world. So…no chance of doing it over.
If I did though…
I know that the resin and gloss aren’t normally associated with kumiko but I’ve become fascinated with high gloss finishes lately.
Thanks for making and sharing such an inspiring design! It is small enough to fit on her dresser and big enough that there isn’t room for both me and it in the doghouse. ![]()
I love this! It’s gorgeous. One of these days I need to check out these challenges, even if it’s just to see all of the entries. This seems like it should be 1st place IMO. haha
This is utterly beautiful. Thank you.
good job, getting outta that doghouse!  i’m sure she loved the gift and the sentiment!
I made the box, but as soon as the GF cut the intricate top out, it warped. I hoped putting it all together would hold it straight. it didn’t. so i have a gorgeous box with a warped lid.  BUT, it is there to hold all the little pieces i’m gathering that i may want to make earrings from later.
  all good! thanks so much for a gorgeous piece!!
Rae
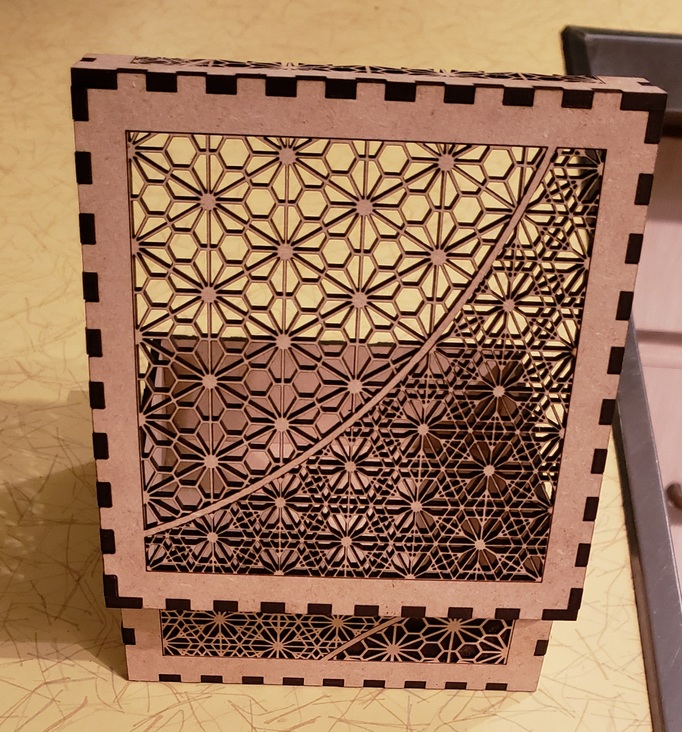
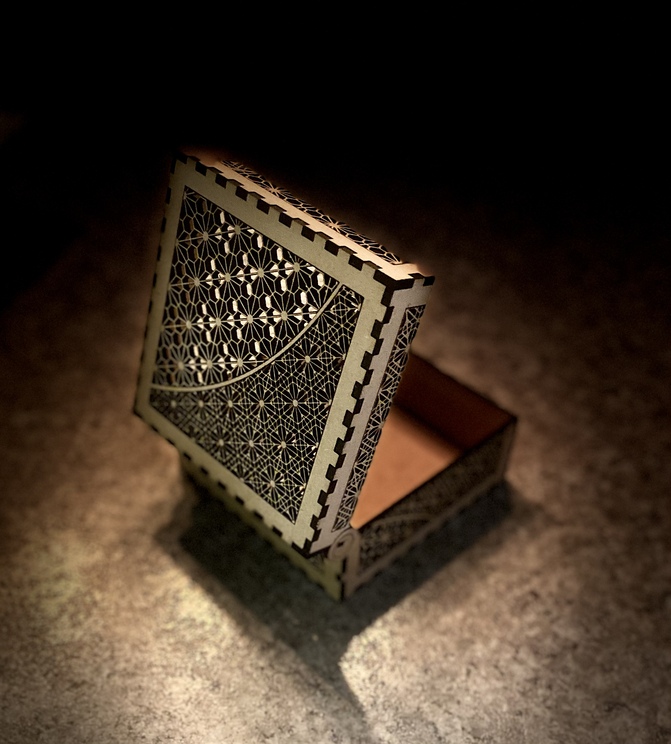
Hi @geek2nurse, You know I am a big fan of you and all the support that you give to the community. I have made several of these beautiful boxes. I did a little research and learned about the Kumiko style and how the practice is performed today. With all that being said, on my first box I made the mistake to cut the score lines. As it turns out, its my favorite box of all time. I love how detailed the pattern is, and that the open edges along the lid and box lines make the box seem even more fragile. You always love getting the most out of your projects and material. This was a great add for the community. I wish I had the skills to pull something like this of and post it in the Freee Laser Designs section. Maybe one day. Until then, THANK YOU… FROM ALL OF US!!!
Mike
Beautiful design!
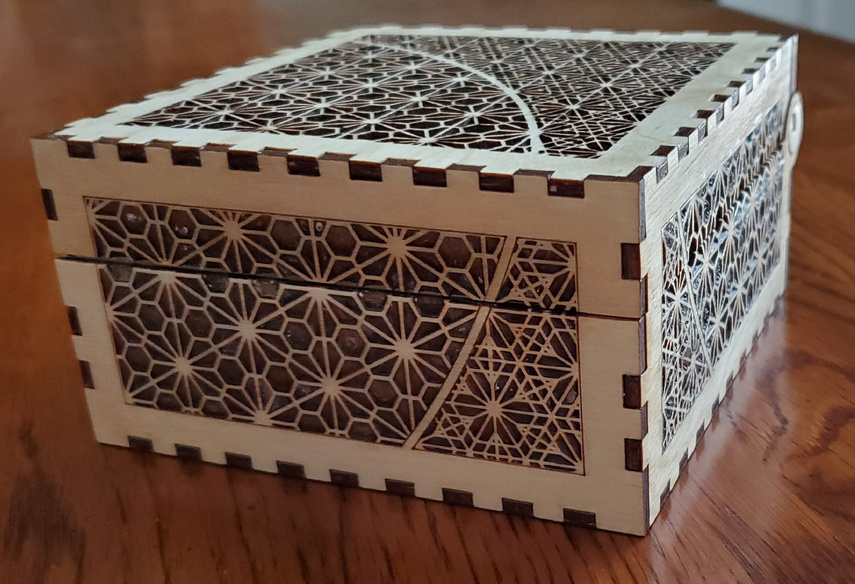
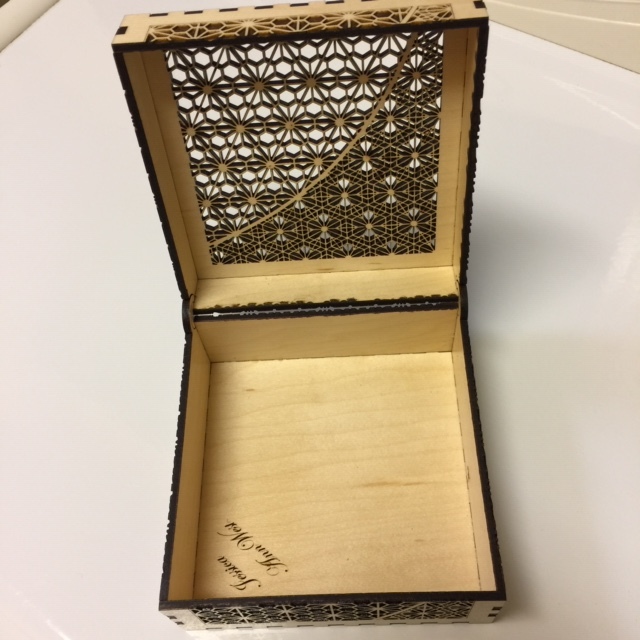
Thanks for a great project @geek2nurse! I’m new to the GF (Christmas present to myself), so this was a big project for me. Fortunately many other community members tried you box and documented their project, so I learned a lot from those who came before. The rubber mallet really help (thanks for the tip). I used Proofgrade Medium Maple Plywood. The kerf was tight enough for the box to hold together well, but I used very small dabs of wood glue every other tab on 1 side, just to add long term strength. Putting the hinge “rings” on was the hardest part; as soon as the hold found the pin, I used the rubber mallet to tap it on. The hinges were tight and squeaking, so a rubbed on a bit of beeswax and that helped immensely. The box is a gift for our daughter in law, so I engraved her name in the bottom of the box. That’s my report! Thanks again!
I just made this box yesterday. I too am new to the world of Glowforge so getting to do something like this was an honour. I have to say, your design is a work of art and I truly appreciate your willingness to share. I didn’t adjust anything and was amazed at how well it went together. I’m curious what you did use as your tolerance to get it that snug. Anyway, thank you again.
Can’t remember specifically for that box, but I usually use a kerf of something like 0.007 inches or so.