I have put in the size and thickness of the balsa wood. I only have limited space to work with obviously. The laser has only been used 10 times about. Any ideas how i can get more accurate cuts?
Also side note: the camera cannot “see” the full bed right? I only see like 3/4th of where i can put things on the crum tray. in terms of the Y axis, i see fully the width of the tray,
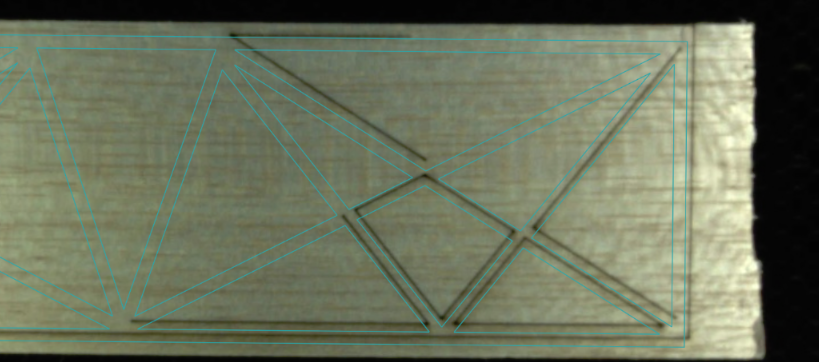
You didn’t include the rulers so it’s impossible for us to know how far off things are. Could indicate a problem, could not. At this time camera alignment can be off up to 1/4", typically more off the farther from center-bed. If you’re using the same size material, you can create a jig out of, say, cardboard that will pretty much guarantee great alignment every time (until you remove the jig). I don’t know if your machine has been granted the new Snapmark feature, but you could put the marks on the jig for pretty much absolute perfect alignment every time ever when taking the jig in and out.
As @Tom_A said - unfortunately this is a common problem and varies a lot between units. I don’t have a good feel from reading the forums for whether there’s very many people who actually have good (i.e. ~1mm) alignment (would love to know!).
If using a jig isn’t an easy option for you, or if snapmark isn’t available on your machine, here’s another quick technique that might make it a bit easier for you – basically just map out what the error is for a given height across the bed, and then mentally take that into account when placing work. See this linked thread:
FYI – like most of the other threads about camera calibration, I was asked to contact the support email address with the screenshots of the print of the gift of good measure (see the end of the thread). Take a look and see if those instructions apply to you. It appears that the support queue is really busy though - it’s been 2.5 weeks and no reply.
Also, yes that sounds right about the visible area on the camera (or at least matches my experience). The laser needs a lot more area to move around the boundary of where it cuts. Having a larger crumb tray than the cuttable area also lets you put bigger pieces of material in and still have them lie flat.
First, no need to email support – you’ve opened a support ticket by posting in Problems and Support, so an additional email ticket would just slow things down.
The camera alignment is going to be most accurate closer to the center, and less so at the outside edges – it has to do with the software correction of the fisheye image. It’s getting better, but still has a ways to go. We’ve learned ways to work around this limitation, and there’s a lot of help to be found here on the forums. Here’s a place you can start: Glowforge Interface - How to Get Perfect Alignment (Yes, perfect!) 🤔
Meanwhile, if you can upload a full-bed image including the rulers, as noted above, support will be able to get a better idea of whether your alignment is outside the current specs.
If I’m understanding what you are doing… For just regular cutting, I would be hesitant to use Snapmarks, even if it’s been enabled. It would add an unnecessary level of complication for basic cuts.
The bed size is approximately 18x20. The max cut size is approximately 10.95x19.45” ish. The entire bed isn’t visible in the camera view. The left side will be dropped approximately one inch off of the crumbtray rail. But, it’s largely irrelevant because that’s a no-cut area anyways.
As mentioned, placement within a 1/4” via the camera is the current level of accuracy. I would try to stop using every last square mm of material in your cuts. Set them up with an adequate buffer between the material edges, others cuts, etc.
This looks like the kind of thing you could set up a jig for, and repetitive enough that it would save time. Make a rectangle, cut it it out of a piece of taped-down cardboard. Then use “add artwork” to add a student’s file and position with respect to the rectangle (which you set to ignore). Afther the cut, delete that piece of artwork and add another…
Thanks for the replies, everyone! There’s a lot good advice in this topic already, so I’ll be echoing some of what others have already said.
The maximum printable area on your Glowforge is approximately 11" x 19.5”, and it’s reduced somewhat when the laser operates at high speed, as it can take space for the laser to decelerate. As for alignment of your prints, the Glowforge software is responsible for ensuring that the print lands on the material in the same place as the preview. Most alignment problems come from the material being closer or farther from the camera than expected. When you open your Workspace in the Glowforge app, the camera on the lid of your Glowforge uses a wide angle lens to take a photo of the entire bed. The software then uses the height of the material to correct the image so the image you see matches what’s in the bed.
The software is still improving, and you may see an alignment offset of up to 1/4". Right now, you can take these steps for the most accurate alignment results:
Use Proofgrade™ materials.
If you don’t use Proofgrade materials, use a precision set of calipers to measure your material, and enter the thickness in the “uncertified materials” dialog.
Use material that is not warped or tilted.
Place your design near the center of the bed.
Clean the area underneath your crumb tray, particularly the four indentations on the floor.
Reboot the machine. Alignment can drift over time, particularly if you bump the head of your Glowforge while removing material.
Should you finish all of these steps, and find that you have an alignment error of more than 1/4", we’d like to have you try a few troubleshooting steps for us:
Turn off your Glowforge.
Check for small pieces of debris or dust.
Check the lower door to make sure it closes all the way. It may require some force to open, but open it, wipe any dust off the edges, and close it all the way.
Remove the tray and clean any dust or debris from the surface underneath. Pay careful attention to remove all debris from the four dimples where the tray rests.
Check the lid to make sure it closes all the way. Small particles of material, such as dust or debris, can prevent it from closing completely.
Check the surface your Glowforge is on to make sure it’s flat. Ensure it is not twisted slightly and that there is no debris propping up one side of the machine.
Turn your Glowforge back on.
We included an extra piece of Proofgrade Draftboard with your materials shipment for troubleshooting. Place the Proofgrade Draftboard in the center of the bed and print the Gift of Good Measure using the default settings.
When the print finishes, leave the lid closed and wait until the fans stop and the picture updates. Without moving your artwork or your material, take a screenshot of the Workspace to show us the difference between the artwork placement and the actual print placement. Make sure to include the rulers in your screenshot and show as much of the bed as possible.
Mac: Press Shift-Command-4 and click and drag a box around your image. You’ll find the screenshot file saved on your desktop.
Windows: Click on the Start Menu and type “snipping tool”. Open the Snipping Tool > New then click and drag a box around your image. Click the Save icon and name and save your file.
Reply with the screenshot along with the date and time of the print, and we’ll investigate.
It’s been a little while since I’ve seen any replies on this thread so I’m going to close it. If you still need help with this please either start a new thread or email support@glowforge.com.