A vid of my laser flute
A vid of my laser flute
Thats nice!
Cheers 
Congrats! Nice vid. Cross linking to your initial topic here. It sounds super and you play very well!
One of if not the first of Matthias Wandel’s videos was his small pipe organ that he built in college. I’ve thought that some square organ pipes would be possible with the Glowforge. Just haven’t gotten to it, but your vid is inspiring here.
This is super awesome. I’d love to know more about how you learned to make these. I’d love to make one myself at some point.
Did you have a specific question? I’d love to give out more info files whatev
If you’re offering files I absolutely won’t turn them down. 
I find them a useful learning tool, but didn’t want to ask.
I’m also just curious generally about the design process for something like this. How you learned hole placement, etc
Fellow Missourian Ron Walter has documented an amazing Busker Organ build. Lots of places for using a laser in this build.
 Making Pipes")
Oh gosh, that is awesome! Really enjoyed your playing and the descriptions of the parts and such. I’ve got a little songbook of Native American flute music (isn’t it pentatonic scale?), and I would love to be able to cut one of my own, if you can share the files. I’d also love to make a laser cut pennywhistle–do you make those?
What a great project! Really appreciated the video!
Very nice sound! 
That is amazing!
Pentatonic yep, have not gotten to penny whistle yet 
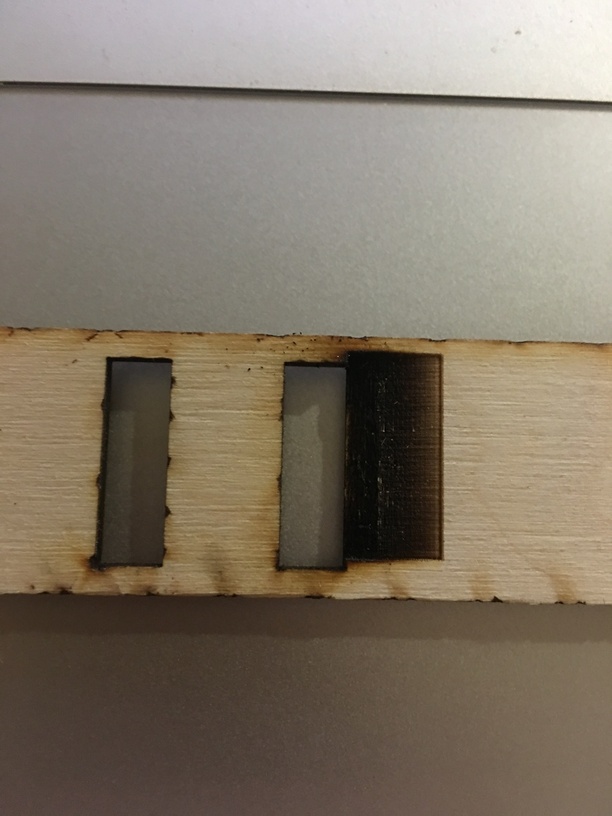
I am also trying to use a shaded rectangle to burn in the sharp edge. I did one last night and it only needed a little extra filing. Post pic tonight.
NativeAmericanStyleFlute.zip (11.1 KB)
I added the shaded rectangle to create the splitting edge
http://www.flutopedia.com/anatomy.htm
but I could not get it centered no matter how I tried to put it directly under the lid camera ![]()
I used 3mm 3ply baltic birch. I also used
http://www.festi.info/boxes.py/
to create a long rectangular box which I altered to become the body of the flute. The finger joints are quite tight, I used a rubber hammer to put them together.
Thank you so very much!!!
Thanks so much for the file. I can’t wait to give it a try!
I’m sure others may have better recommendations here, but if I were trying to add that engrave onto an already cut face piece (which I’m assuming is what you did), I’d recommend pulling both the face plate and shaded rectangle into the GFUI and aligning them to each other, then put down a piece of paper or cardboard in the glowforge, run a draft score of the face svg to map out where to place it, then without moving anything in the GFUI and being careful not to move the paper/cardboard, lay your face piece on that scored outline, then run the engrave.
Edit: Also, thanks a million for your willingness to share your design!
Ok, you asked for it…here come the dumb questions. 
When I look at your flute vs. the SVGs, I see a few things that aren’t making sense to me:
I don’t see any finger holes.
It looks to me on the real thing that there are 2 slots on the face plate with the engrave between them to create the air gap. In the SVG, it appears to me that it would actually only cut one big slot. There also seems to be a couple of circles in there I’m not sure what to do with:
The “Block” file - is that the stairstepped piece?
Which part is the AirPlug? is that the two vertical pieces separating the slow air chamber from the sound chamber? (great link, btw…glad I can sort of understand the physics behind this design )