Continuing the discussion from Laser head bumping into right front mounted magnet:
@Jules @rpegg What I am really trying to accomplish, is to establish correct placement of my prints anywhere on my material. In an attempt to find a way to align things easier each time, I first taped all around a piece of material to my crumb tray, then I made a maximum sized cut out of the center of it. This was to create an outer border line on my crumb tray for squaring up my material with the gfui each time. By making the cut out border taped to my crumb tray, I am able to put my smaller pieces of material up against that border edge, then while zoomed all the way in using the gfui, I just move my design down to the right bottom corner, tap up arrow twice and left arrow twice(to be sure I won’t cut off my material edge), and I get a perfectly strait placement right up to the edge of my material each time. Only problem with this is that I have to ignore the camera bed image, and only work from the boundary edge in the gfui, and from the edge of my material. Because the camera alignment is off everywhere, I have to guess on my placements anywhere else based on how far off I think it will land. I have to compensate for the camera misalignment every time I place something away from the edge. I have worked like this successfully for a while, but it just seems rediculous to be limited in this way due to the camera not being able to see strait and/or print where it shows it in the gfui bed image.
You are dealing the same as everyone else. Only difference is the amount of misalignment for each machine. Jules’ is small, mine a little more, others quite a bit.
Mine’s off by about the same as everyone else’s…I’m on the same software. 'Bout a quarter inch off at the outside edges. I just compensate for it by not placing stuff right at the edges.
I have seen what they are capable of with the PRU though, so I’m not concerned. That was within half a mm when I had to send it back. I am looking forward to seeing it again one day. 
I’ve never measured but my pro is about 1mm. That is I’m confident placing things about a mm from the edge of my material or any cutouts on a scrap. It’s bitten me once or twice probably due to incorrect height settings but it’s rare.
Wow… that’s nice. Mine is about 1/4 but it’s different in each corner, both distance and direction.
However, I have done the same - I took a piece of draftboard and cut out the max size from the middle, but then I also made “rulers” and scored them to match the rulers in the UI. I use another straight edge to line things up with the rule marks, so now if I place a part at a particular spot relative to the rulers in the UI, it is exactly where it should be on the bed.
So the best answer for the original topic of this discussion is that there is no real solution for the laser head contact I am experiencing? Only to just reduce my maximum cut size down and move my prints further from the edge in the gfui? And basically I will need to find a different method to line things up on my own without relying on the cut boundary outlined in the gfui for a reference point?  Is there a current max cut size specification that coincides with the usable cut area outlined in the gfui? It has been about a month since I first posted this issue, and still have not heard any response from support. They may just be so used to @Jules doing their job for them on here, that they don’t even bother checking anymore.
  Should I send an email to support instead?
That doesn’t strike me as being a fair statement. There are a handful of volunteers here who try to help people to get their problems resolved without having to wait to hear from Support, but we’re doing it to assist them, not in place of them, and we don’t hold any illusions about our role here. They’re perfectly capable of dealing with them, but they triage the problems, and sometimes things fall through the cracks. Unfortunately I think your first post did.
I’m afraid you’re not going to be happy with the response that you get from support. The only issue they can likely help you with is the bumping of the head, and I don’t know what that answer is going to be. It’s not going to keep you from having to place your items where they will fall on the cutting area of the bed. This system doesn’t rely on numeric placement or an origin, which is what you are wanting if I understand what you are saying above.
Once the support team finds the post again, (@jae), they’ll address the head bumping. And normally, sending a direct email to them is the same as posting here, so duplicating the tickets just slows things down. One or the other is fine, and neither is quicker. If you post it here on the forum, you’re likely to hear from one or more of us before support though, which does speed things up in a lot of cases, not necessarily this one, since our ability to assist is pretty limited in this case.
It is a shame that they lost track of it the first time, but they’ll respond when they see this post…it can take several days for them to see it though, so don’t get too frustrated while you wait. ![]()
I’m so sorry we missed your previous post.
We hate to miss a message and want to make sure our systems are working properly. Is it possible the post was made in another section of the community and moved to Problems & Support?
Regarding your unit’s alignment and the printer head bumping the inside of your Glowforge, I’d like you to try the following troubleshooting steps:
- Turn off your Glowforge.
- Check for small pieces of debris or dust.
- Check the lower door to make sure it closes all the way. It may require some force to open, but open it, wipe any dust off the edges, and close it all the way.
- Remove the tray and clean any dust or debris from the surface underneath. Pay careful attention to remove all debris from the four dimples where the tray rests.
- Check the lid to make sure it closes all the way. Small particles of material, such as dust or debris, can prevent it from closing completely.
- Check the surface your Glowforge is on to make sure it’s flat. Ensure it is not twisted slightly and that there is no debris propping up one side of the machine.
- Turn your Glowforge back on.
- We included an extra piece of Proofgrade Draftboard with your materials shipment for troubleshooting. Place the Proofgrade Draftboard in the center of the bed.
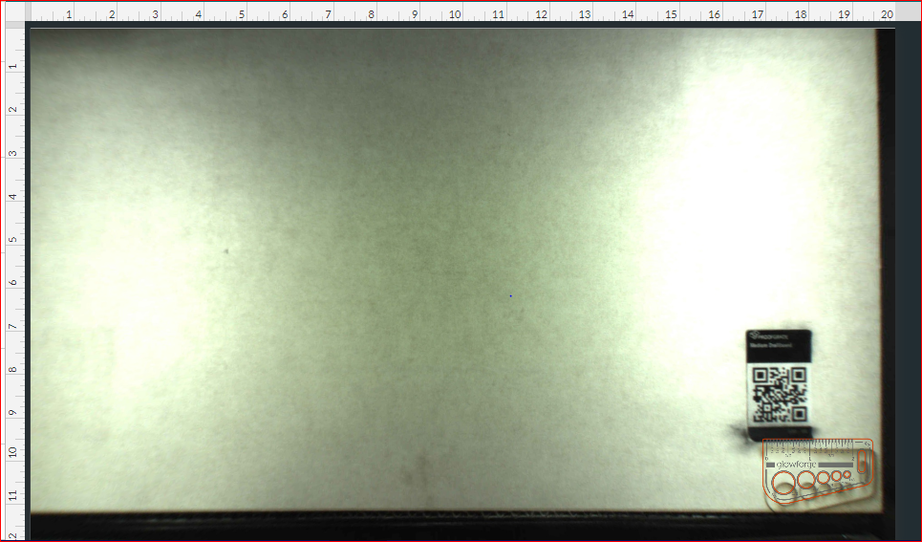
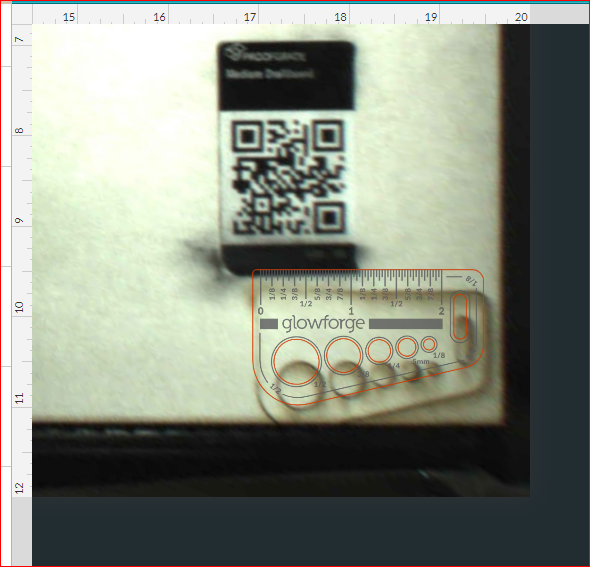
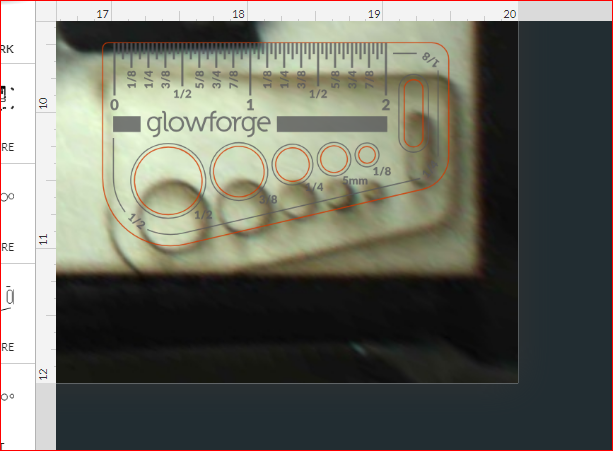
- Ignoring the engrave and score steps, cut the Gift of Good Measure as close to the right front corner as you can.
- When the print finishes, leave the lid closed and wait until the fans stop and the picture updates. Without moving your artwork or your material, take a screenshot of the Workspace to show us the difference between the artwork placement and the actual print placement. Make sure to include the rulers in your screenshot and show as much of the bed as possible.
- Mac: Press Shift-Command-4 and click and drag a box around your image. You’ll find the screenshot file saved on your desktop.
- Windows: Click on the Start Menu and type “snipping tool”. Open the Snipping Tool > New then click and drag a box around your image. Click the Save icon and name and save your file.
- Send us the screenshot along with the date and time of the print, and we’ll investigate.
Thanks in advance.
I did notice that my glass lid seems to be bowed outward in the middle and does not sit flush with the top of my machine. It does sit fairly flush in the front and back though. Could this be causing issues with camera alignment? Could you tell me why there is an ongoing issue with alignment and what is the delay in correcting the problem? Is it a matter of having a camera that is not sufficient for its purpose? Thank You
Screenshots from alignment print printed on 6/23/2018 at 9:15am pst.
Probably not. Just about all of the Glowforges are made that way. 
Your test didn’t show the head bumping issue because it is too far to the right. When you’re dragging it, it should show a margin where it can’t print on the right. You want to back it off to the left so that the engraving just lights up. You can use the arrow keys for this. And then it may show the engrave getting bumped to the left part way through.
This test cut was a catalog design, and was aligned as per instructions provided by customer support. The design was placed as far in the bottom right corner as possible while at maximum zoom, and the engrave & score settings were ignored just as instructed. And yes, I did move the design just off screen at bottom and right and used a single arrow tap to return the image to the workable area from both directions at maximum zoom level. It went off screen in the picture because of the alignment, not the head bumping. My bump only occurs on the downward cut when reaching the bottom right corner. This design did not enter into that area, so there was no head bump. The draftboard was placed in the center of the crumb tray.
Unfortunately, it looks like your unit is experiencing an issue that we can’t resolve remotely. I want you to have a reliable unit, so I’m recommending we replace this one. I’ll be in touch via email to sort out the details. I’m so sorry about the bad news.