I have been having this issue for a while, my machine is level, everything on the machine is clean.
I have two Pro’s they sit side by side, we clean them after several hours of use. When this machine has finished its cut the button turns Amber. I don’t no if that would help anyone solve our issue.
1 Like
what did find out that was wrong with it please mind just did same thing
1 Like
@bob-irene, you need to make a separate problem request so that the support people can get you helped. This will make the help process go faster for you.
2 Likes
through email?
1 Like
I have a new email address and i can figure out where to change it
1 Like
No, in the forum under Problems and Support, like this one, just do one of your own. You can email Support@Glowforge.com if you don’t want to ask for help on the forum, just don’t for help on the forum AND the email. That slows the process for you.
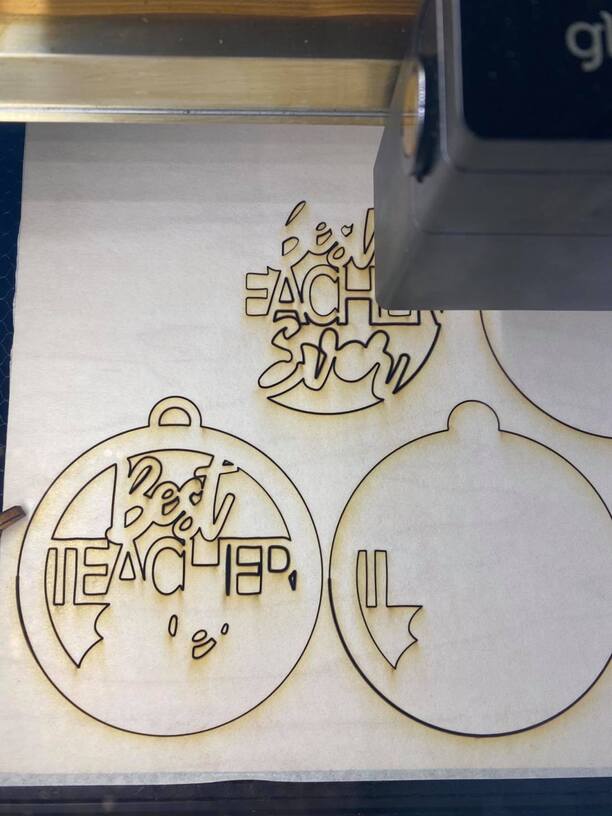
A few folks have had a problem where the laser was losing it’s focus position mid cut, and it required a new head. That’s (I think) worst case. Things to check to try and fix it more easily!
1st - of course check the file. Duplicated lines (even ones with a width of 0 so they don’t show in your art program) could cause this.
2nd - debris in the head channel. Make sure there’s nothing in the tube it moves up and down in, a small piece of debris - especially sticky debris - could cause this.
3rd - make sure the magnet is still fully engaged. When you go to put the lens back into the head - does it click into place with noticeable force?
3 Likes
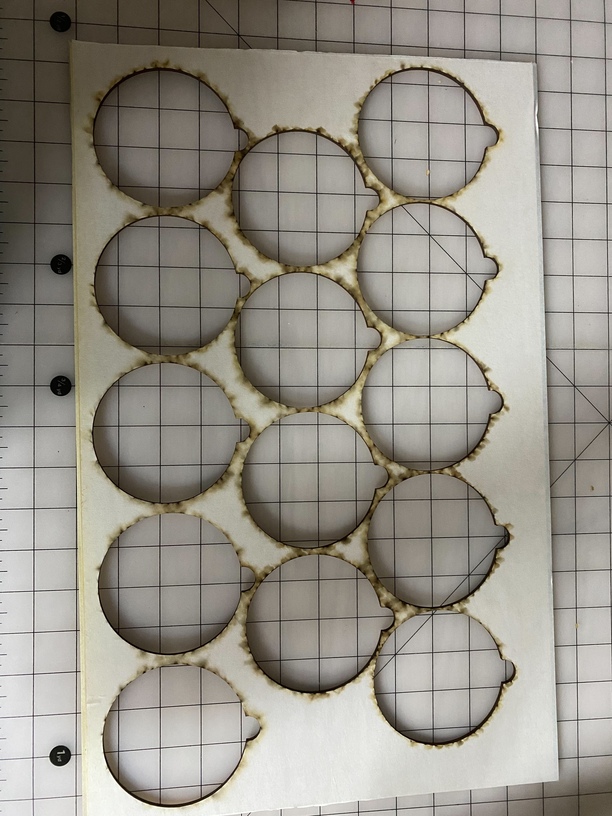
We have two Pro machines, we have used this file on the other machine with no issues.
We have also taken everything to bits cleaned it many times and nothing has helped.
Pretty much assures you it’s a problem with that one machine then.
The fact a single continuous cut path starts precise then gets thicker (i.e. the outline of the ornaments) indicates the focus mechanism has failed on that machine.
1 Like
@kabbs10476
I’m so sorry to hear one of your Glowforge pros is not cutting evenly. I would be happy to look into this for you.
Could you please confirm the serial number of the printer having the issue for me?
The serial number can be found on the back of the Glowforge, printed on a sticker near the AC adapter on the right-hand side. It will look something like ABC-123-4.
Also, can you tell me the date and time of the print that had the issue?
1 Like
Hi David
We have been having issues with this machine for a while, it seems every cut. I kind of used it less due to the issues, that’s the great thing about having too, but we are coming up to the busy season and it really needs to be working correct. The serial number is YTJ-476-4
We cleaned everything last night and celebrated the machine, but i tried it again today and still its not working correct.
I’m just wondering if I need to email Glowforge, as I am waiting for days for a reply on here???
Emailing will move this conversation to email, it will not speed them up.
They’re running this up through engineering and they will respond when they have more information, but they don’t write back until they do. It can be a touch frustrating, but I’d rather they spend the time working on getting folks up and running, then sending notes saying “I’m still working on it”. YMMV
Ok 
1 Like
It’s been over a week and still not got any further forward with this issue??? We need help!!
@kabbs10476 I am so sorry for the long delay in our response. This is not the experience we want our customers to have.
Could you provide a photo of the back of the print example you provided earlier? This will help in our investigations on why the cut is not even.
I would also like to check over just a few more things. Could you do the following for me?
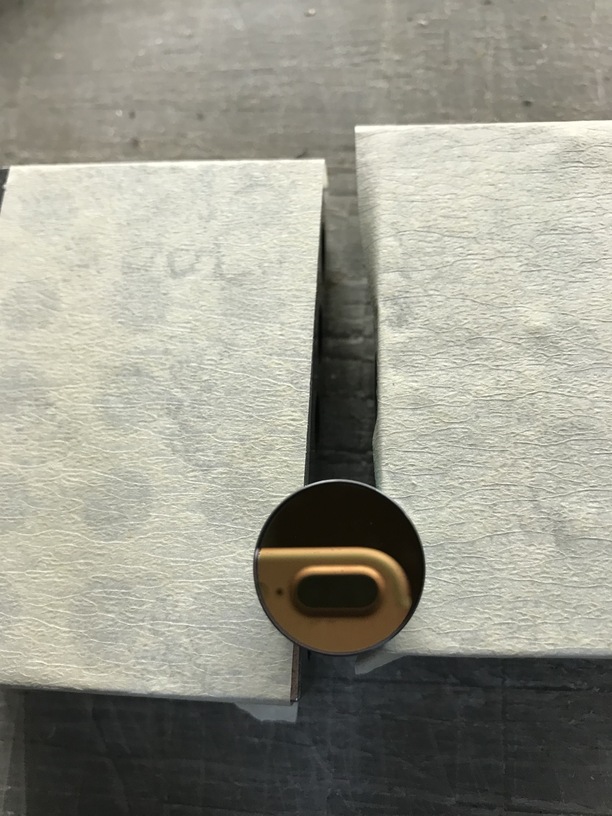
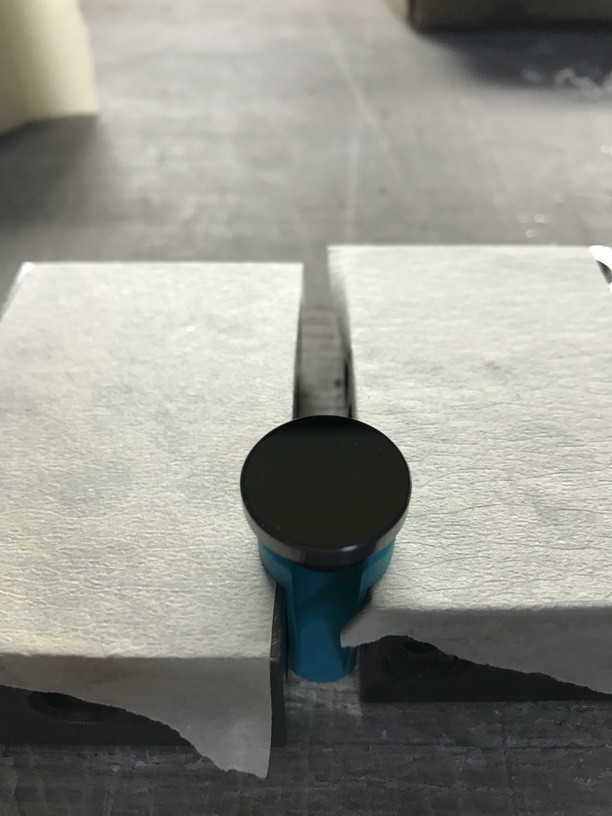
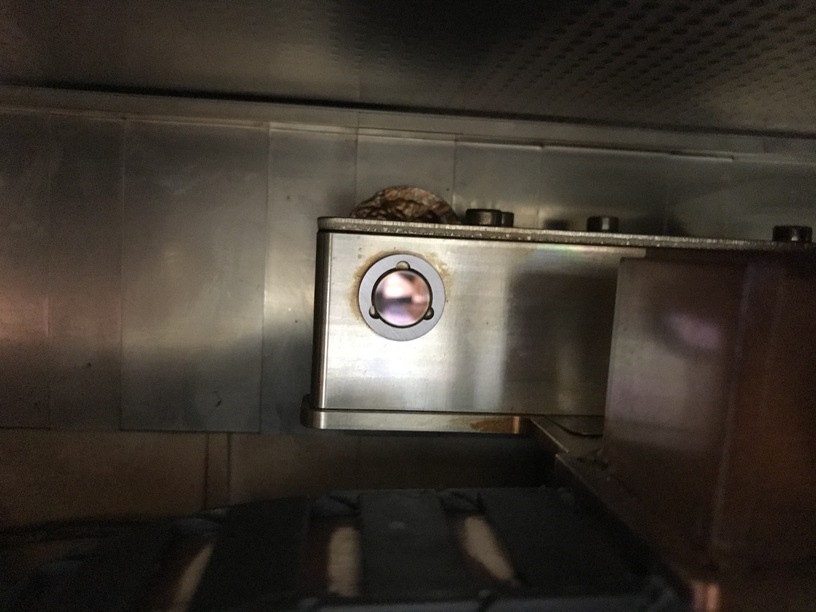
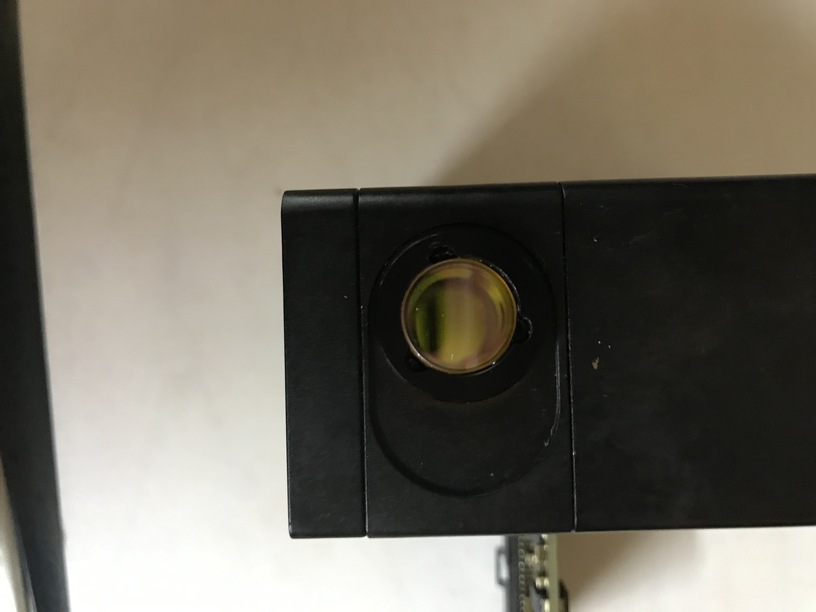
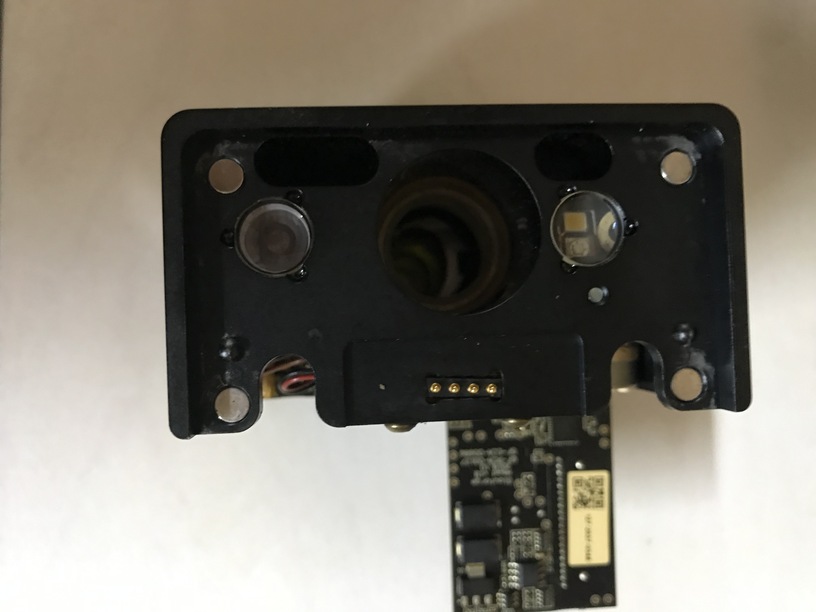
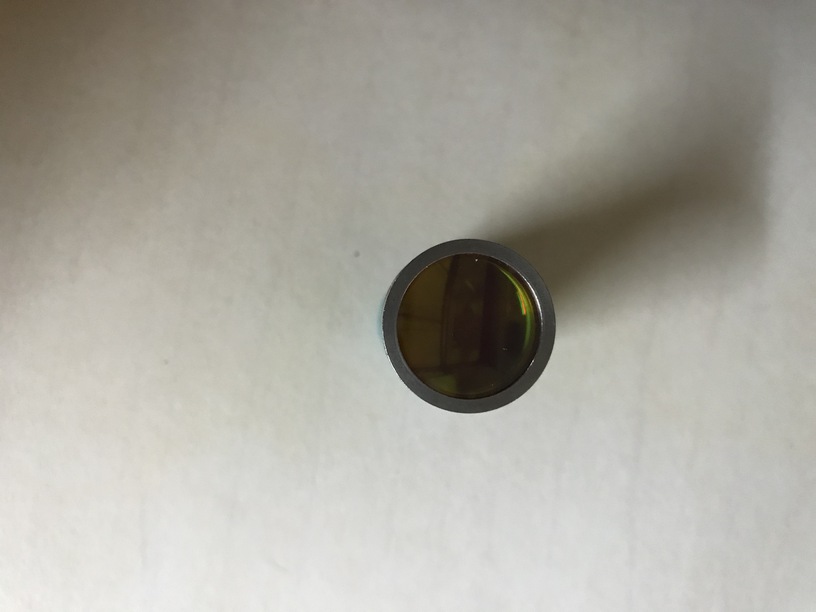
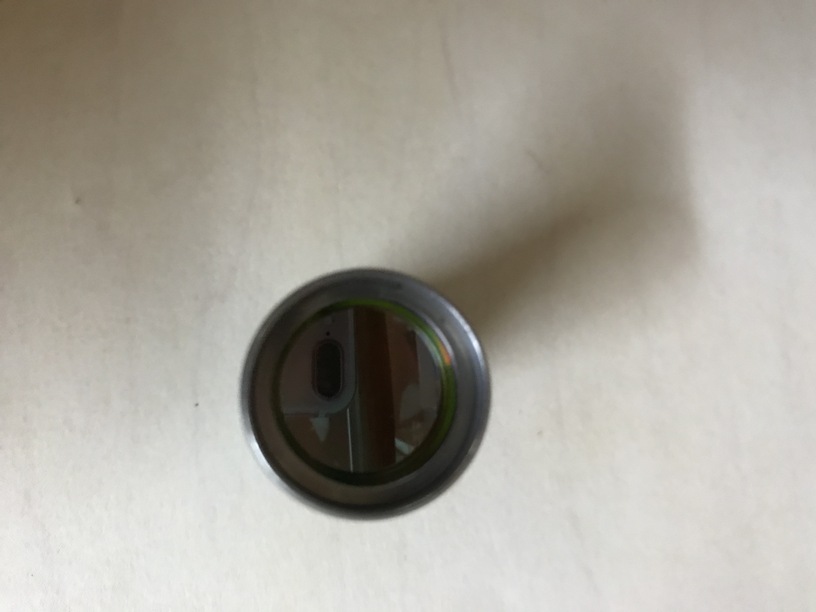
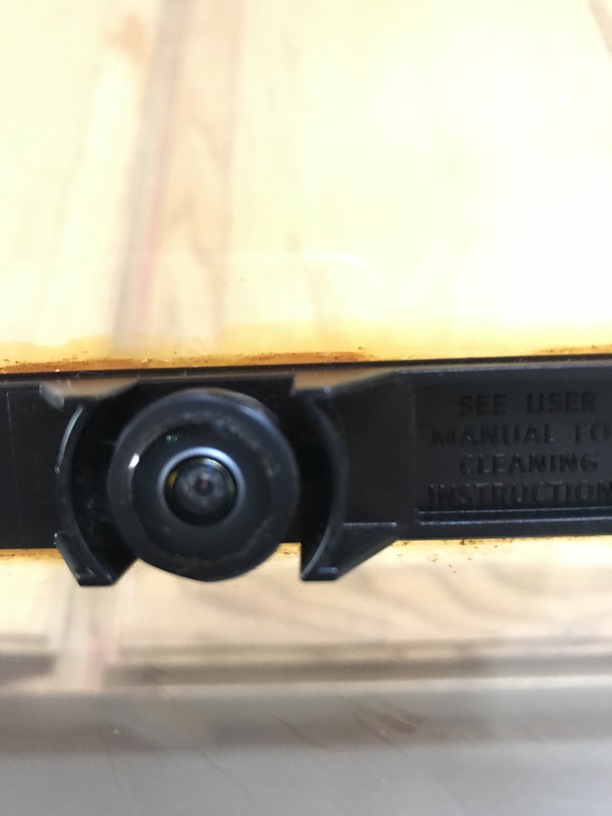
Please send photos of all your cleaned optical components, with special attention to any damage you might find:
Both windows
The printer head window, on the left hand side of the printer head

The laser window on the inside left of the Glowforge

The printer head lens
Both sides of the lens, top and bottom

The mirror inside the printer head

The bottom of the printer head

Once we have those pictures, we’ll follow up with next steps.